To document a hold on a client, you will need to create a Legal Status Order.The following workflow will show you how to create the Legal Status Order and complete associated documentation.The associated documentation will be completed within the order and will be used for the Legal Status State Report or to help with clinical/medical workflows about what transpired during the legal status. In addition,please make sure to fill out the needed demographics tied to Legal Status within the Client Information (Client) Screen under the Demographic tab.
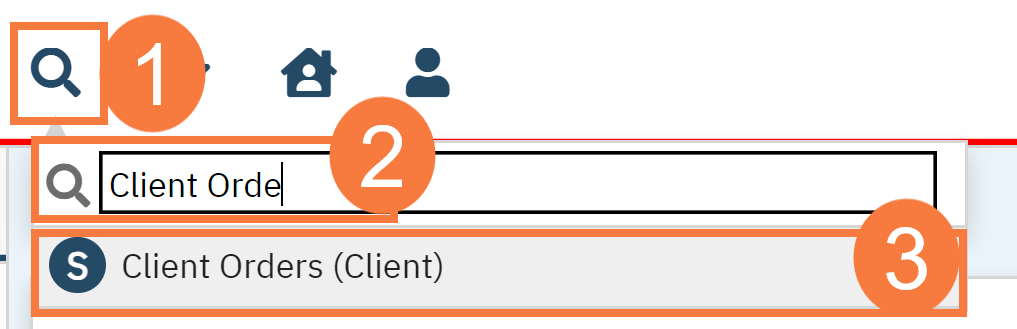
With your client open, click the Search icon
Type Client Orders in the search bar.
Select Client Orders (Client) from the search results.
Click the New icon in the top right corner.
The Client Order Selection Popup will appear. To create a NEW legal status order, click OK.
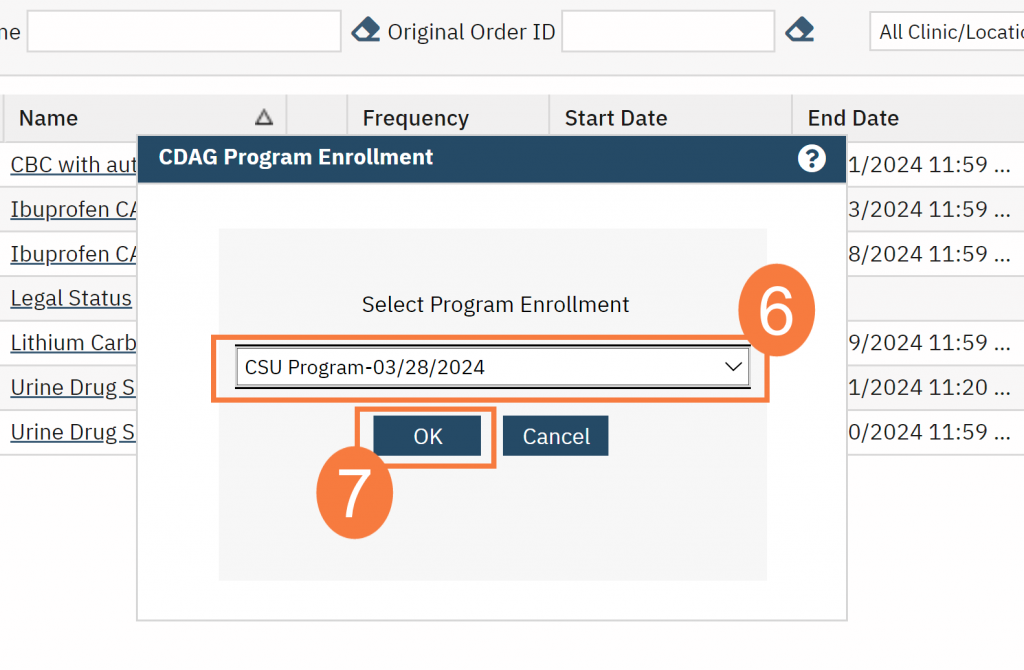
The CDAG Program Enrollment will open. Click the dropdown menu and select the correct program.
Click OK.
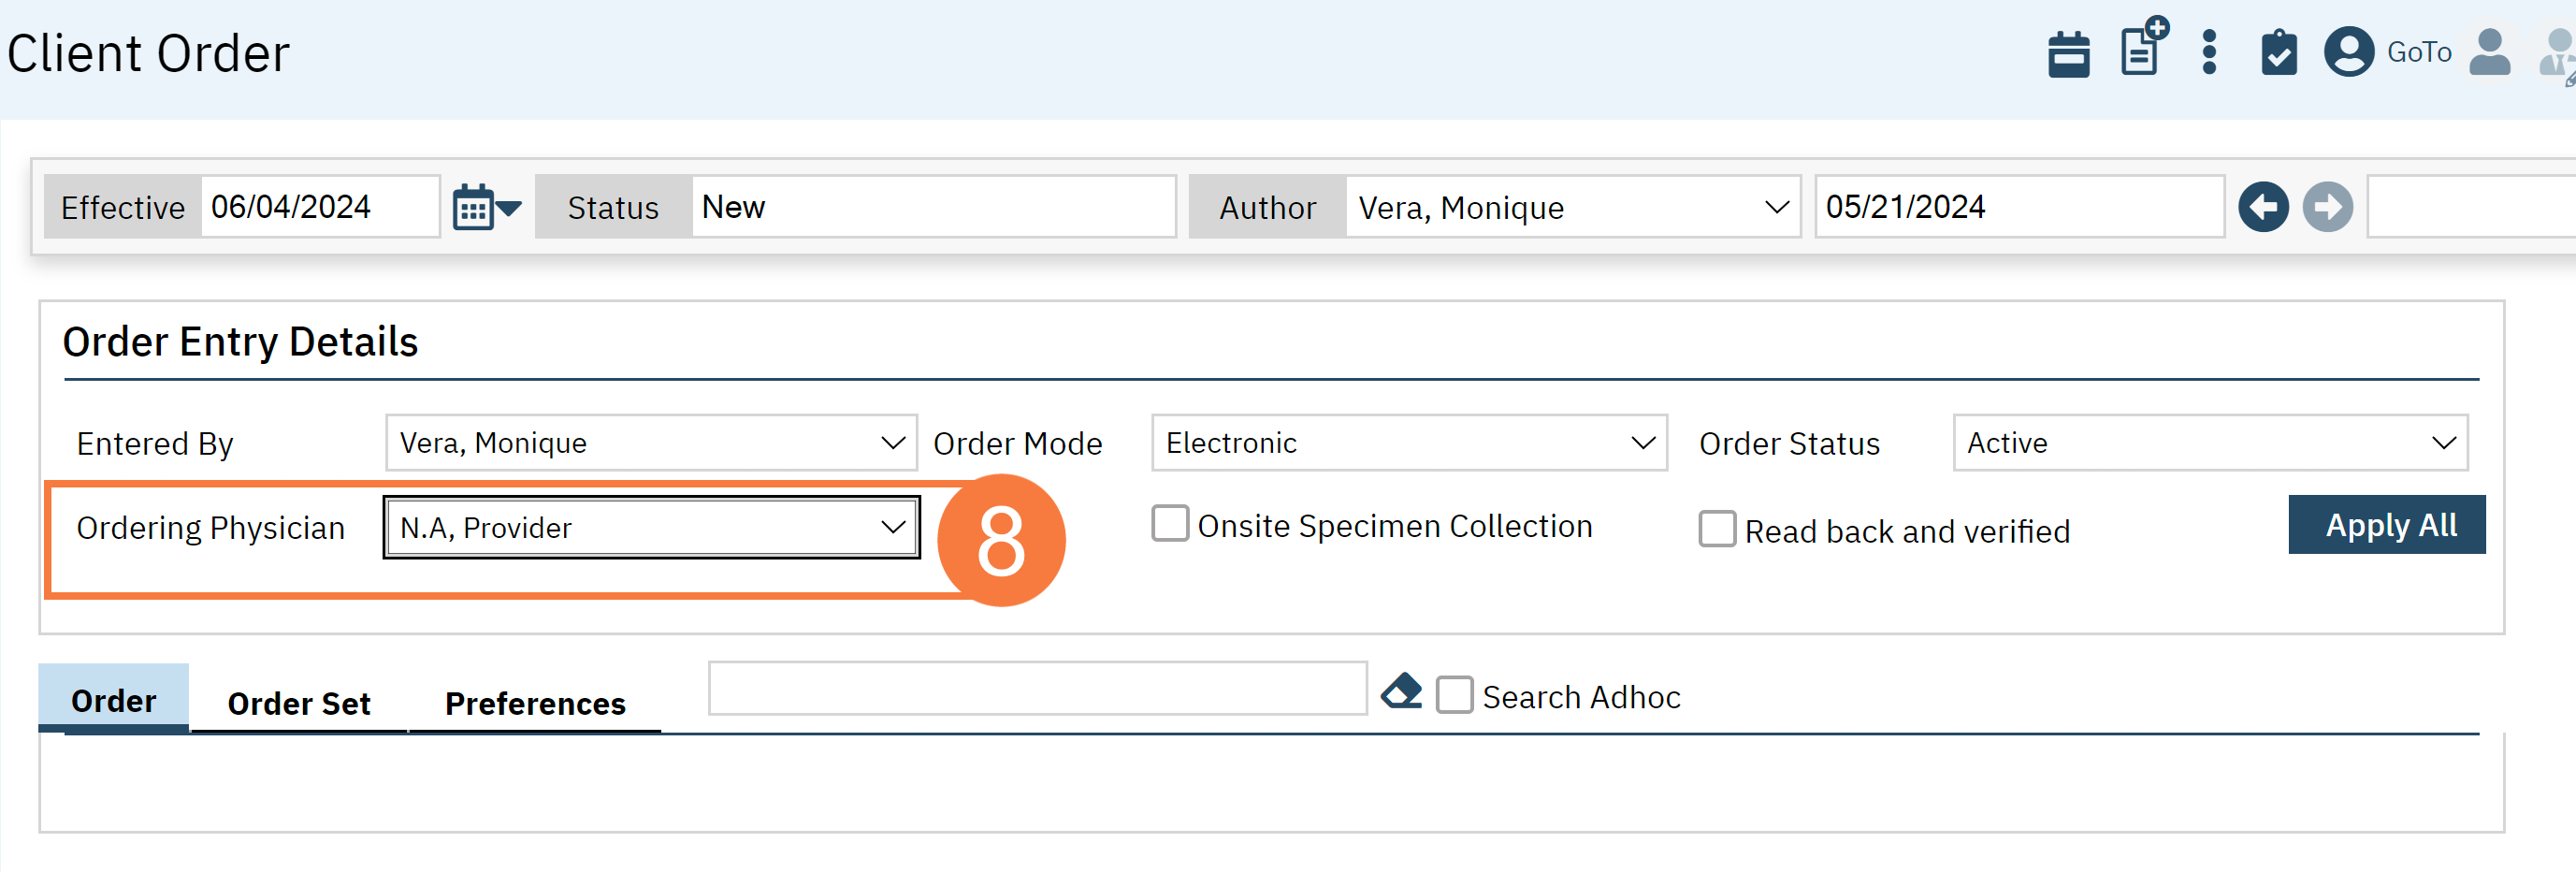
In the Order Entry Details section, click the Ordering Physician dropdown.
If you are the ordering physician, select your own name now
If you are not the ordering physician, select your medical supervisor
If you do not have a medical supervisor to select, choose *Provider N.A. (If you are clinician trainee or a provider working under a supervising clinician, Click Here)
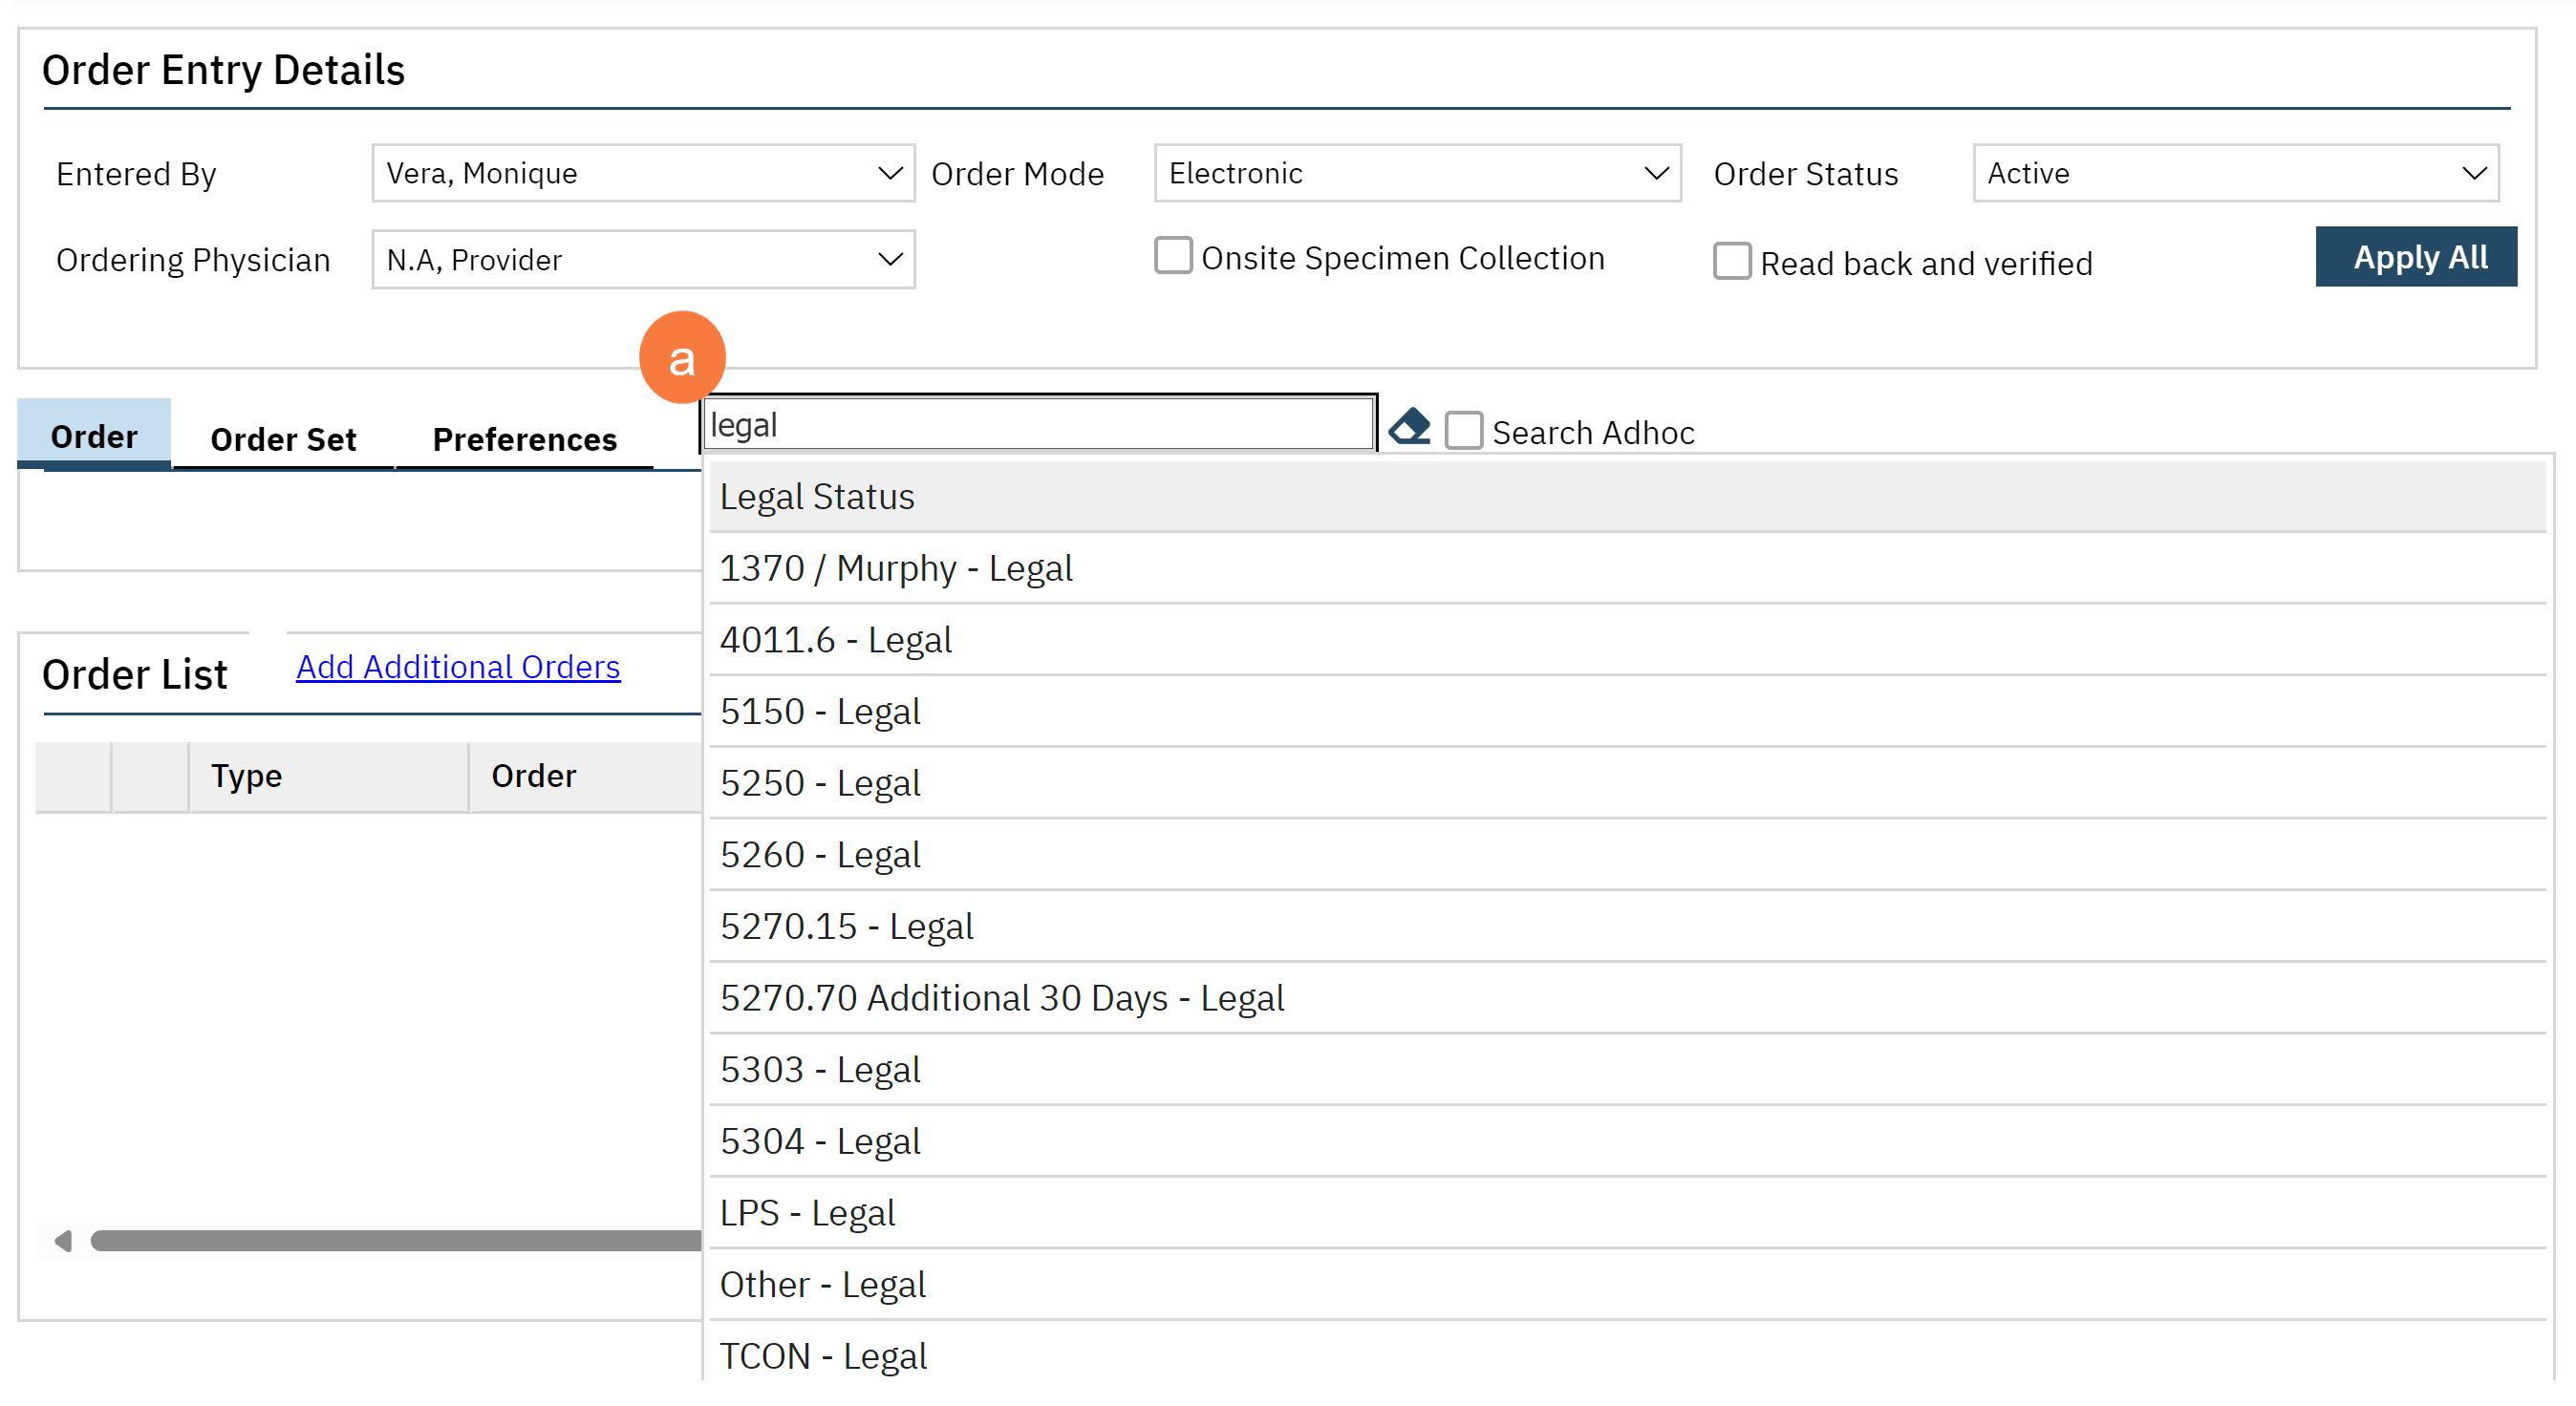
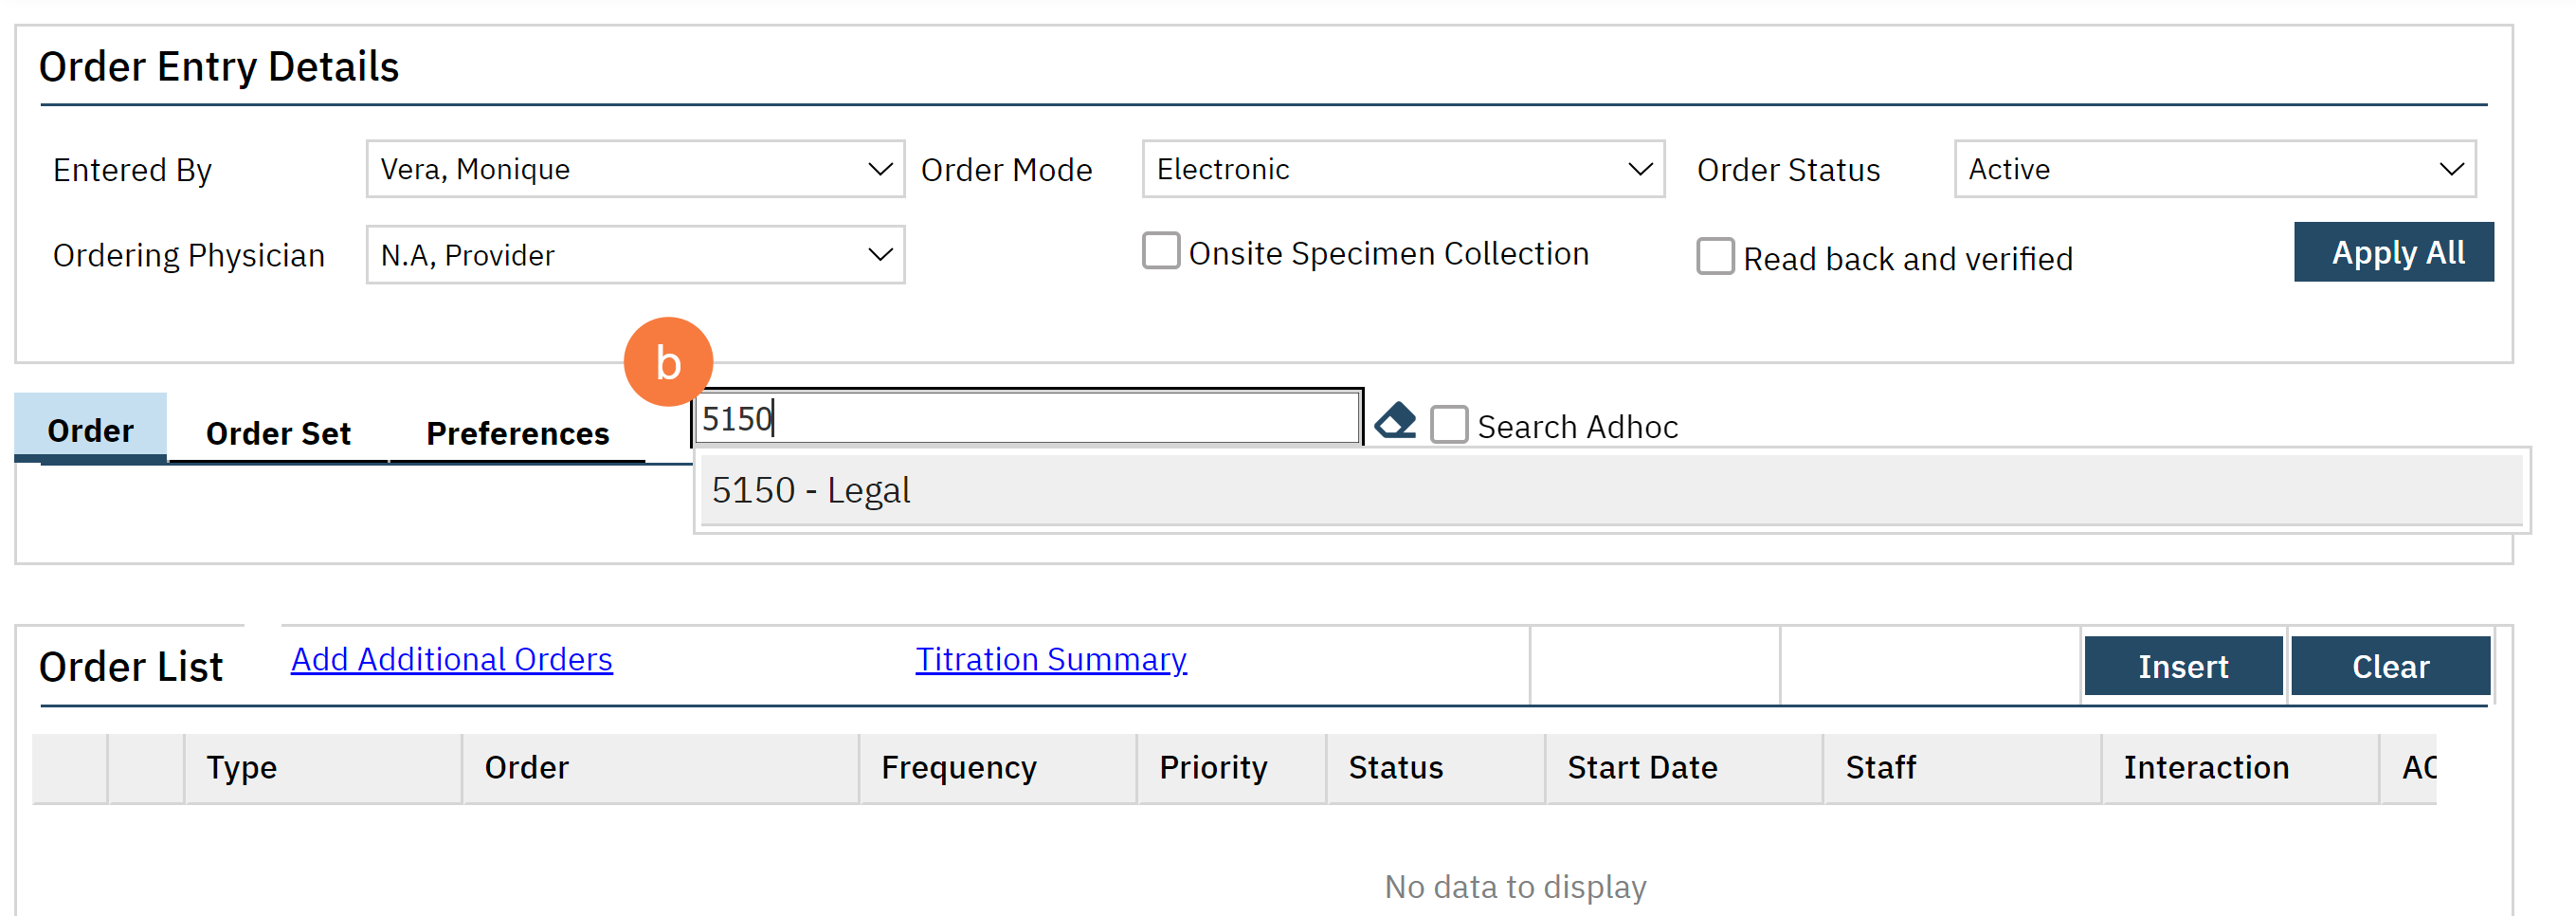
You can search for legal status in 3 ways:
Type Legal in the Search box to see a full list of legal status codes.
Type the Legal Code in the Search box to see a full list of legal status codes.
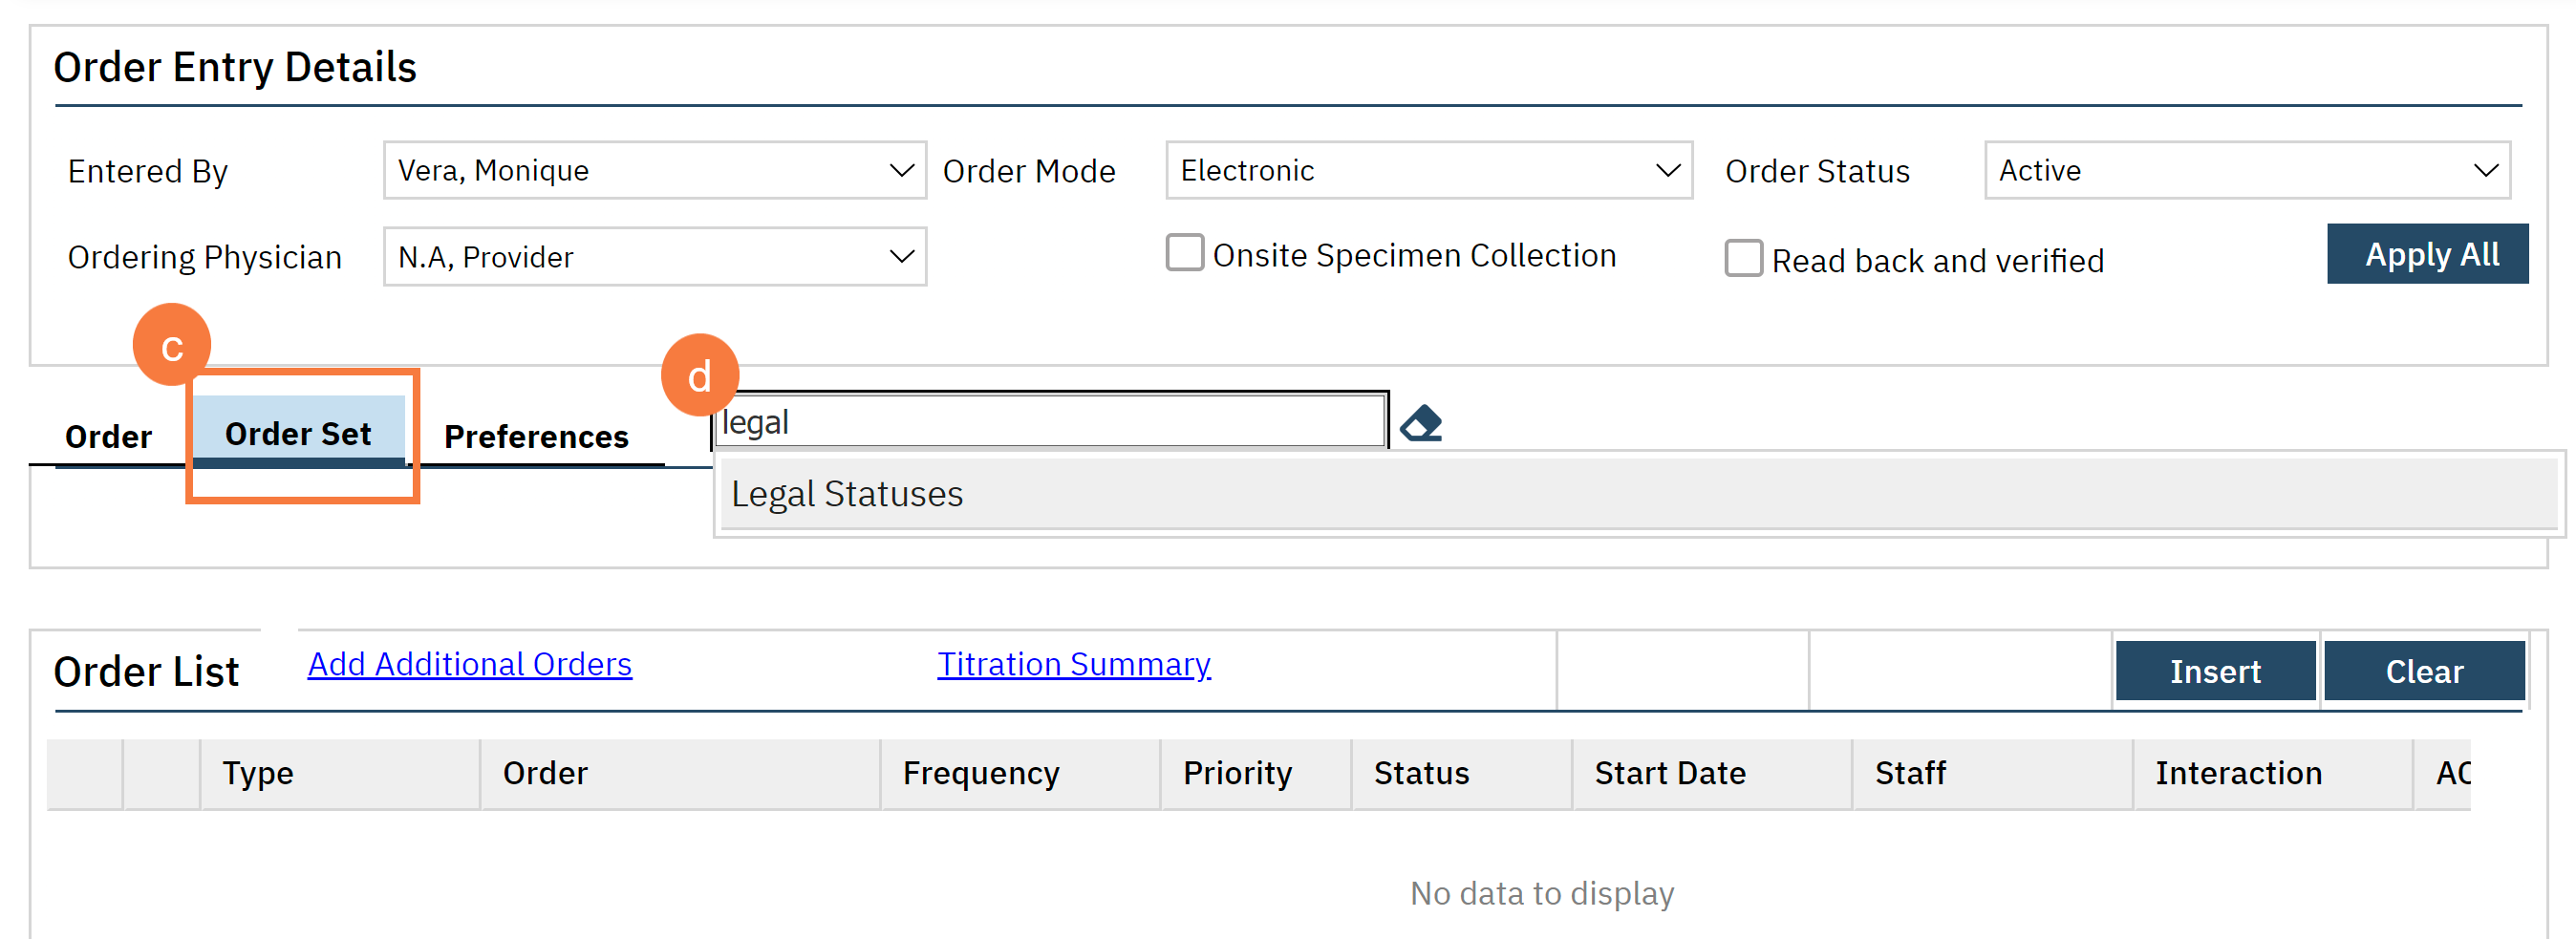
Click the Order Set tab.
Type in Legal to the Search box. in the Search box to see a full list of legal status codes.
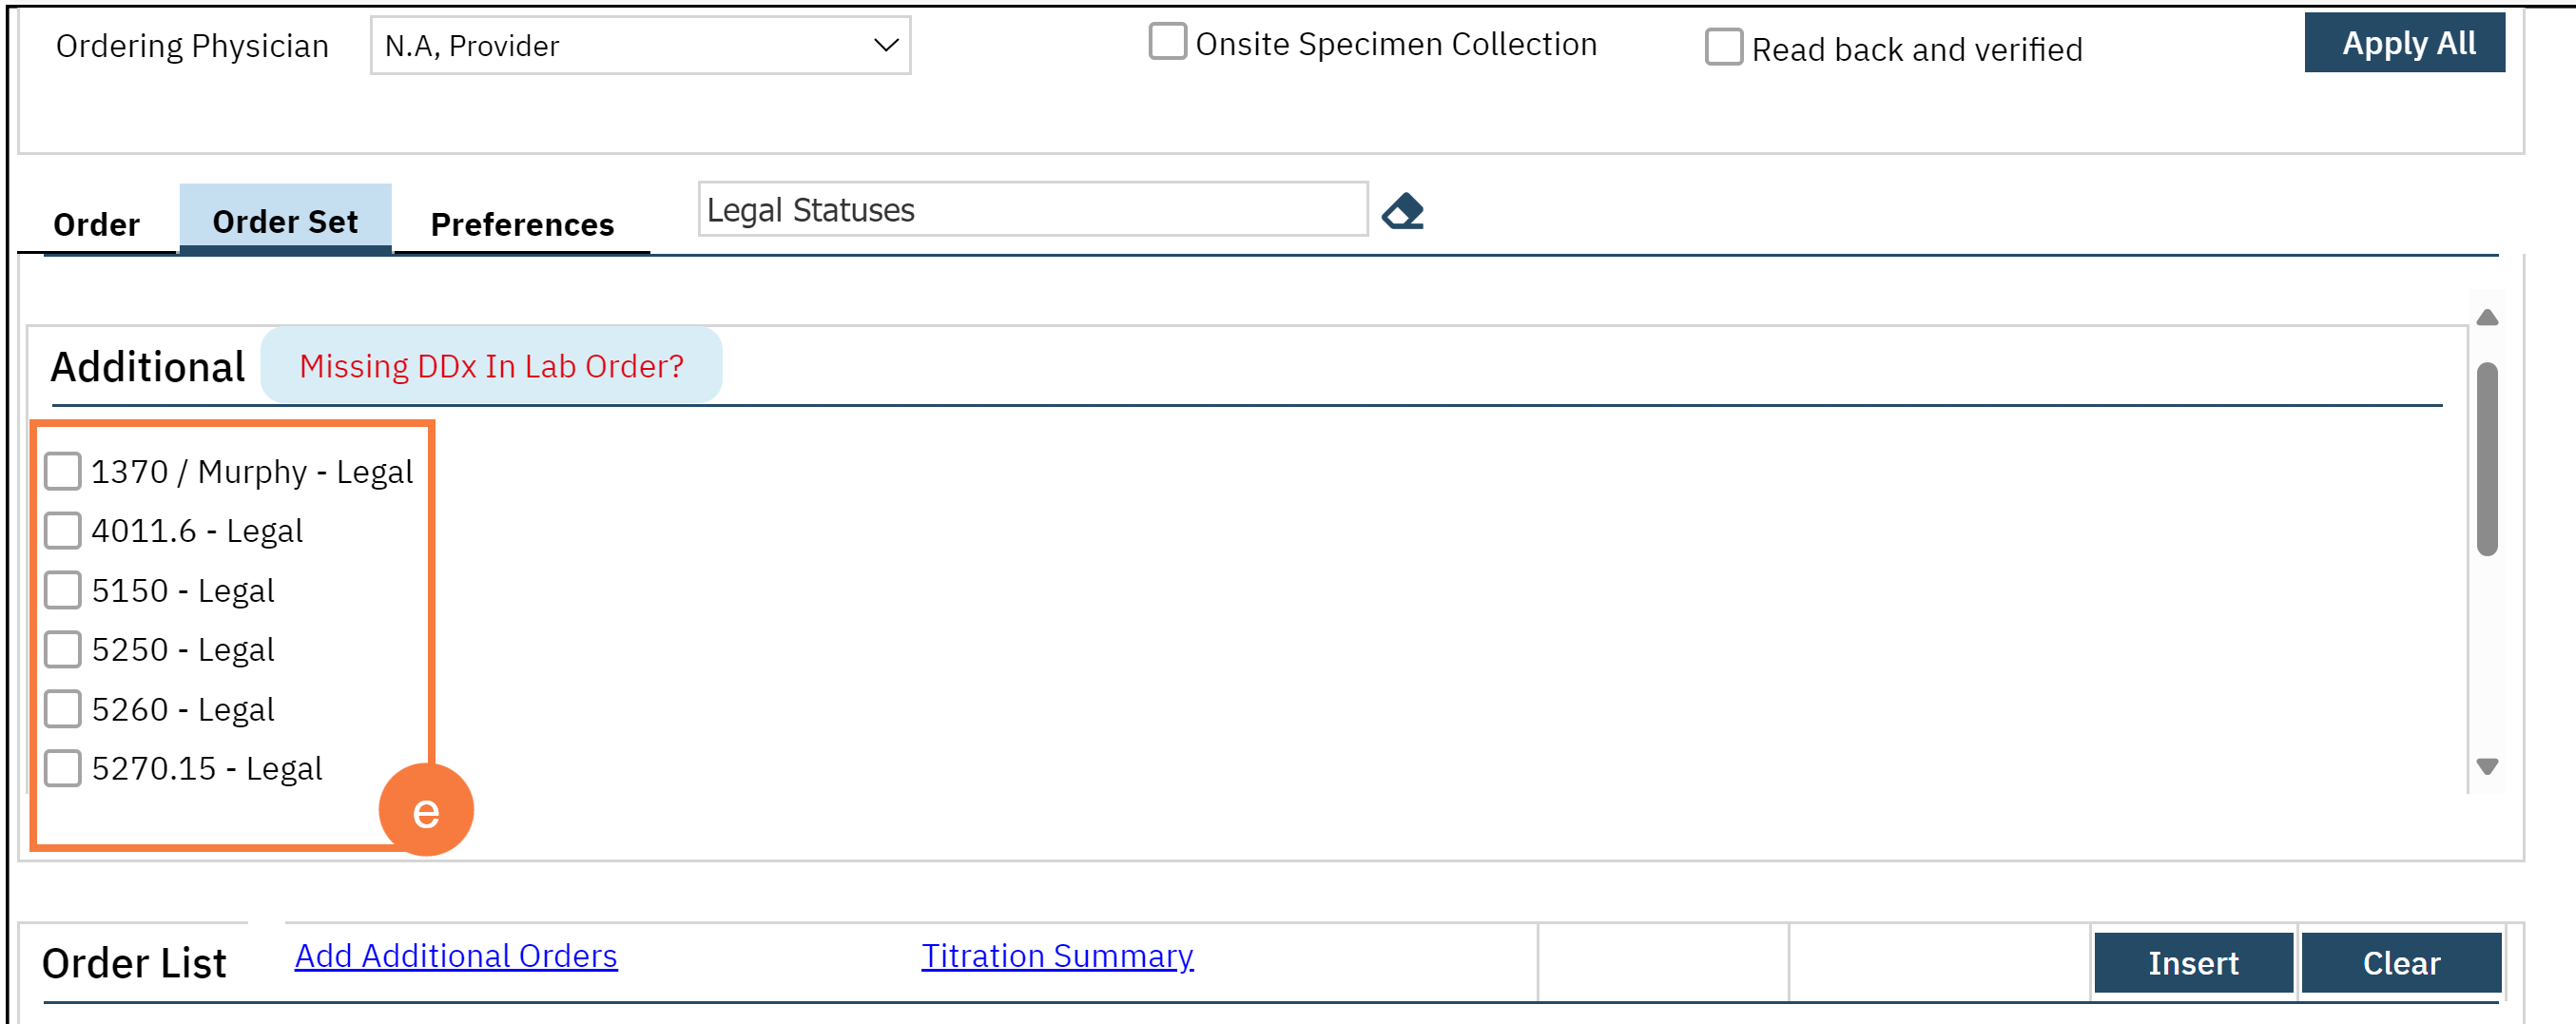
Select the Code in the box below.
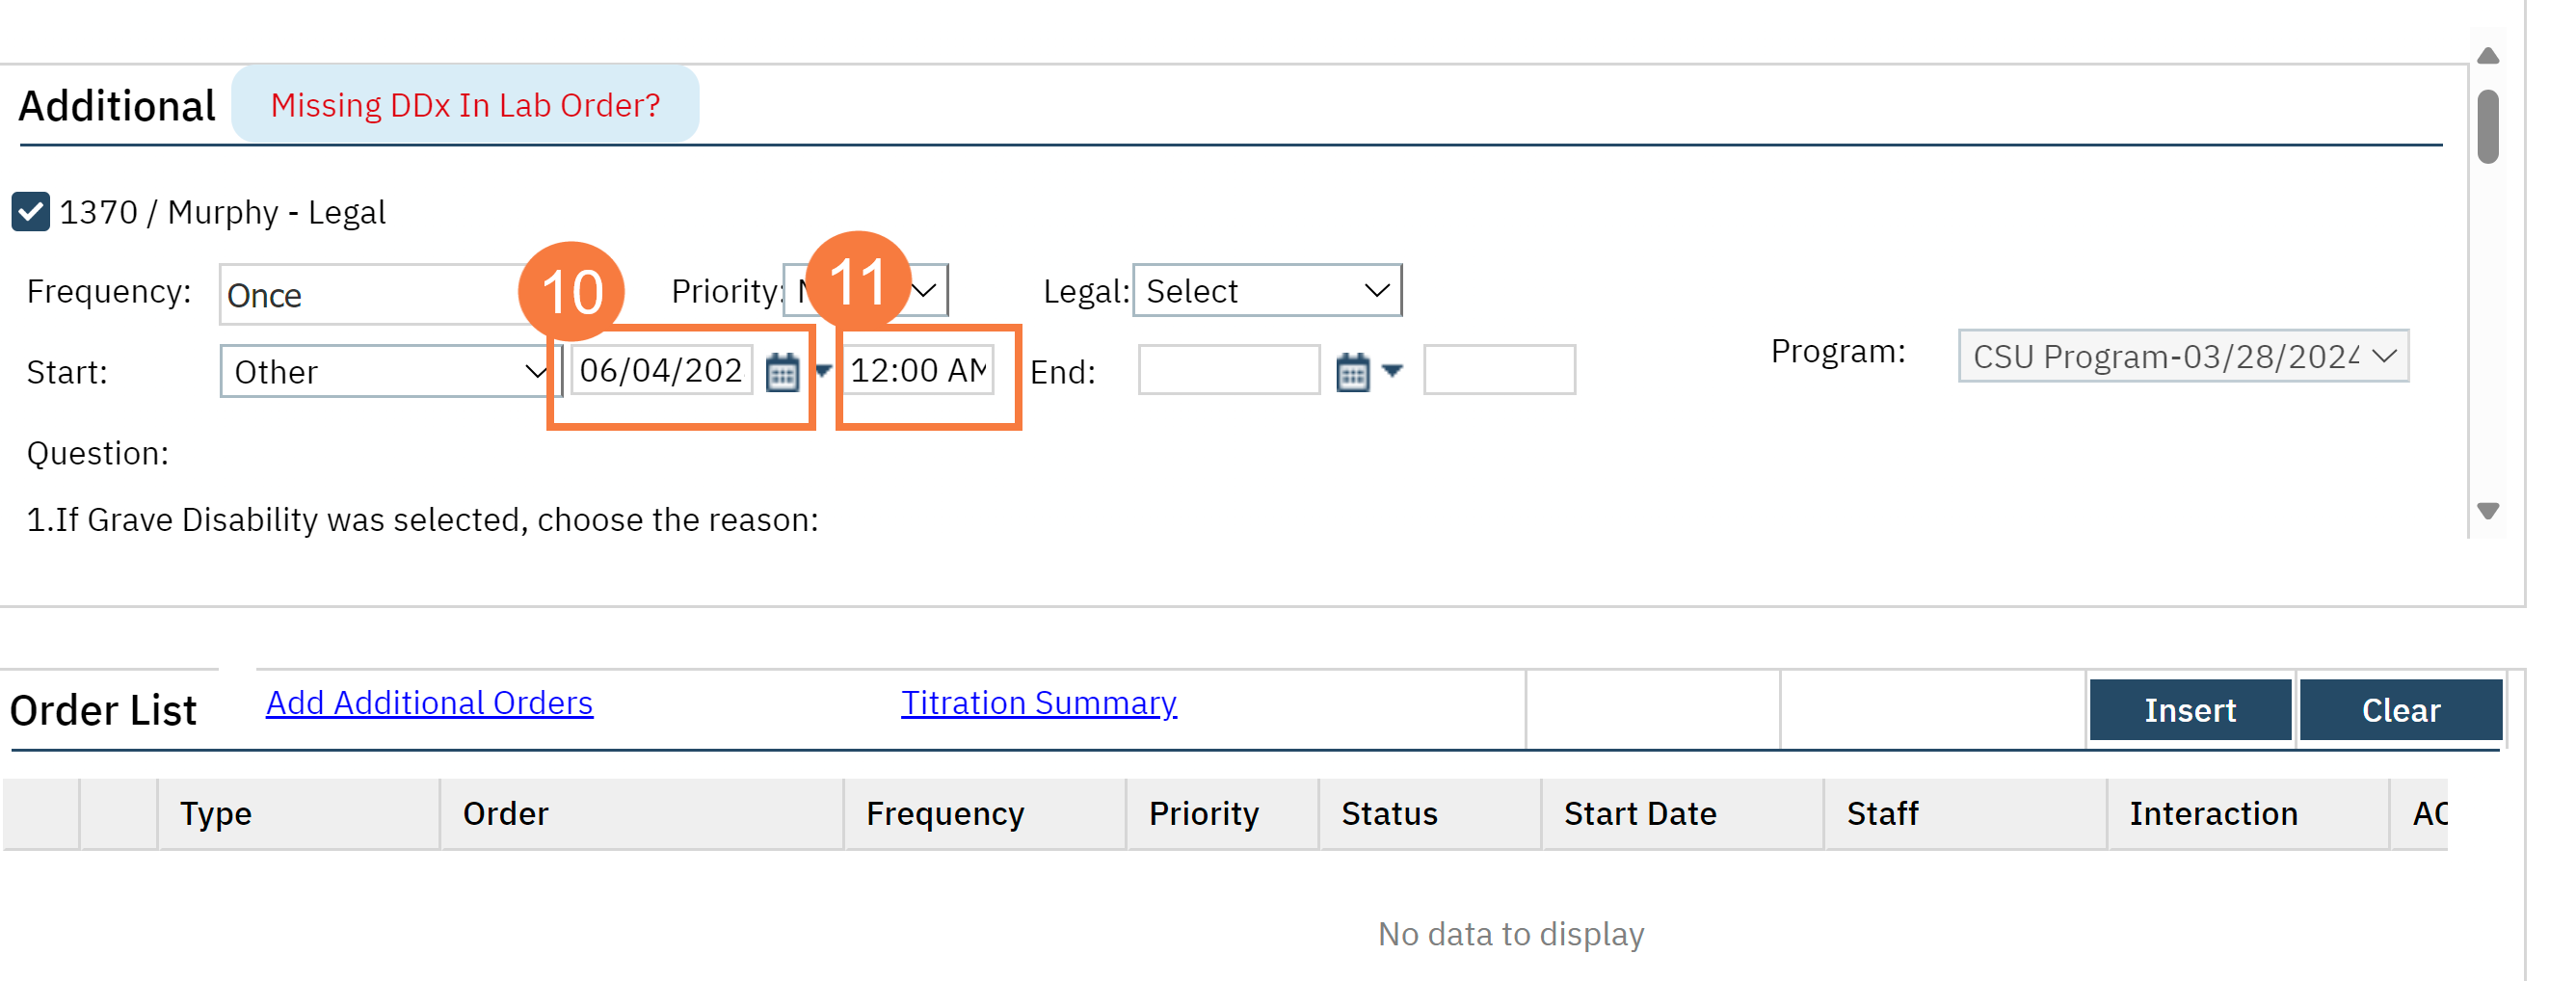
Click the Start Date Calendar icon and select the date.
Enter in a Time in the box to the right of the date you selected.
Note: The Start Date and Time should represent when the legal status was initiated. This is important to document because this information will feed into the DHCS Legal Status Report.
Note: The End Date and Time should represent the maximum time allowable for the legal status. The documentation of this information is to help workflows know when the time of a legal status is expiring. When the order is discontinued, this will capture the end of the legal hold unless indicated otherwise to be different in the “Rescinded Date”in the question section.
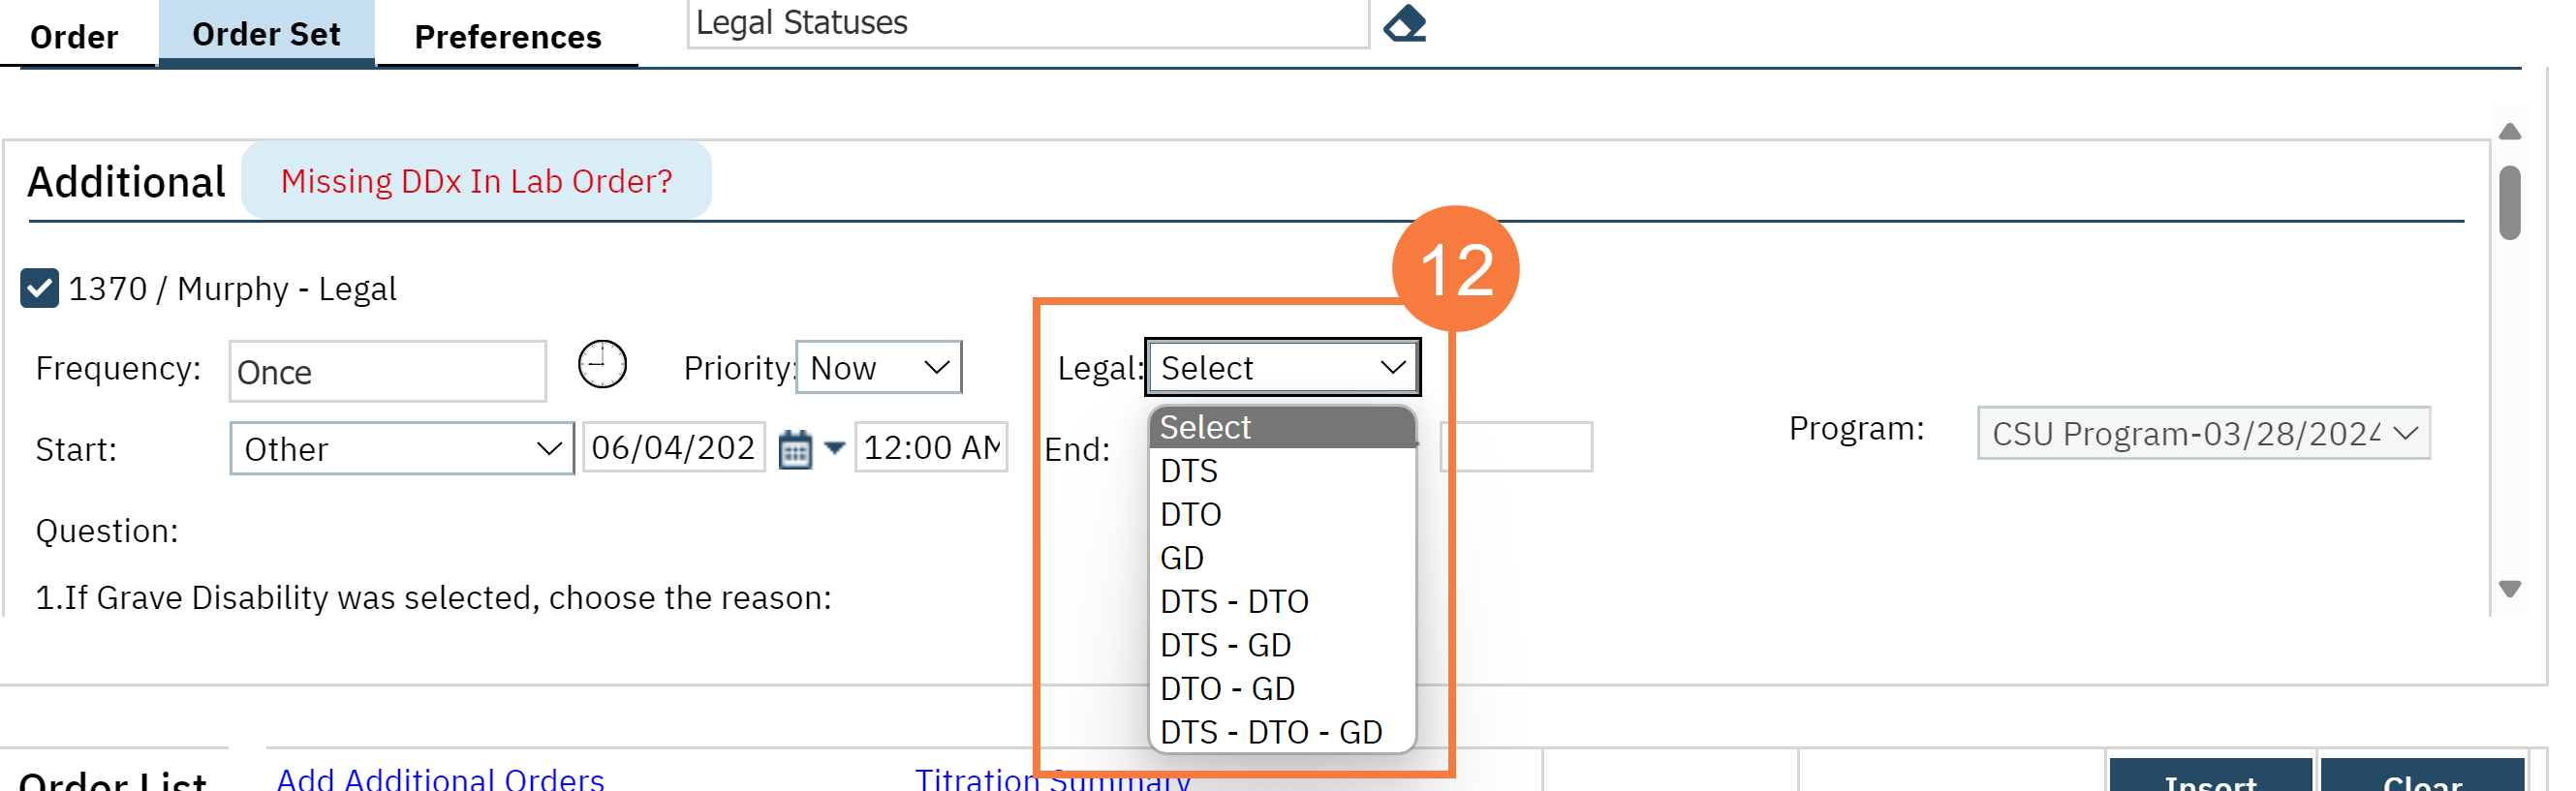
Click the Legal drop-down and select the needed legal reason.
Note: This will both show on the whiteboard if in an inpatient unit, and be captured for the DHCS report.
“DTS” refers to Danger to Self
“DTO” refers to Danger to Others
“GD” refers to Grave Disability. Please indicate in the question section the reason for the grave disability.
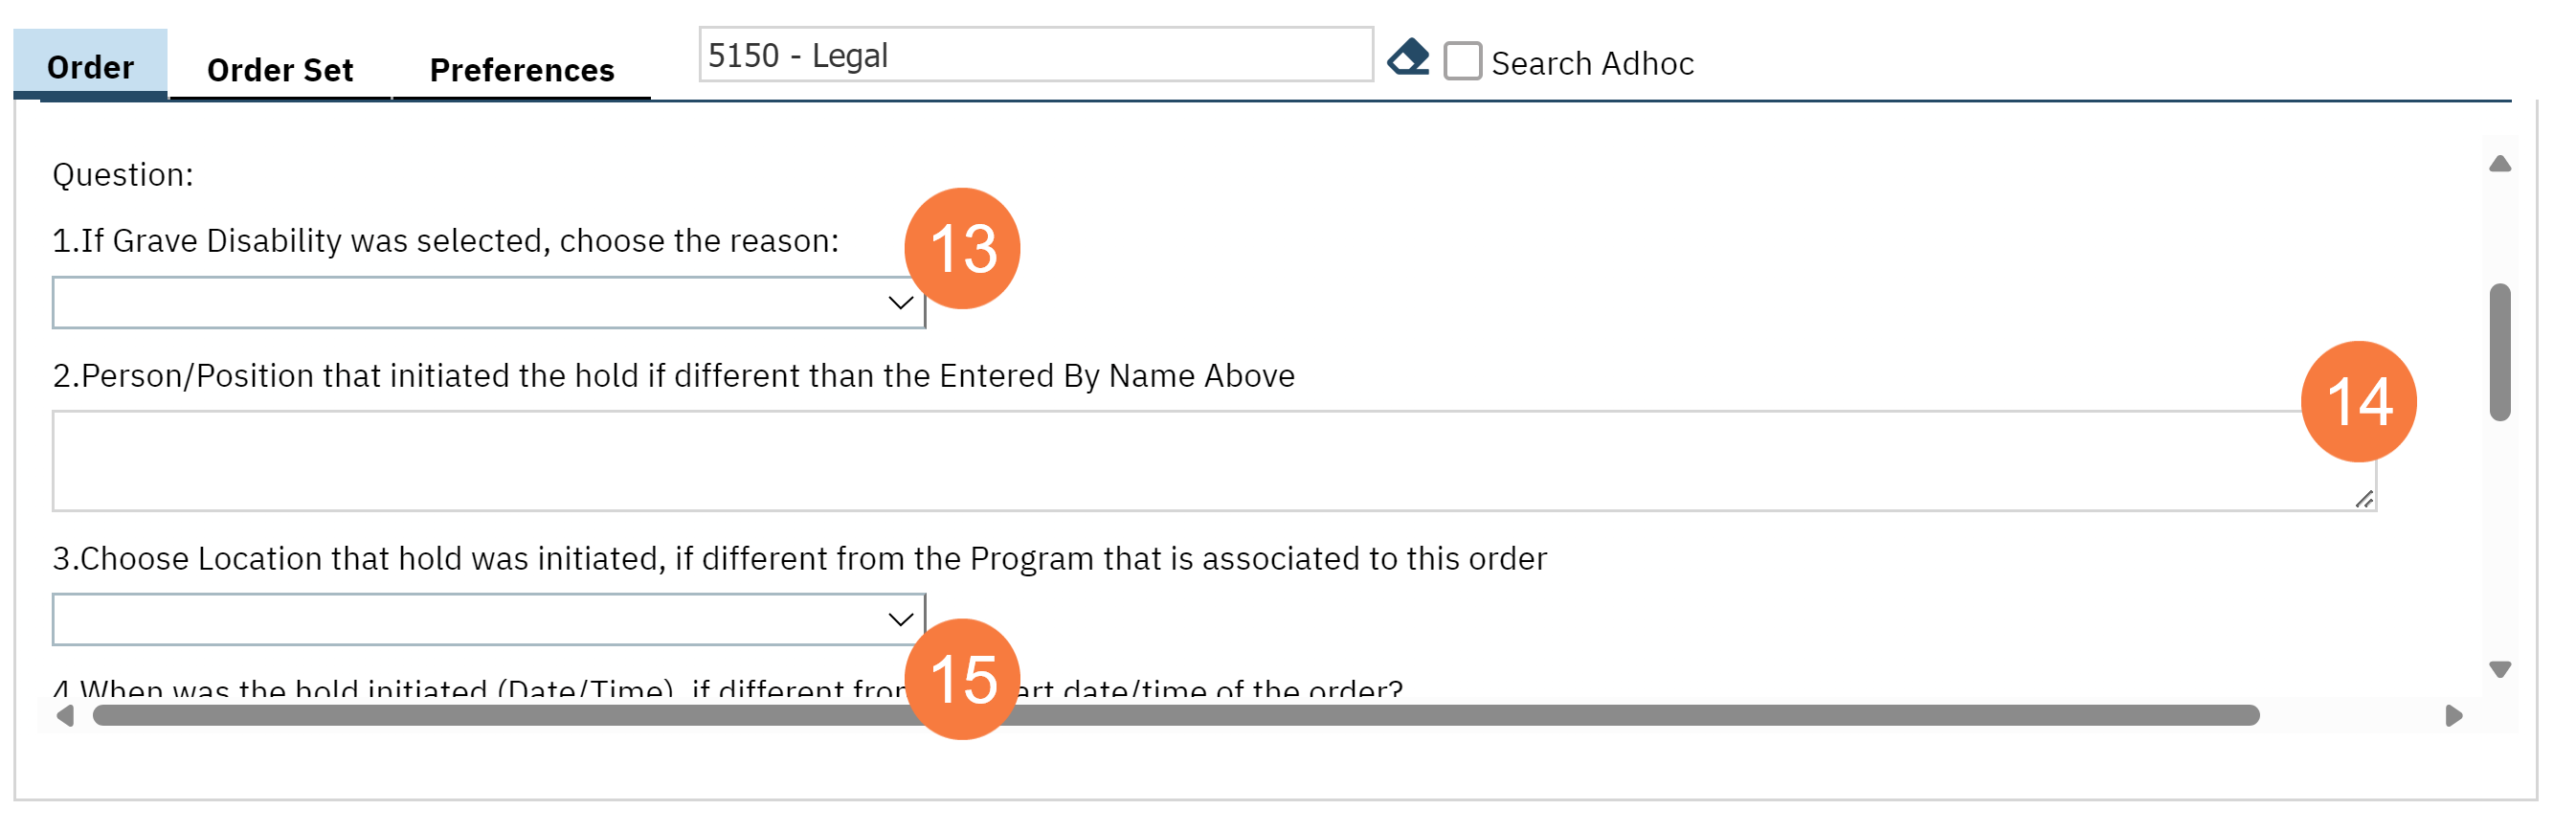
Scroll down in the order to answer the questions
(1) If Grave Disability was selected, choose the reason. This information is being captured for the DHCS report. Click the drop-down arrow to select the reason.
(2) Person/Position that initiated the hold if different than the Entered by Name Above. Type in a name if applicable.
(3) Choose Location that hold was initiated, if different from the Program that is associated to this order. Click the drop-down menu to select a location if applicable.
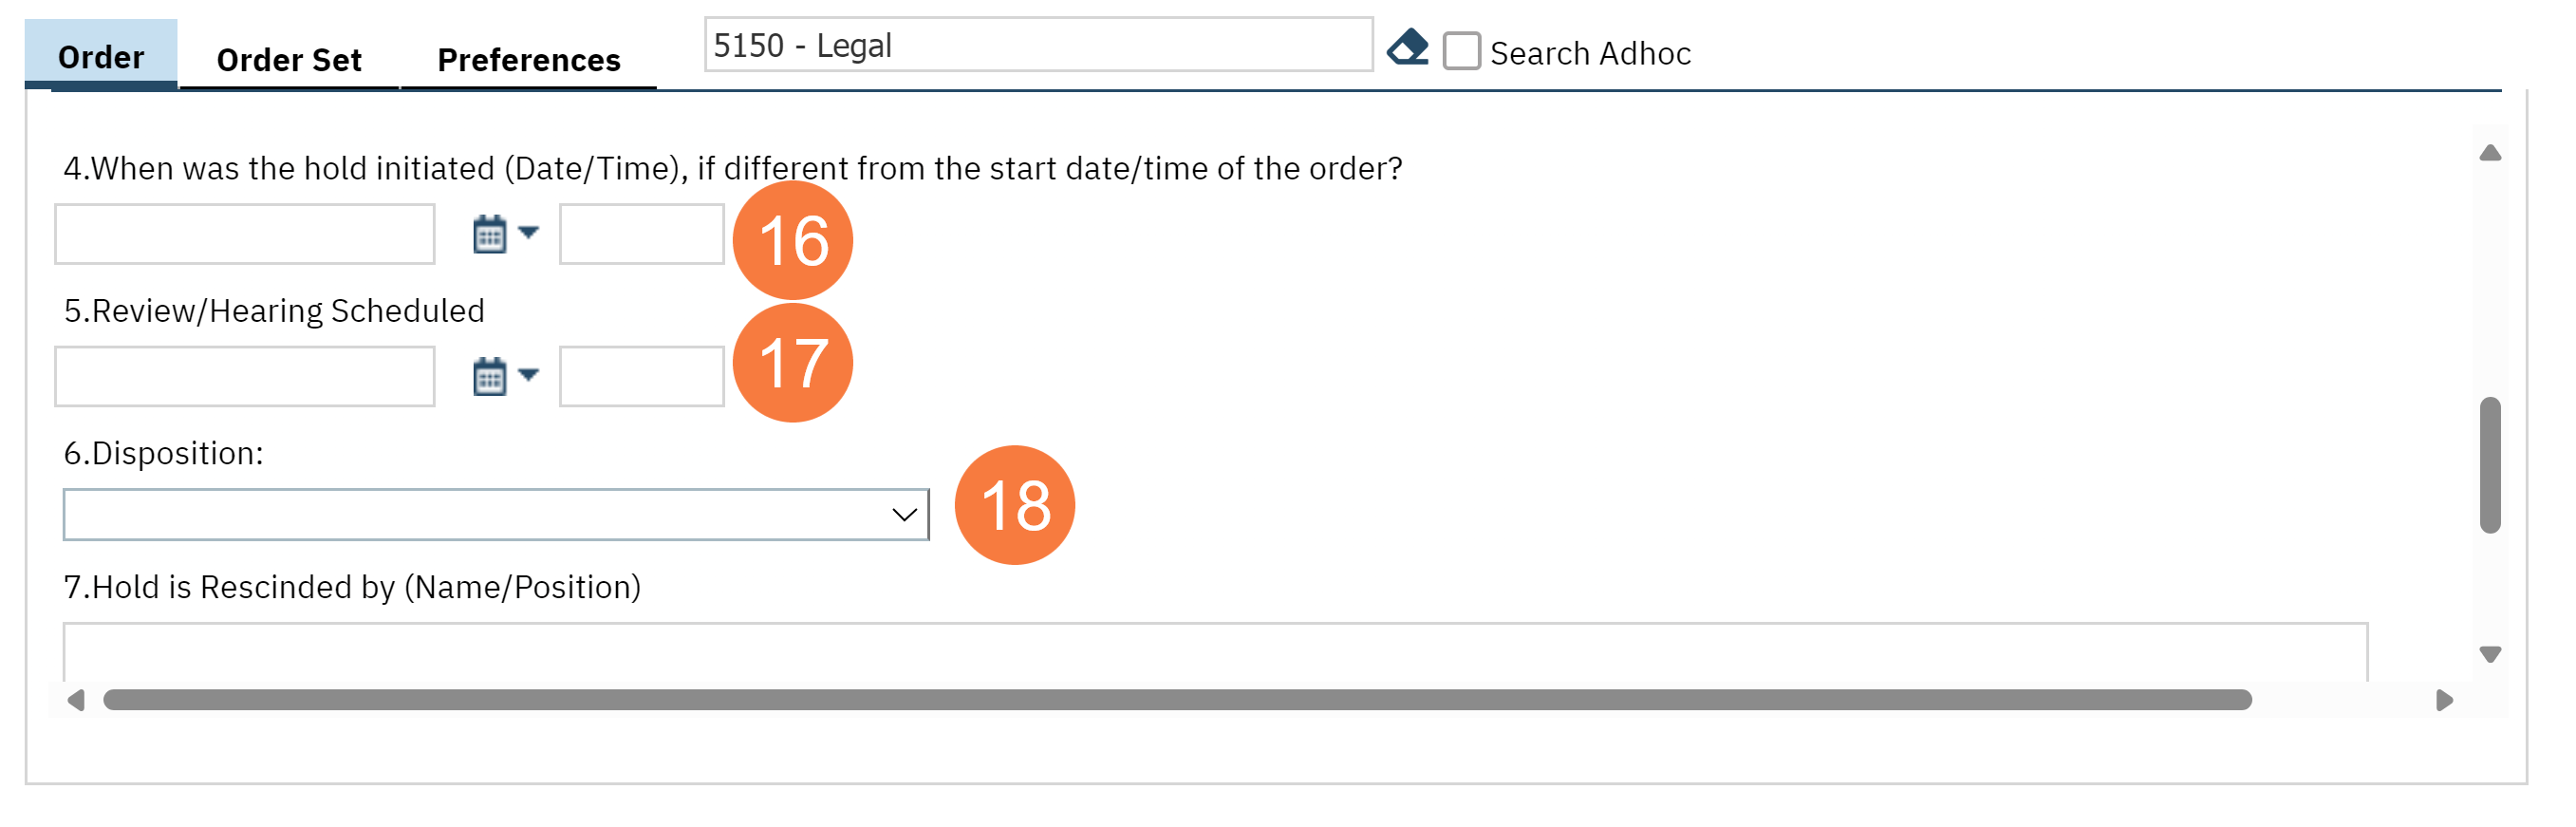
(4) When was the hold initiated (Date/Time), if different from the start date/time of the order? Enter the Date & Time if applicable
(5) Review/Hearing Scheduled. Enter Date & Time.
(6) Disposition: Click the drop-down menu to select the disposition.
(7) Hold is Rescinded by (Name/Position). Enter name and position in the text box.
(8) Rescinded Date (if different from order’s end date) Enter Date & Time.
(9) Legal Status Comments. Enter Comments in the text box.