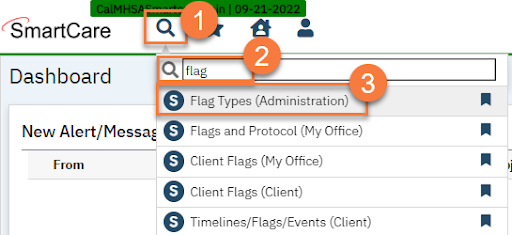
- Click the Search icon.
- Type in “Flag Types” in the search bar.
- Select “Flag Types (Administration)” from the search results.
- This takes you to the Flag Types list page. Click the New icon.

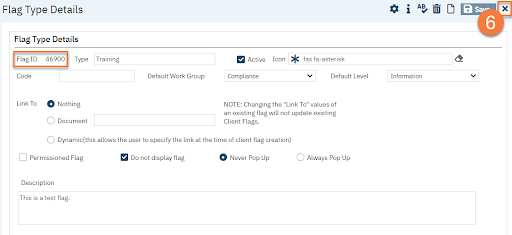
- This takes you to the Flag Type Details screen. Enter the name of the flag you’re creating in the Type field.
- Make sure the Active checkbox is checked.
- If desired, select an icon. Search “Fas fa” to get the full dictionary.
- If you want to assign this flag to a workgroup automatically, select the workgroup in the Default Work Group field.
- If desired, select the Default Level. The options are “Information”, “Urgent”, and “Warning”.
- Select whether you’re linking this flag to a document or not. When you link a flag to a document, once you complete the document, this will automatically mark the flag as complete. If you do not assign a document, you’ll have to mark the flag as complete manually. If you select “Document”, enter the name of the document you want to link this flag to.
- If you don’t want the flag to display to other users, select “Do not display flag”.
- If you want the flag to pop-up when opening a client’s chart, select “Always Pop Up”. Otherwise, leave the “Never Pop Up” option selected.
- If desired, enter a description of the flag.
- Click Save.

- The Flag ID will automatically be added. Click the Close icon.