- With the client open, click on the Search icon.
- Type in “MH Non-Psychiatric SMHS Timeliness” in the search bar.
- Select “MH Non-Psychiatric SMHS Timeliness Record (Client)” from the search results.

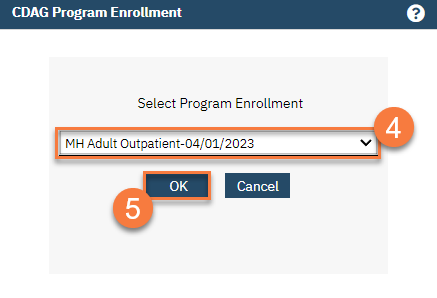
- A CDAG window will pop up. Select the program you’re tying this record to.
- Click OK.
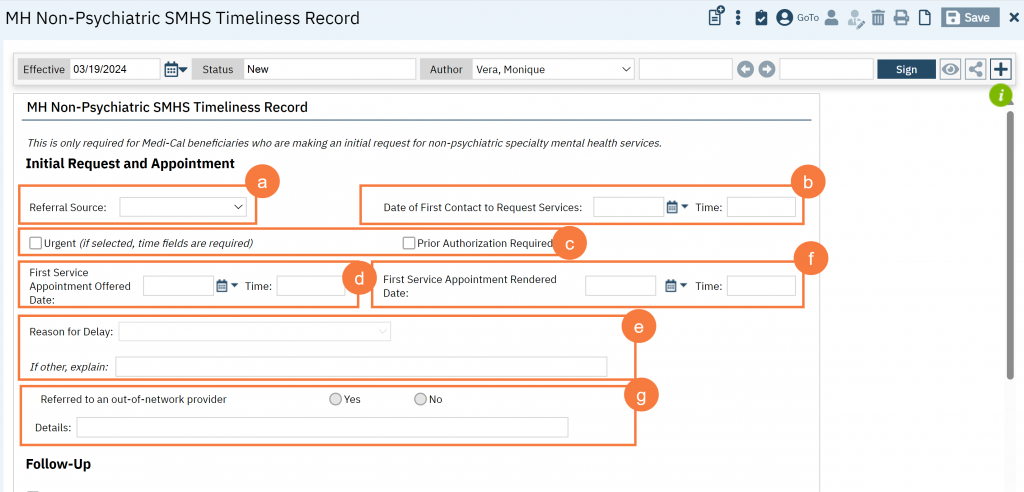
- This takes you to the MH Non-Psychiatric SMHS Timeliness Record. Complete the record. You can save information as you go and come back to it later, if you do not have all the data required.
- Enter the Referral Source. This should be the person who referred the client to services. If the client requested services themselves, select “self”.
- Enter the Date of First Contact. This is the date when the initial request for services was made. You may also enter the time of the first contact as well. This is required when the request is marked “urgent.”
- Note if the request was marked “urgent” or if the service requires prior authorization. When “urgent” is selected, all time fields are required, as timeliness is measured in hours rather than days.
- Enter the First Service Appointment Offered Date. This is the first available appointment that was offered to the client, regardless of whether they accepted that appointment or not. For example, if you have an appointment available on Tuesday 1/10/24 at 9am, but the client says they’re unavailable on Tuesdays, you will still enter that you offered an appointment on 1/10/24 at 9am.
- If the offered appointment is outside of the timeliness range, enter the Reason for Delay. This may be due to the client requesting a specific service, or a specific provider. If you select “other”, enter a description of the reason in the text field indicated.
- Enter the First Service Appointment Rendered Date. This is the date the client actually had their first appointment. If a client accepts an appointment but doesn’t show to that appointment, then a service has not yet been rendered and that date should not be entered here. If the client never actually starts services, leave this field blank and follow the instructions listed below in 7.
- Indicate whether or not the client was referred to an out-of-network provider. This does not include contract providers who provide SMHS, but rather other agencies and providers who do not contract with the county. If you answer yes, provide the details of the referral.
-
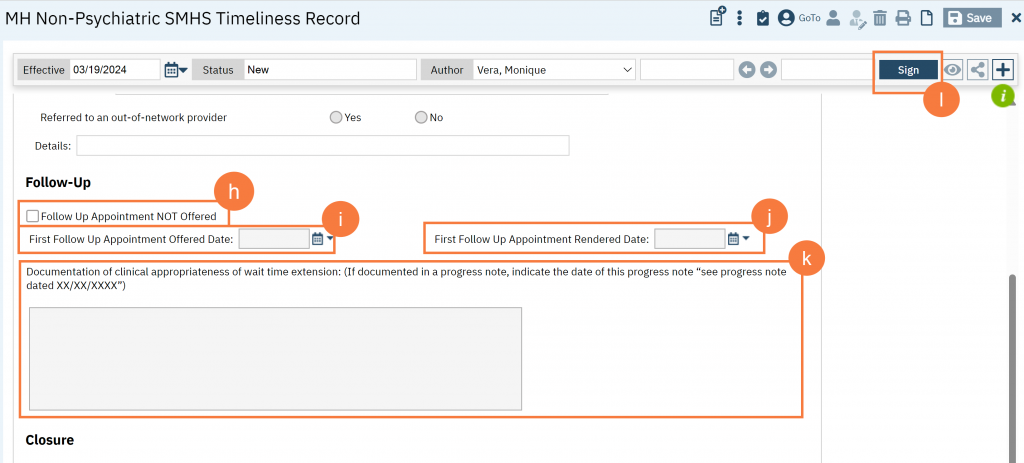
- If a follow-up appointment was not offered for any reason, click on the Follow-Up Appointment NOT Offered checkbox. This will grey out the rest of the Follow-Up section.
- If a follow-up appointment is offered, enter the First Follow Up Appointment Offered Date. This is the first available appointment that was offered to the client after their first rendered service appointment. Much like in step d above, enter the offered date, even if the client did not accept that offered appointment.
- If the follow-up offered appointment is outside of the timeliness range, the “Documentation of clinical appropriateness” field will become available. Document the clinical appropriateness of delaying follow-up care, or indicate where in the client’s record this is documented. For example, if it’s documented in a progress note, you can simply write “see progress note dated 1/10/24”.
- Enter the First Follow Up Appointment Rendered Date. This is the date the client actually had their first follow-up appointment. If a client accepts an appointment but doesn’t show to that appointment, then a service was not rendered and that date should not be entered here. If the client never attends a first follow-up, leave this field blank and follow the instructions listed below in 7.
- A record is considered complete when a client has had a first follow-up appointment rendered. At this point click Sign to complete the record. You may now close the screen.
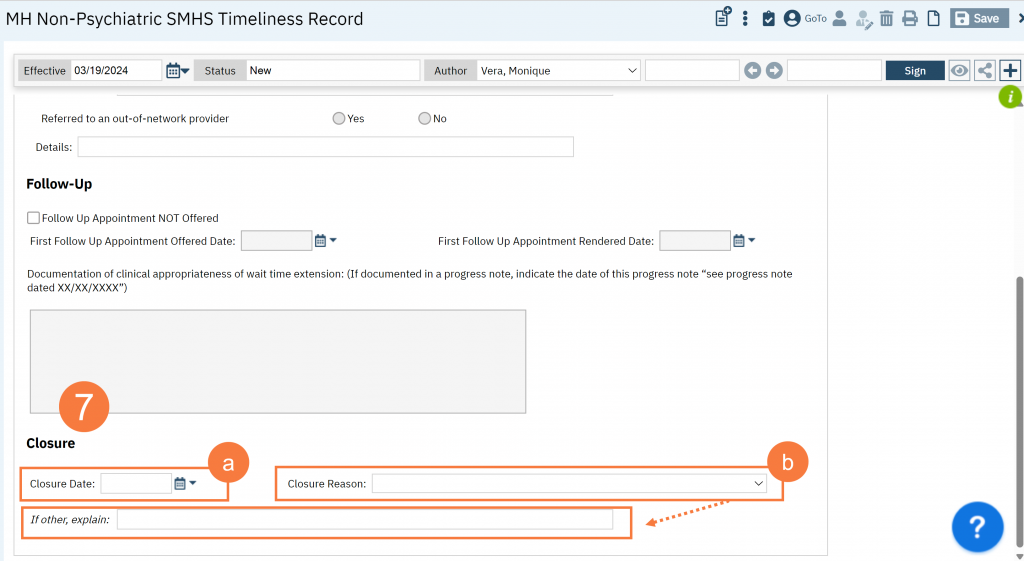
- Sometimes a client does not complete the admission process. If a client starts the process (e.g. makes a request for services) but doesn’t complete it (doesn’t attend a follow-up appointment), then you will close the record without it being complete.
- In the Closure section, enter the Closure Date. This is the date you’ve determined the client will not complete the admission process.
- Enter the Closure Reason. These reasons generally indicate which step in the process the client exited. If you select “other”, enter a description of the reason in the text field indicated.
- Once you’ve completed the closure section, click Sign to finalize the record. You may now close the screen.
Updated 12/26/23