Sometimes it’s necessary to associate two documents together.
Examples:
- A client has signed a paper version of a consent in Spanish. This paper version has been scanned in. You complete the same consent in SmartCare to document the date and time of the consent and to use SmartCare consent functionality. You document on the SmartCare version that the client has signed a paper version so you associate the scanned document to the SmartCare version.
- A client has provided verbal consent for a document, which is documented in a service note. You want to associate the document and the service note together.
- An assessment references a mental status exam. Both documents were created in SmartCare and you’d like to associate them so it’s clear to auditors which Assessment the MSE belongs to.
- Two staff members worked with a client on the same day as part of a crisis response team. For clinical care, you want to associate these two notes so a person reading one note can also easily read the other note.
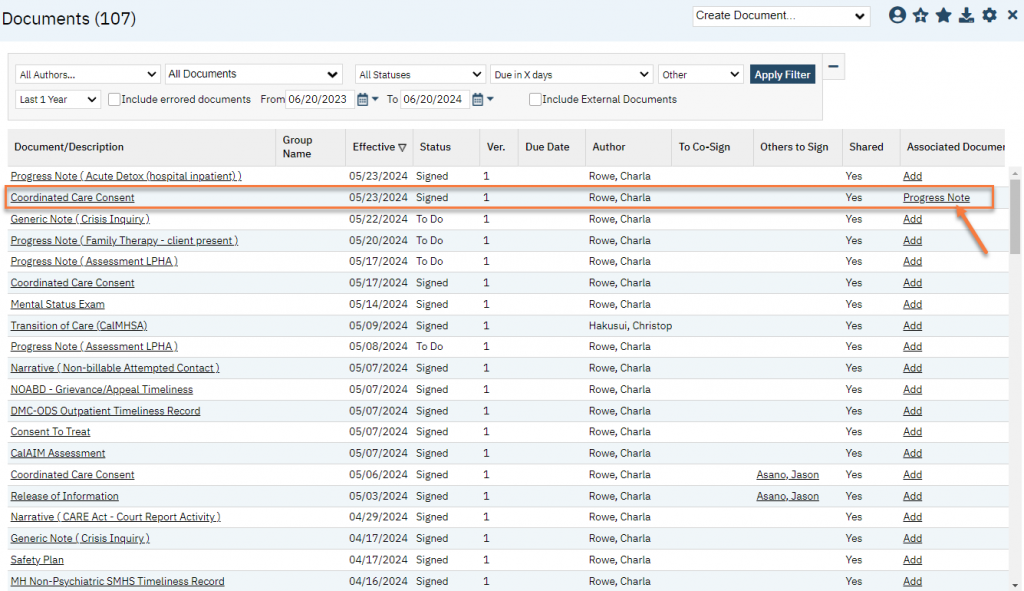
While on the Documents (Client) list page, you can see what documents are associated to a given document by viewing the Associated Documents column. Clicking on the link in this column will take you to that associated document.
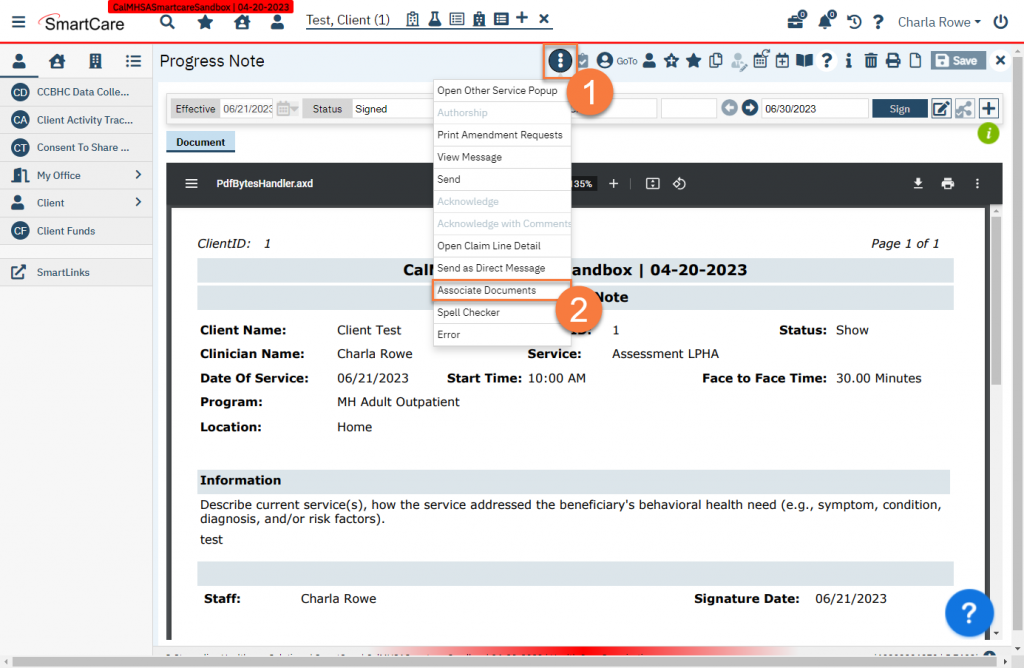
How to Associate another Document From the Service Note or Document Screen
- Click on the Other Actions icon.
- Select Associate Documents.
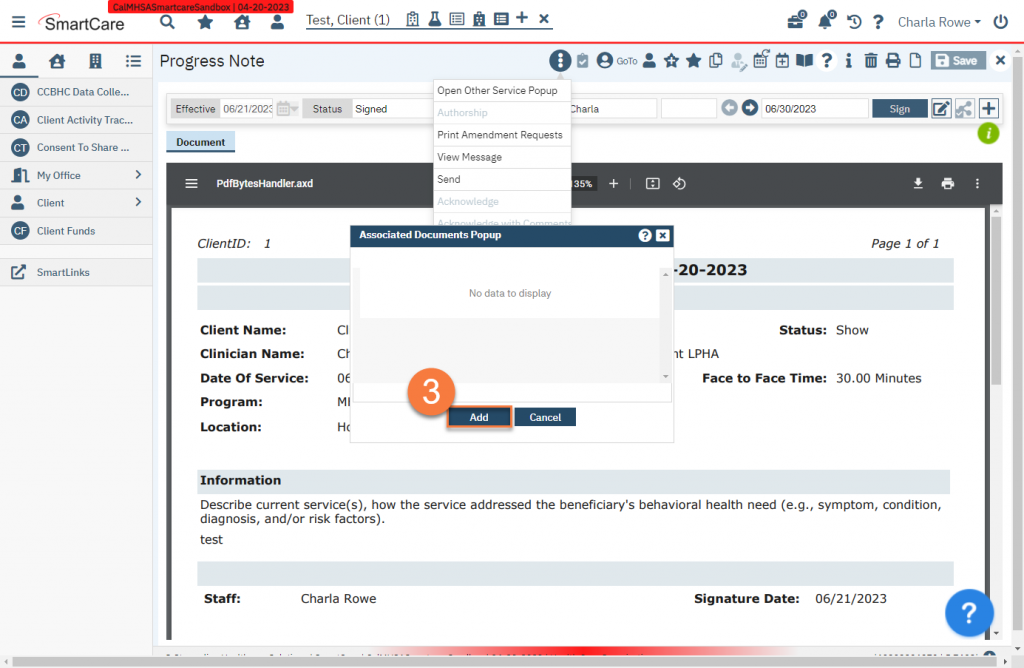
- This brings up a popup window showing you what documents have already been associated with this document. If there aren’t any, this will say “No data to display”. Click Add.
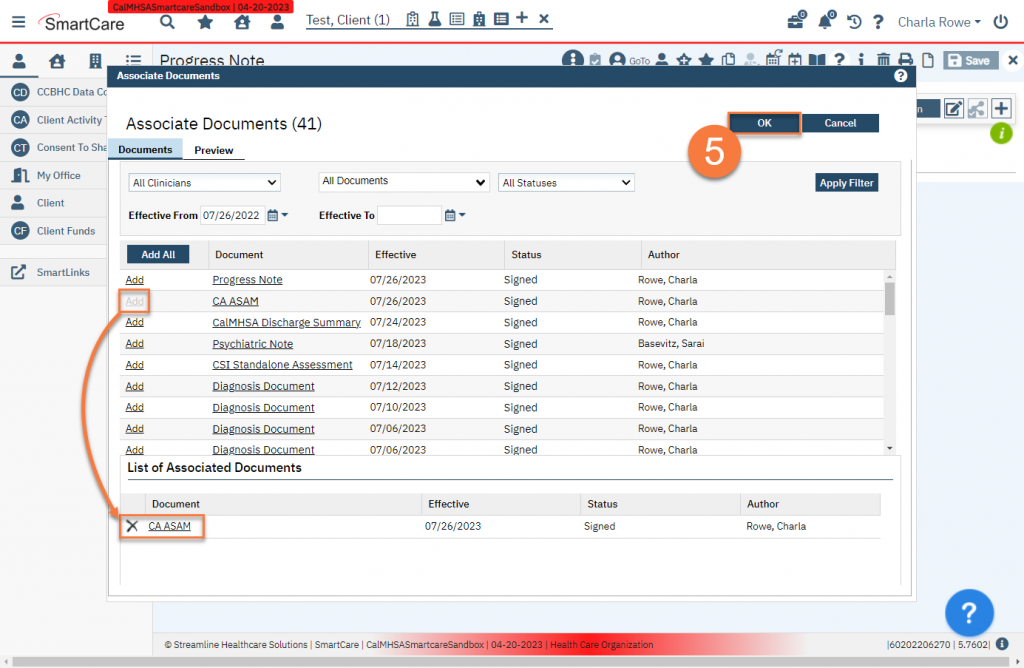
- Things brings up an second popup window that shows the client’s documents. You can use the filters to more easily find the document you’re looking for. Click on the Add link next to the document you want to associate with the note.
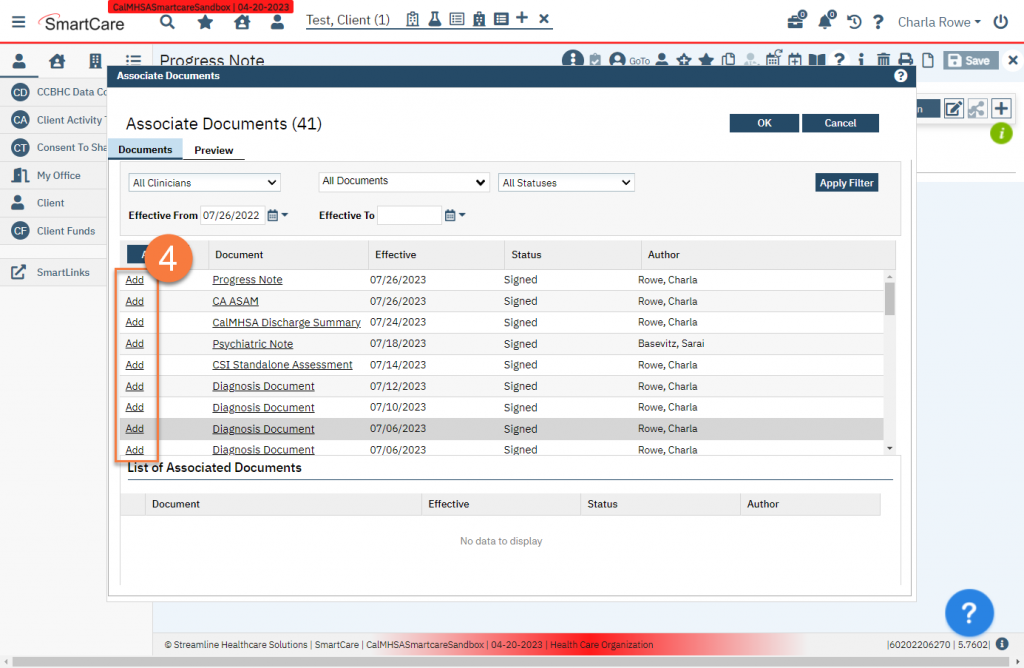
- This will add the document to the List of Associated Documents section and grey out the option to add it. If you made a mistake, you can click on the Delete (X) icon next to the document you want to remove. Add as many documents as you need to. When you’ve finished adding all the documents you want to associate with this note, click OK.
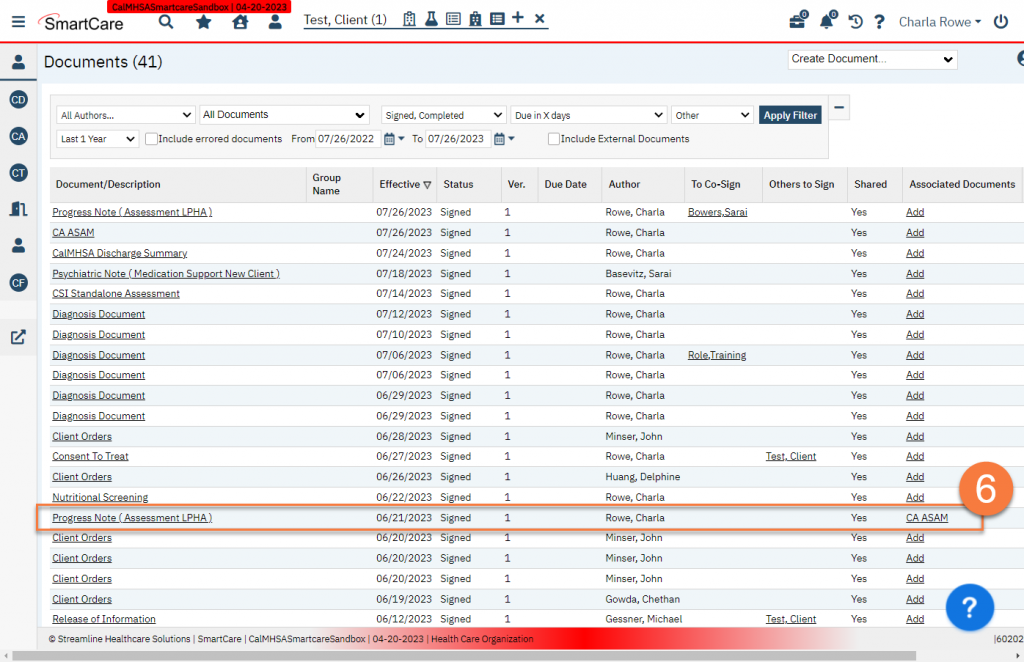
- These documents are now associated with the original document. You can see what documents are associated with this document in the Documents (Client) screen. Any associated documents will show in the Associated Documents column.
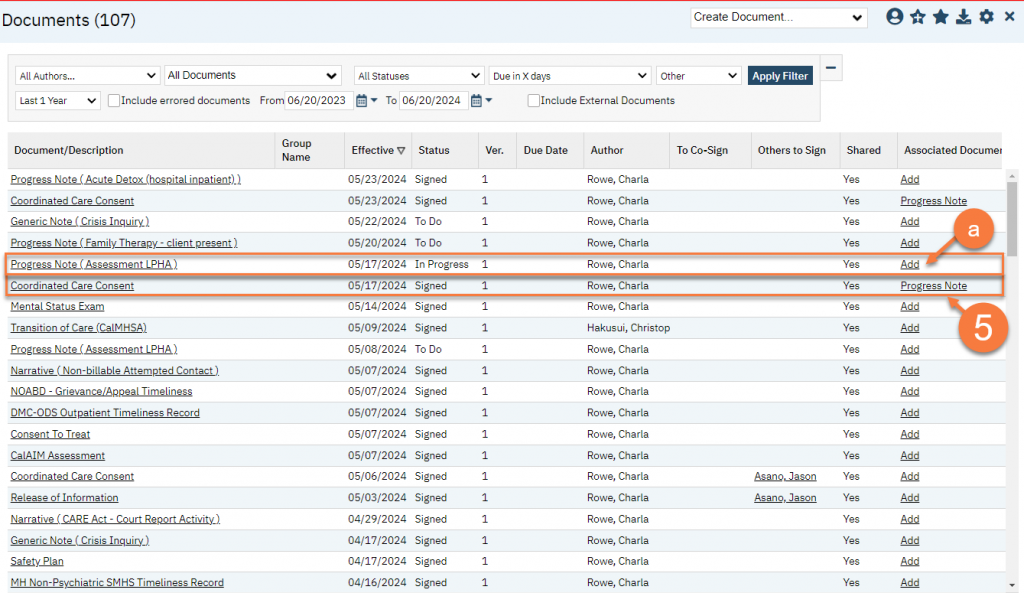
How to Associate another Document From the Documents List Page
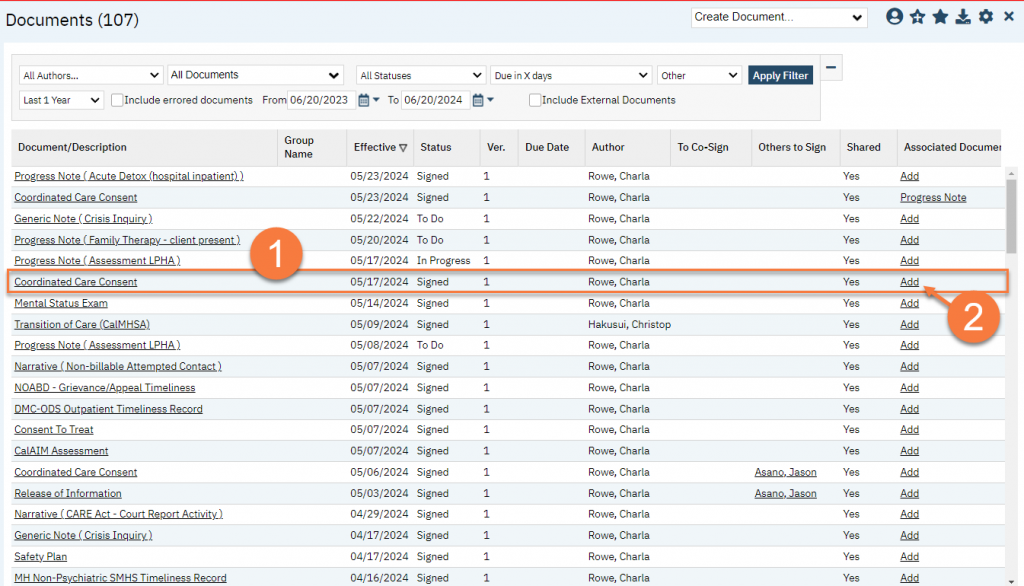
- Find one of the documents you want to associate.
- Click on the Add link in the Associated Documents column.
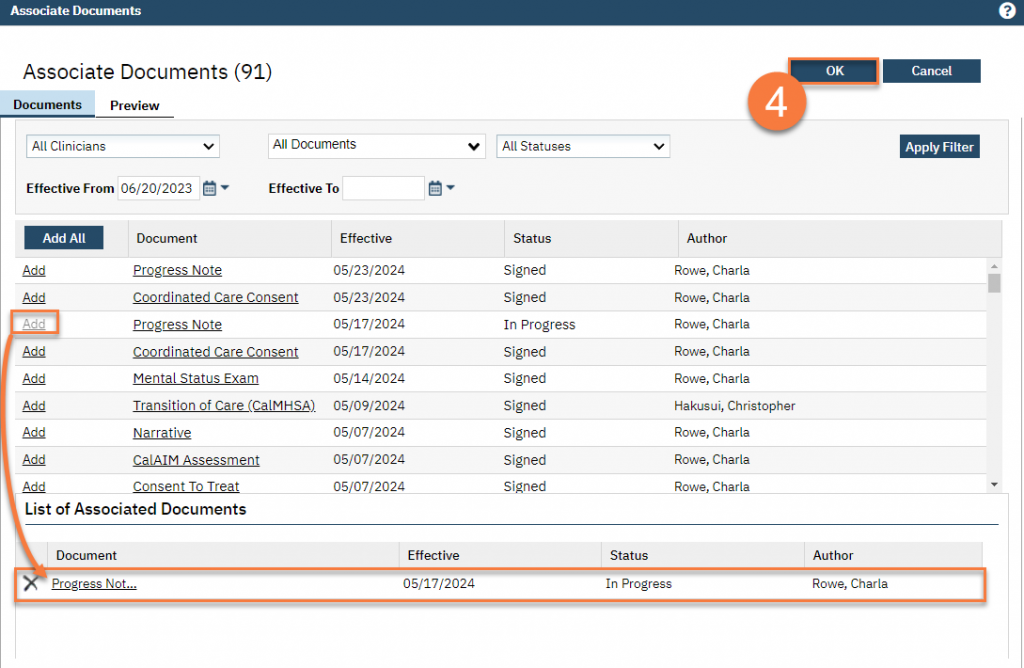
- This will bring up the Associate Documents popup window. Find the document you want to associate with the one you selected in step 1 and click on the Add link next to that document.

- This will bring grey out the Add link and add the document in the List of Associated Documents section at the bottom of the popup window. Repeat step 3 until you’ve associated all the documents you want with the document you selected in step 1. Click OK to save this association.
- You can now see the document from step 3 is associated with the document you selected in step 1.
- Note that the associated document you selected in step 3 does not automatically also have an association to to the document in step 1. To create a bi-directional link, repeat steps 1-4 with the documents reversed.
Updated 6/20/24