It may happen that a user enters documentation for the wrong client. When this occurs there are two options, these options are dependent on the status of the document.
- Firstly, we need to know the status of the document. The status is a field in the document header.

Documents Not in Signed or Completed Status
- If the status is that that is not in Signed, Completed, or New the user can move the document to the correct client.
- If document status is New, but the user has already been completing the document, the status can be changed to In Progress once it is saved.
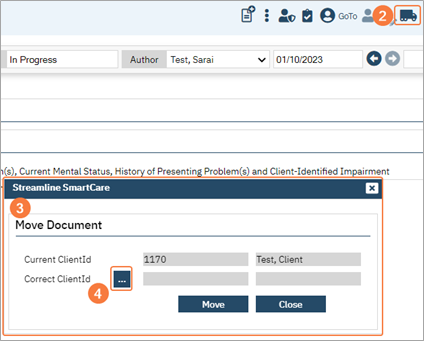
- In the toolbar, the user can click the Move icon.
- The user will see a Move Document popup window.
- The user should click the ellipsis button to identify the correct client.
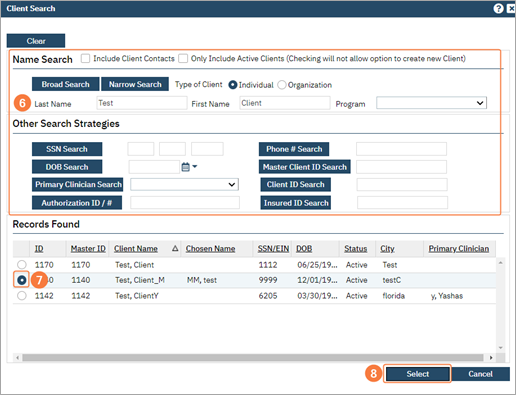
- The user will see Client Search pop-up.
- User can search for the client through any available fields.
- Note: The user has to click on field names in order to generate the search.
- Correct client can be selected by selecting the radio button.
- Click the Select button to proceed.
- Now the Correct ClientId field will be populated.
- The user should click Move button.
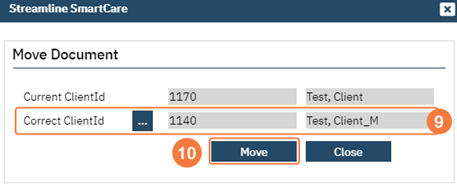
- The document has now been moved to the correct client
Documents in Signed or Completed Status
Once a document has been signed or completed it cannot be moved. At this point the document can only be errored. A new document would need to be done in the correct client record.
- In the document toolbar click Select Action icon and click Error.
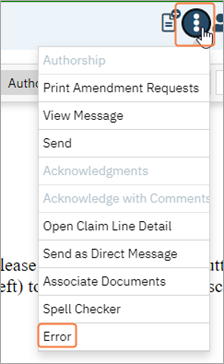
- The user will see Note Error popup window. They should click OK button to proceed.
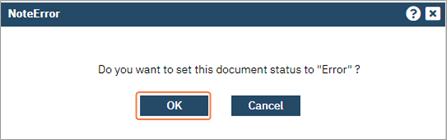
- The document status will now be Error and an Error watermark will appear on the PDF.

- Errored documents are not removed from the client record and can be located by selecting Include errored documents checkbox in Documents list page filter.

How to Complete a Clinical Document
There are multiple documents throughout SmartCare, and users may have general questions about how to complete the document. Firstly, there are guides and videos on specific clinical documents; users can be directed to them. Below is some general situations a user may experience while completing a document.
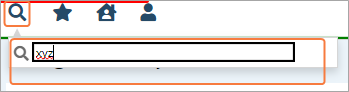
- User does not see the document in Search. In screenshot no results are produced by search.
- This is because the user does not have access to search for this document.
- This is because the user does not have access to search for this document.
- User received red error stating “You are not authorized to view the screen (xyz)”when they click Document hyperlink.

- Note: Document hyperlink can be accessed through various screens.
- This means the user does not have access to the Document (View) permission.
- New icon in inactive when they are viewing a document.

- This means the user has access to view the document but does not have access to Document (Edit) permission.
- If a county does not believe permissions are set up correctly the action is dependent on where role was created.
- For roles created by CalMHSA, only CalMHSA can modify the permission.
- For roles created through the county, the county can modify the permissions.
- See How to Configure Role Definitions section for details.
How to Complete a Note
The system will have multiple note templates that can be associated to a procedure code. A user’s ability to complete the note is dependent on the note present. Below we outline the best steps a user can take to complete a note.
- After the user has completed the Service tab and clicked Save they should click on the Note tab.
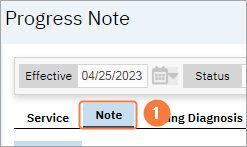
- Many times, users will report the note tab is inactive. The note tab becomes active when the service is in show status.
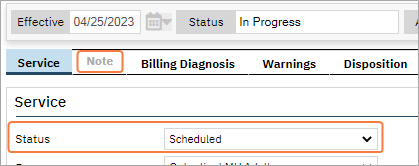
- Many times, users will report the note tab is inactive. The note tab becomes active when the service is in show status.
- The user should click the Validate icon in the toolbar.
- Clicking Validte will also save the document.
- The Validations pop-up window will appear.
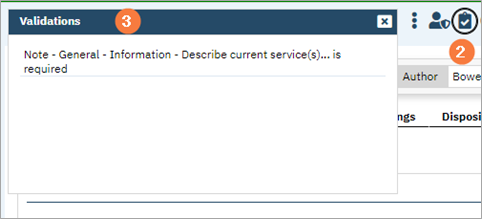
- Validation pop-up can be moved in the screen and can be left opened while the user works in the document.
- Validations inform the user of what is required to be completed prior to signing a note. They can be read as follows:
- Tab(s)
- Section
- Field that needs to be completed.
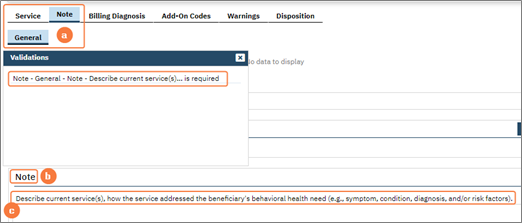
- Once user has met all validations, they can sign their note.