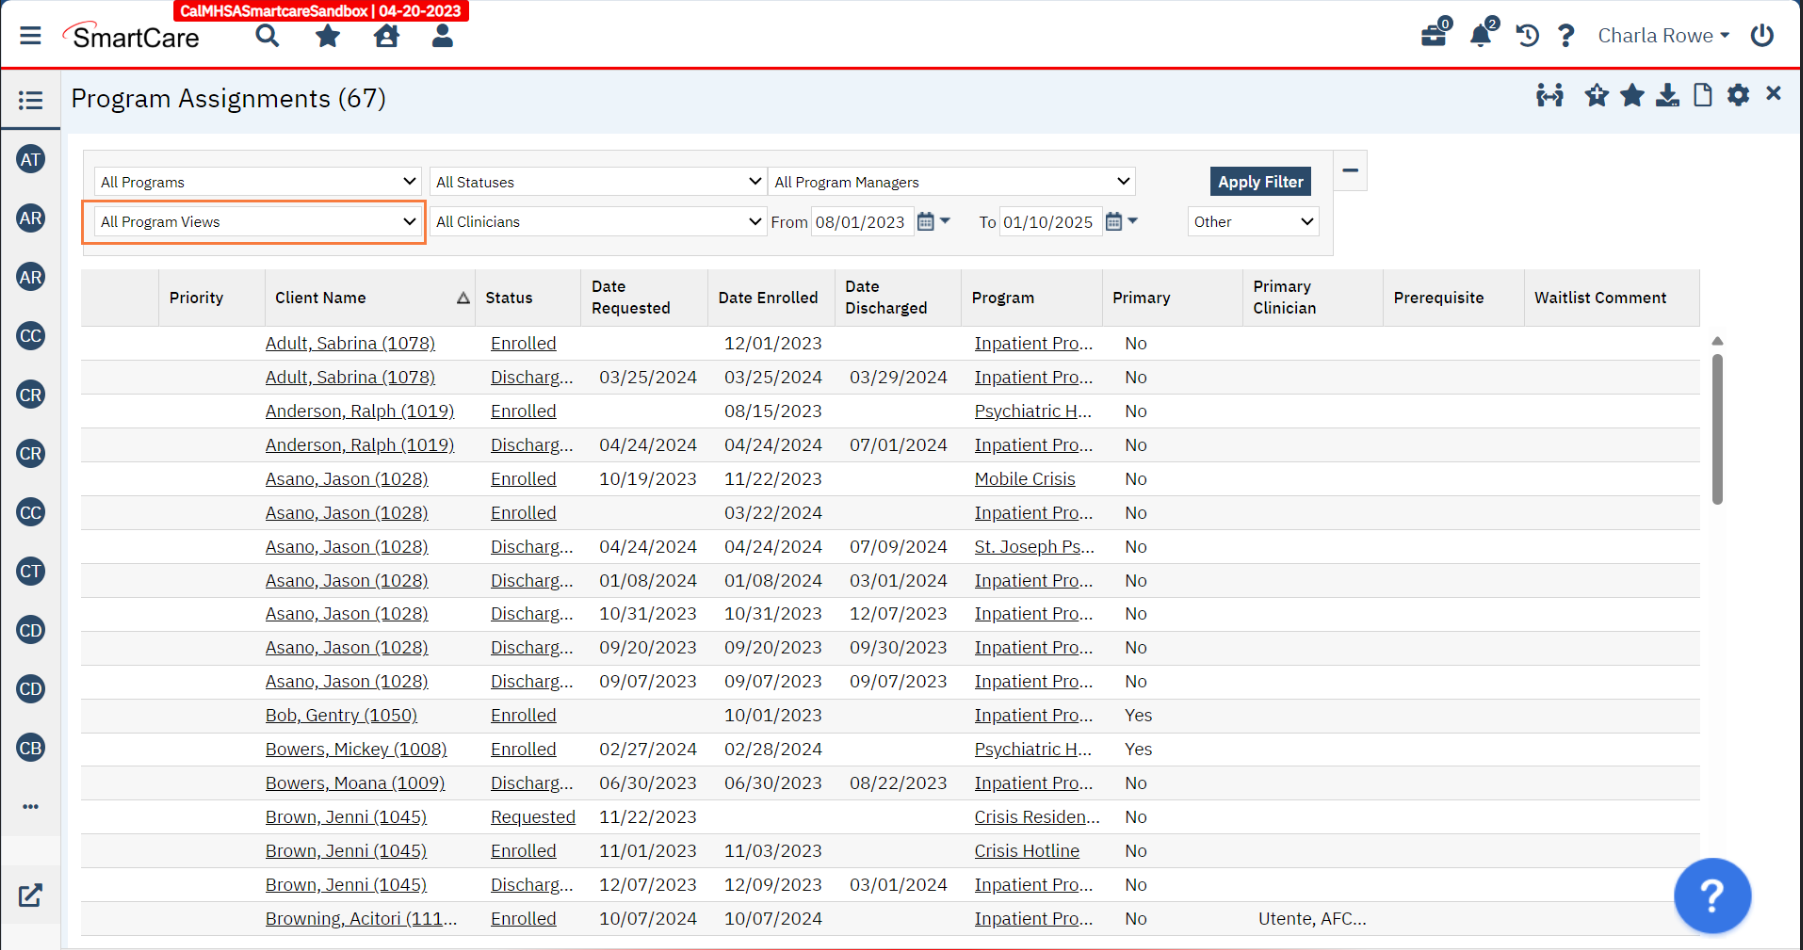
Creating a Program View lets you define the programs that you can use to filter programs on the Program Assignments screen. The Program Views you create are specific for you and are displayed in the All Program Views dropdown list on the filter section on the Program tab of the Program Assignments screen.
How to Create a Program View
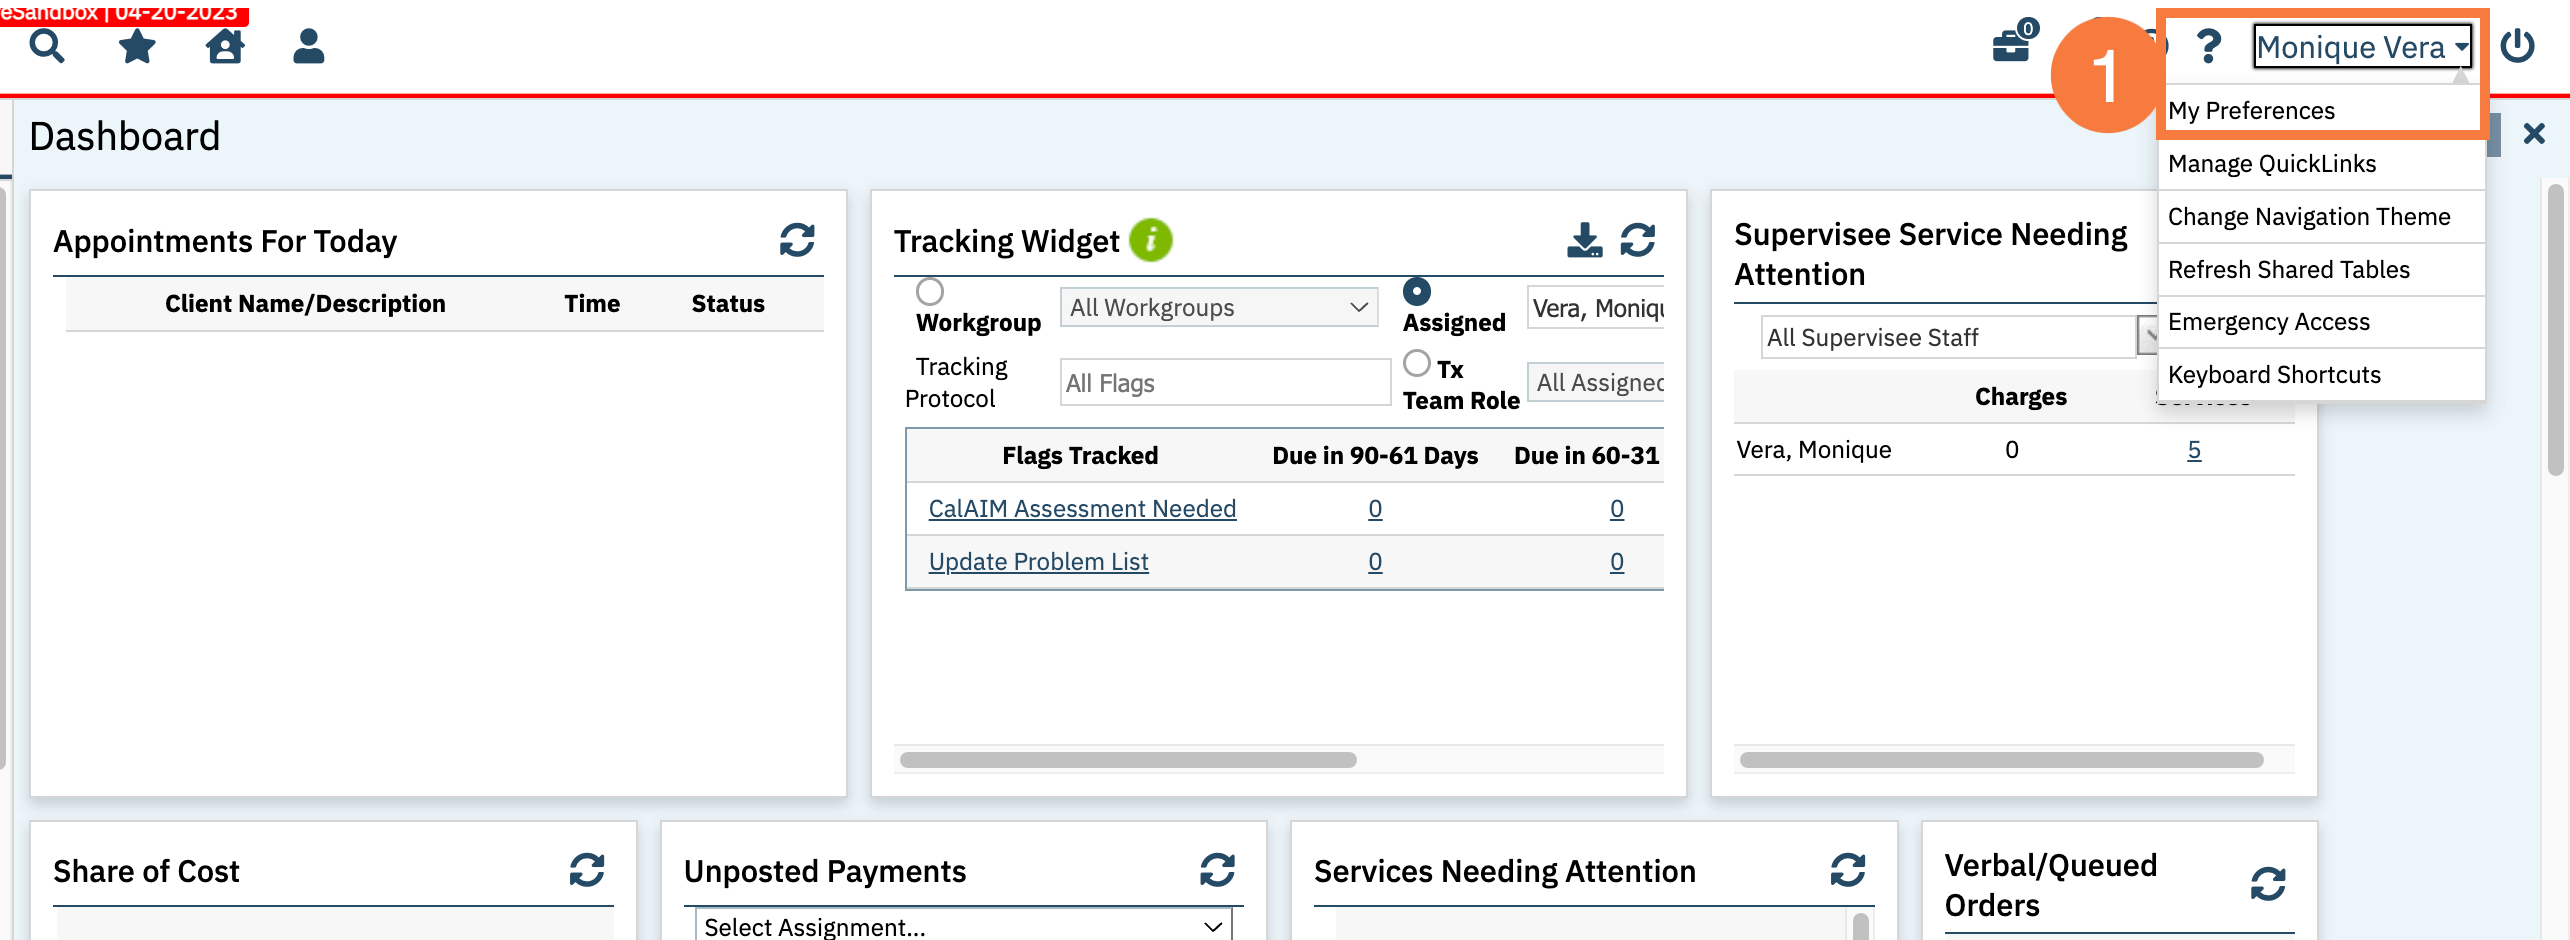
ClickMy Preferences in the User Settings dropdown list in the header section of the screen. The My Preferences screen opens.
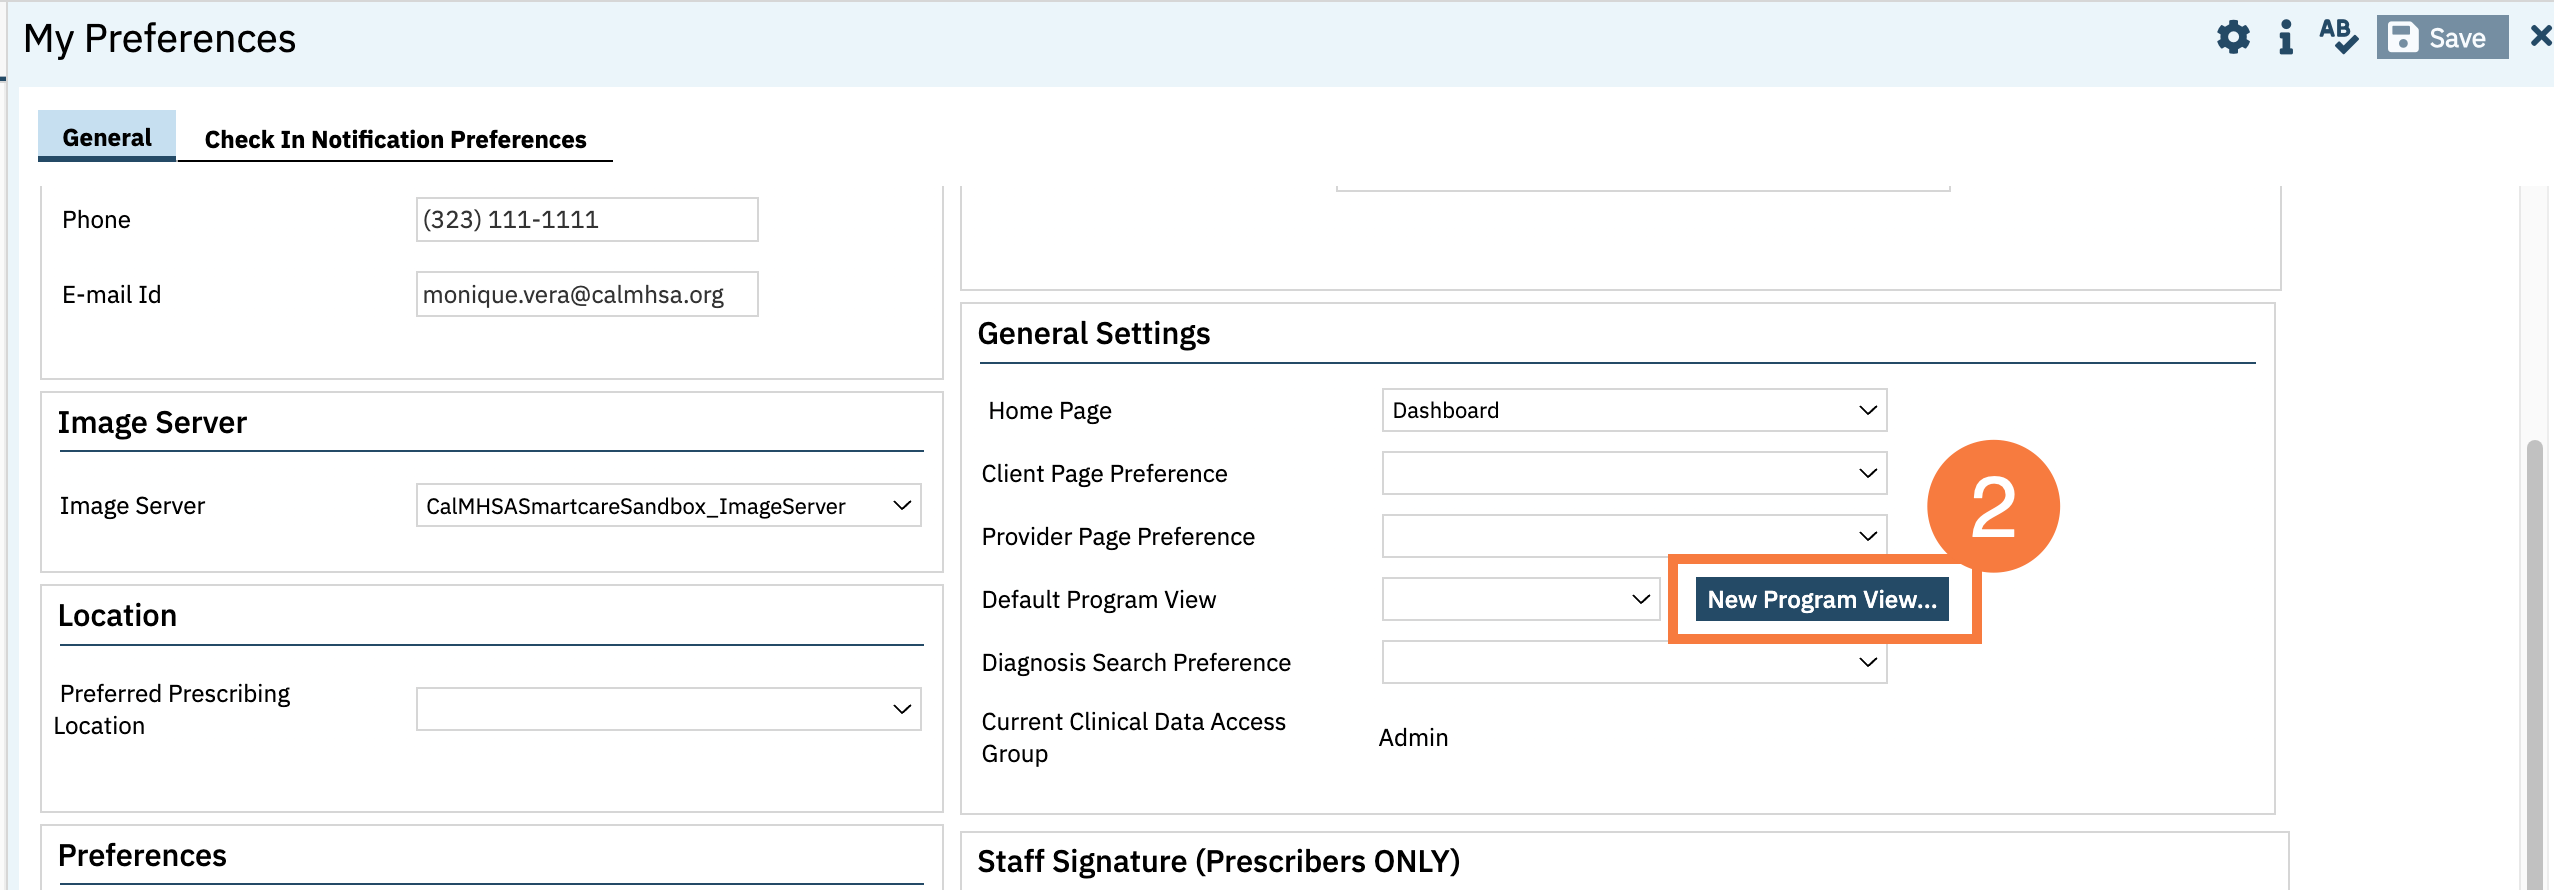
In the General Settings section, click the New Program View button. The Program Views window opens.
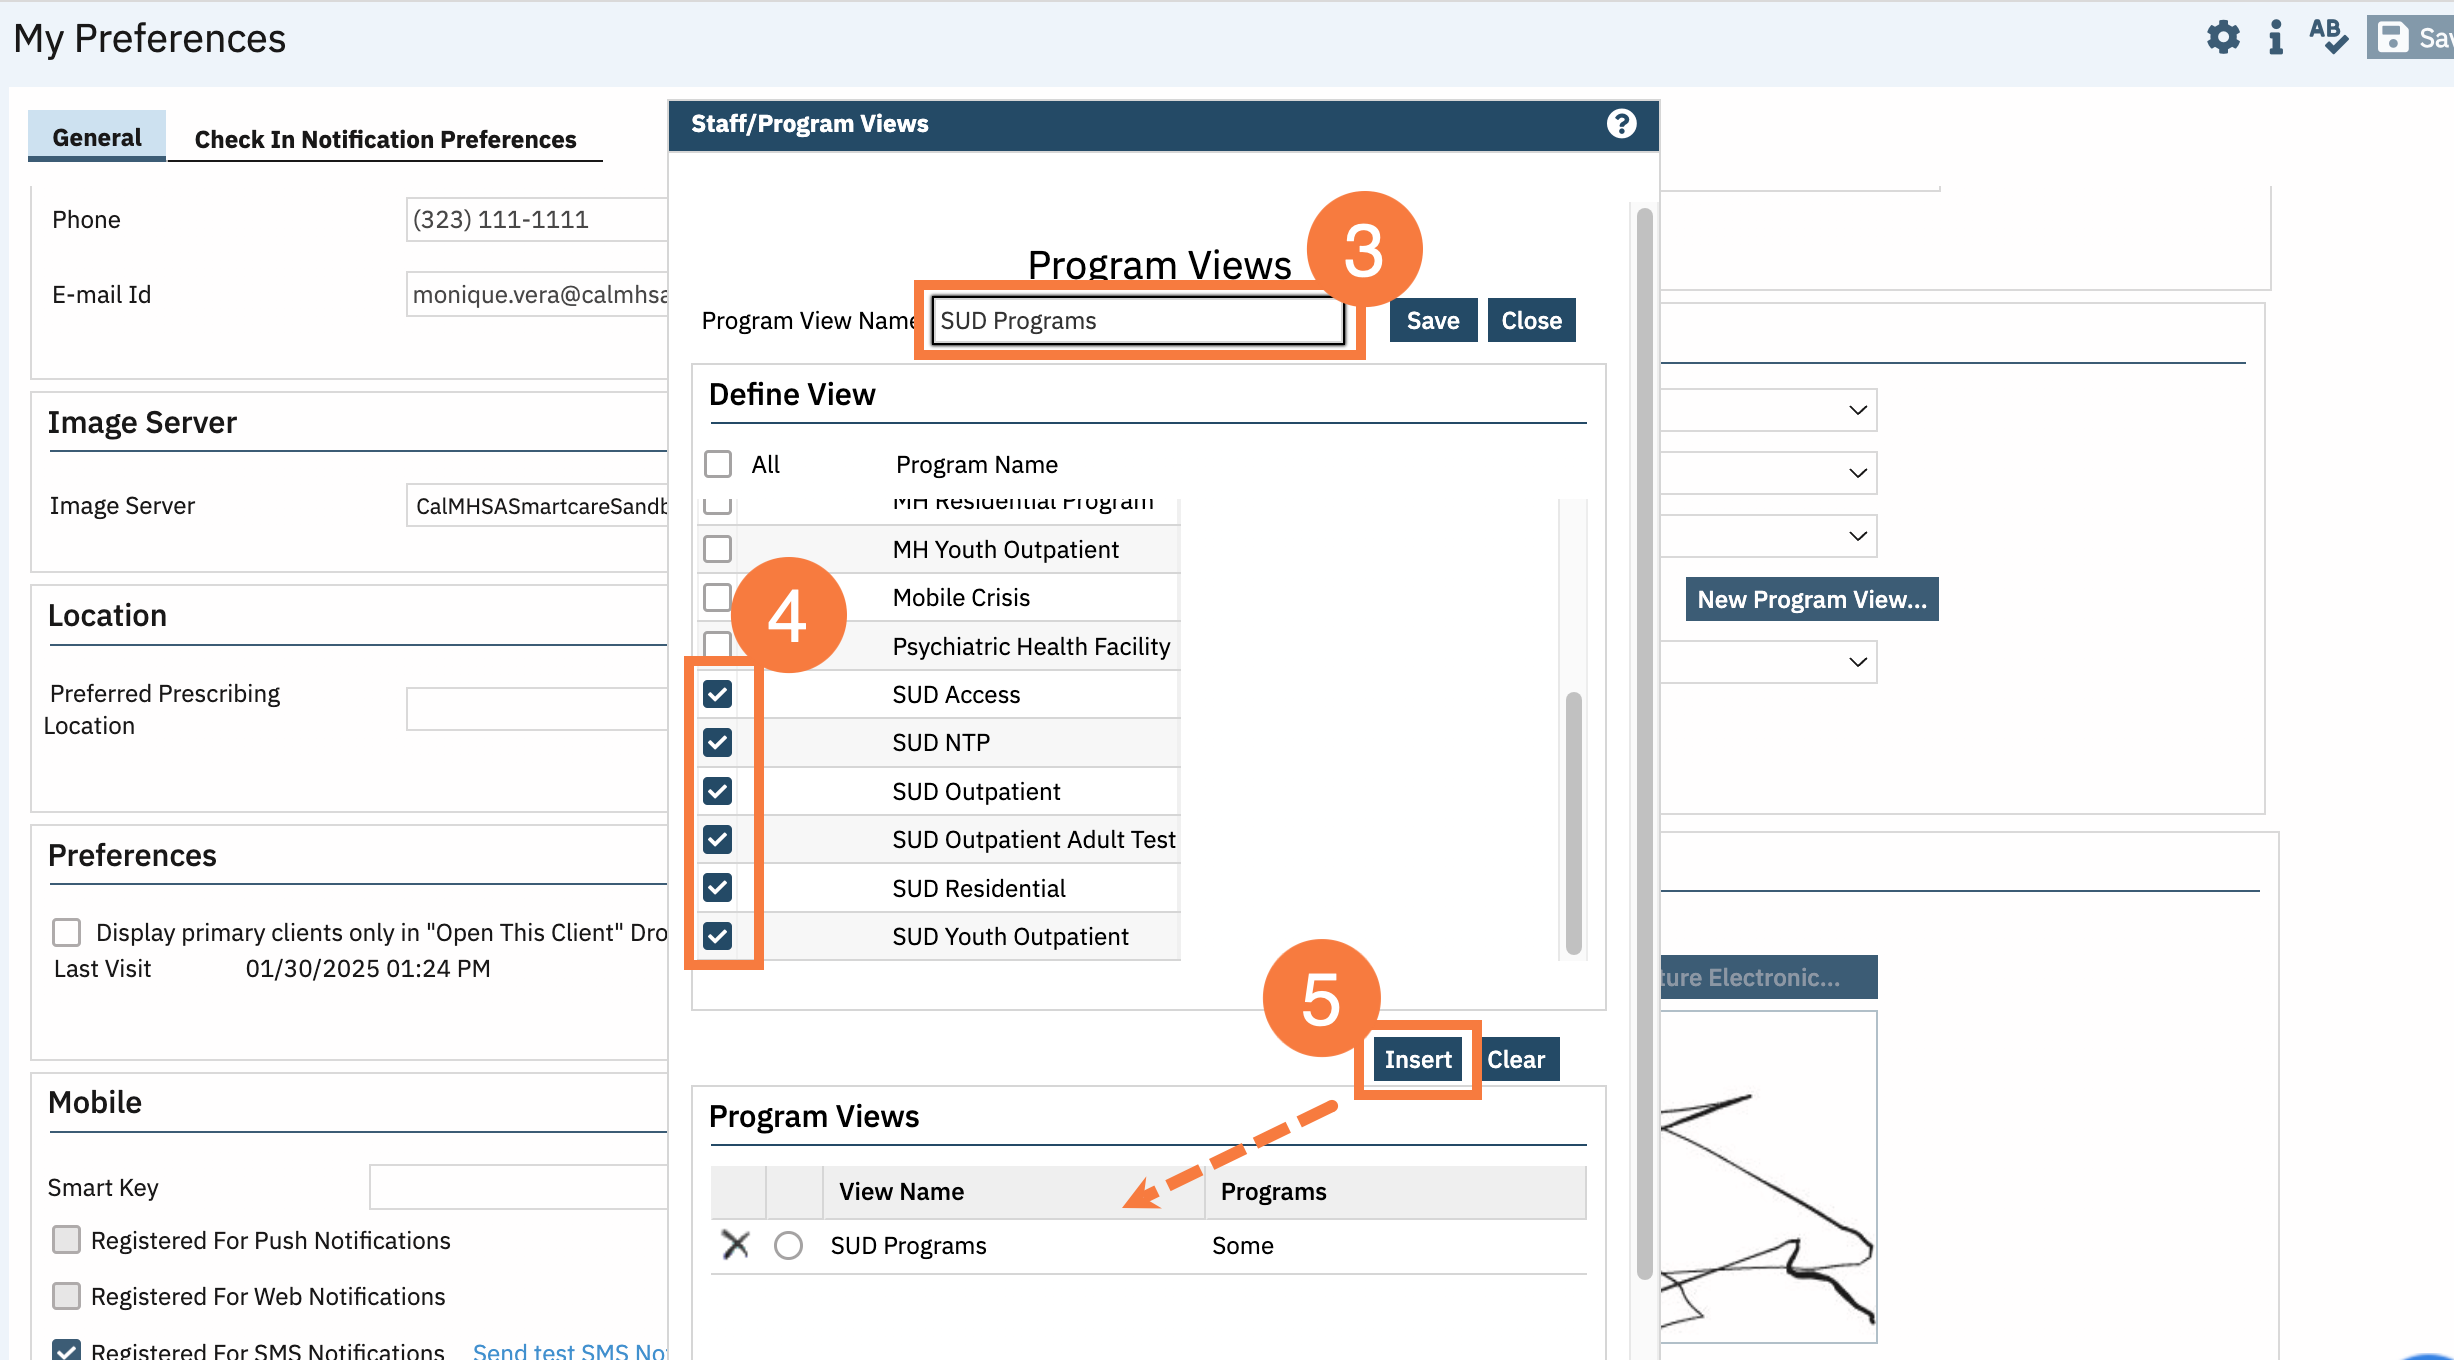
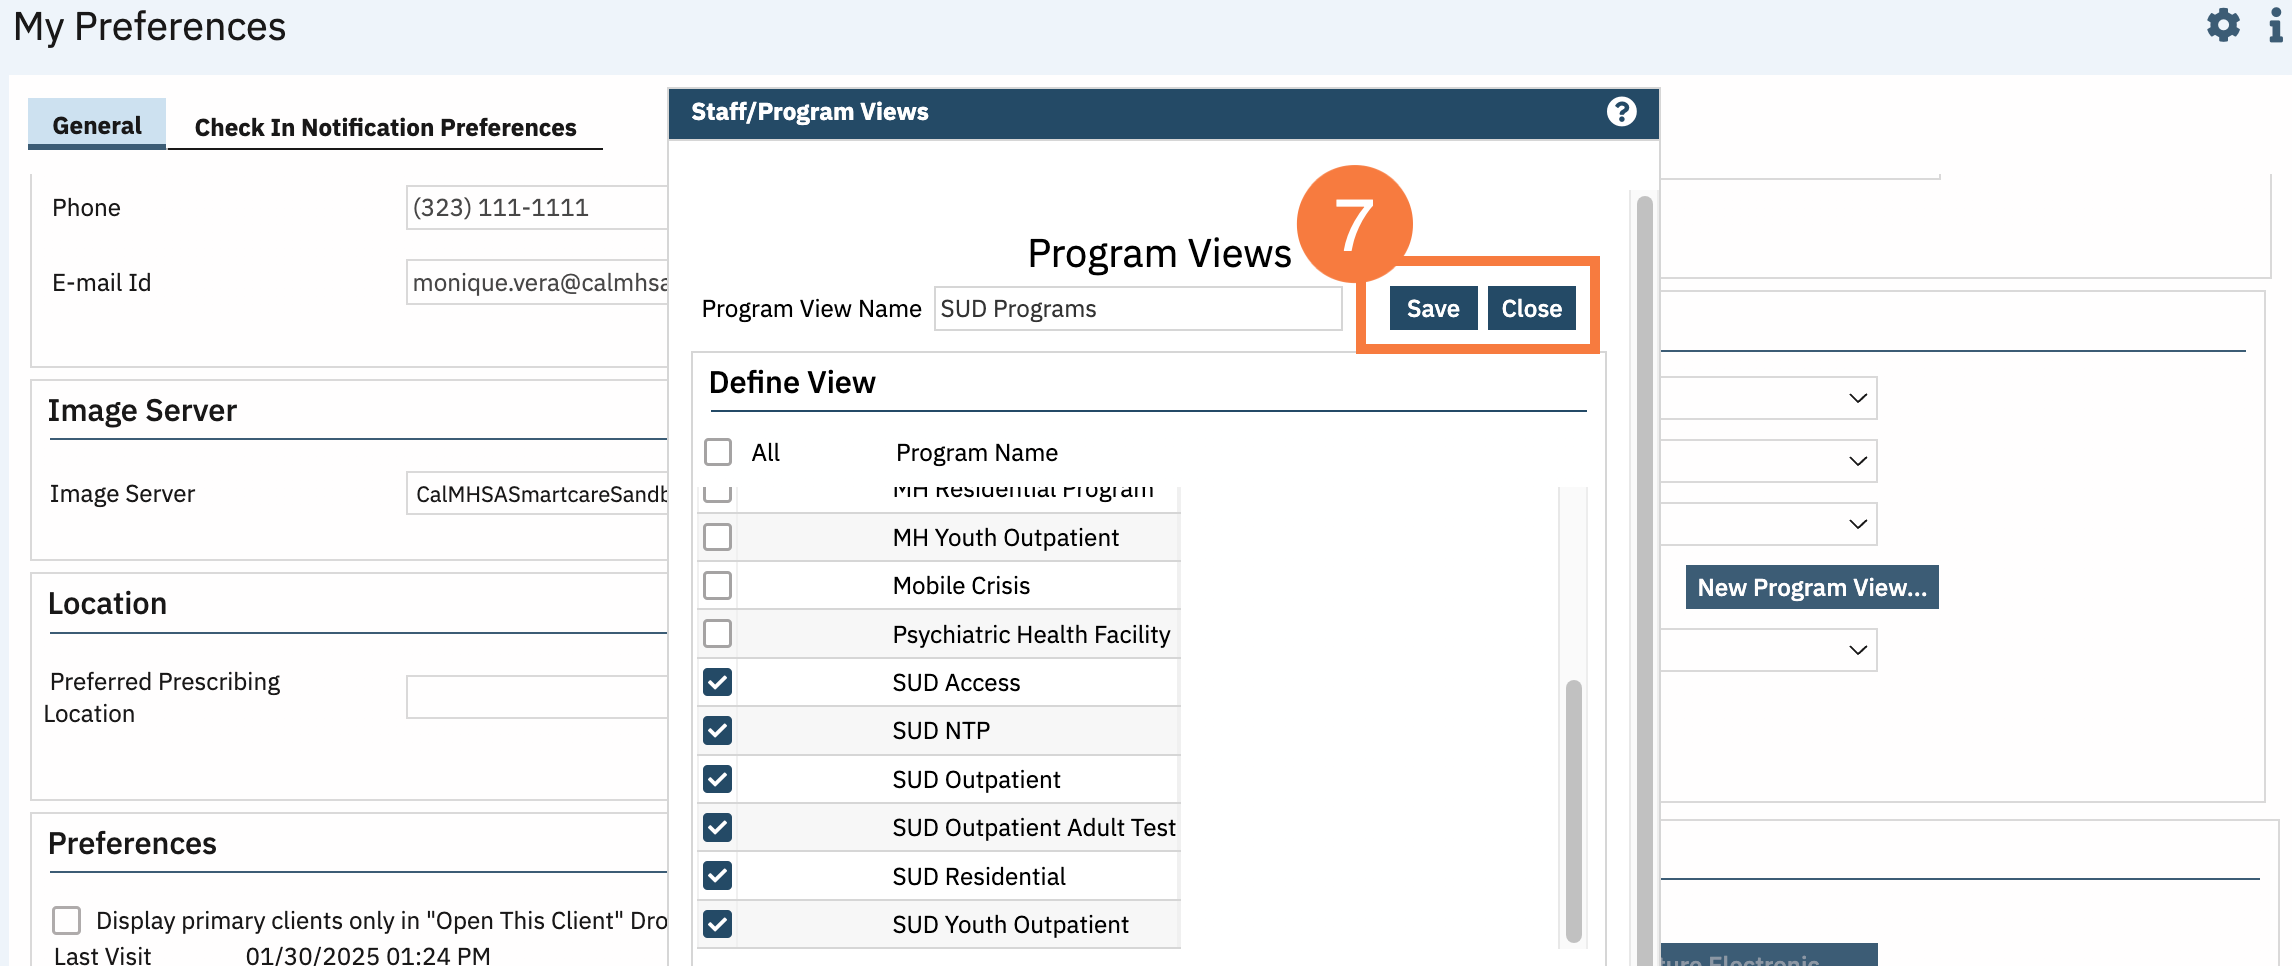
Enter the name of the program view you are setting up in the Program View Name field.
Select the checkbox next to each program you want to include in the Program View.
Click Insert. The program view is displayed in the Program Views section of the window.
To set up another Program View, repeat steps 3 – 5.
When you are finished setting up program views, click the Save button and click the Close button to close the Program View window.
Modify a ProgramView
ClickMy Preferences in the User Settings dropdown list in the header section of the screen. The My Preferences screen opens.
In the General Settings section, click the New Program View button. The Program Views window opens.
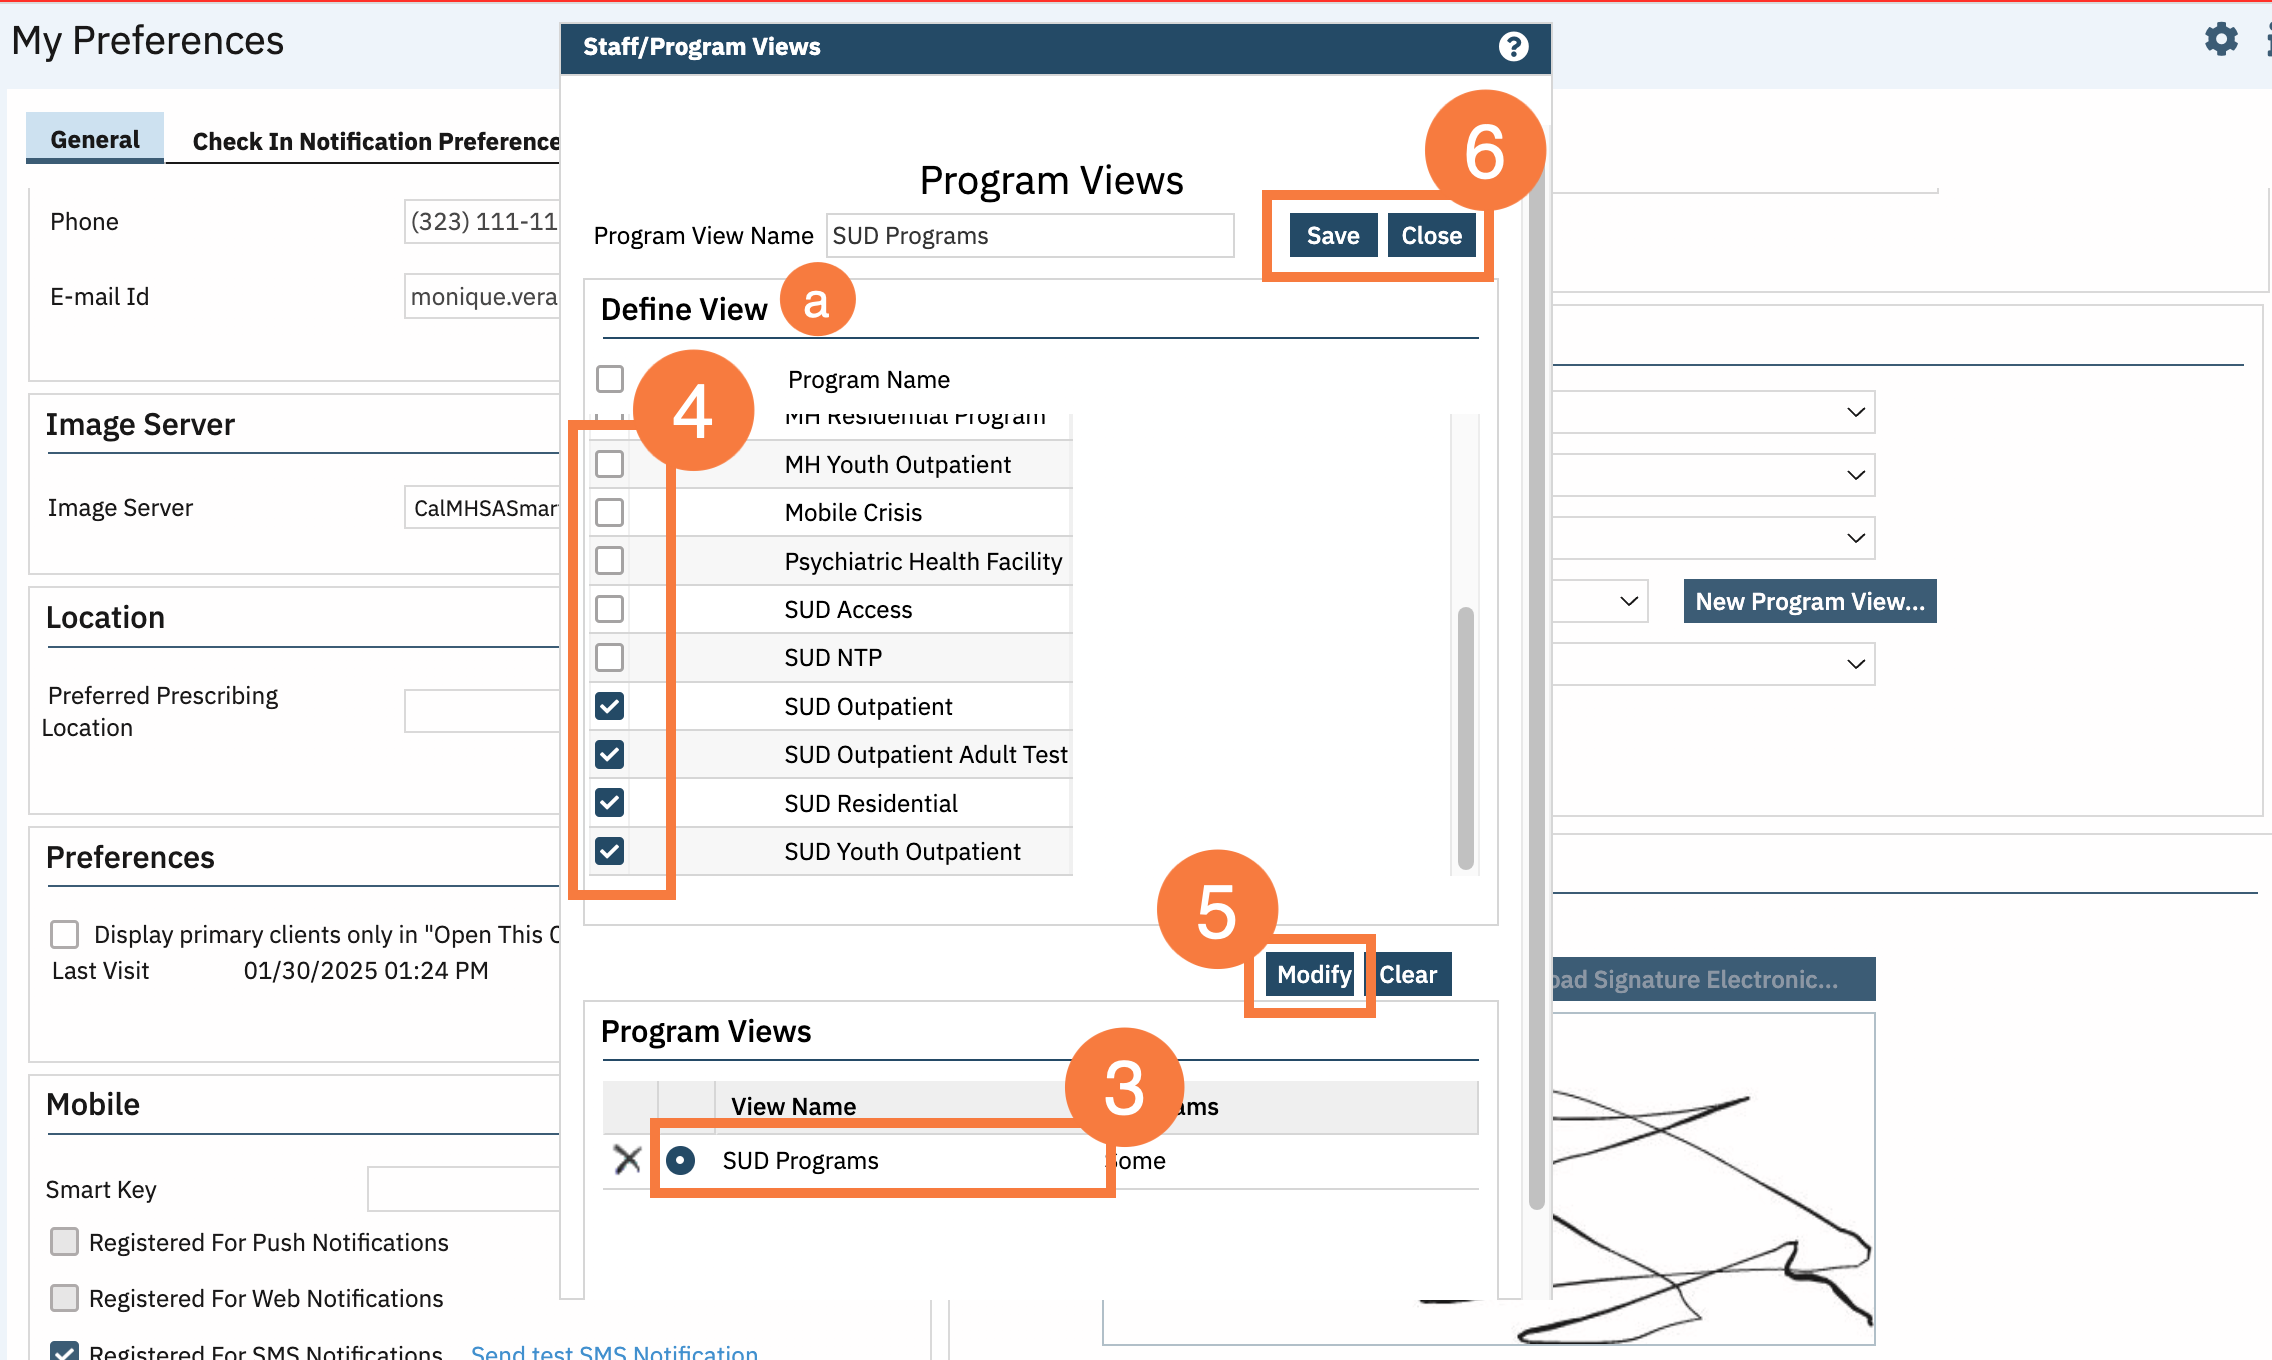
Select the radio button next to the Program View you want to modify.
The programs that are included in this view are indicated by the filled in checkboxes in the Define View section.
Add or delete programs to the view.
Click the Modify button.
Click the Save button to save the changes and click the Close button to close the Program Views window.
How to Delete a Program View
ClickMy Preferences in the User Settings dropdown list in the header section of the screen. The My Preferences screen opens.
In the General Settings section, click the New Program View button. The Program Views window opens.
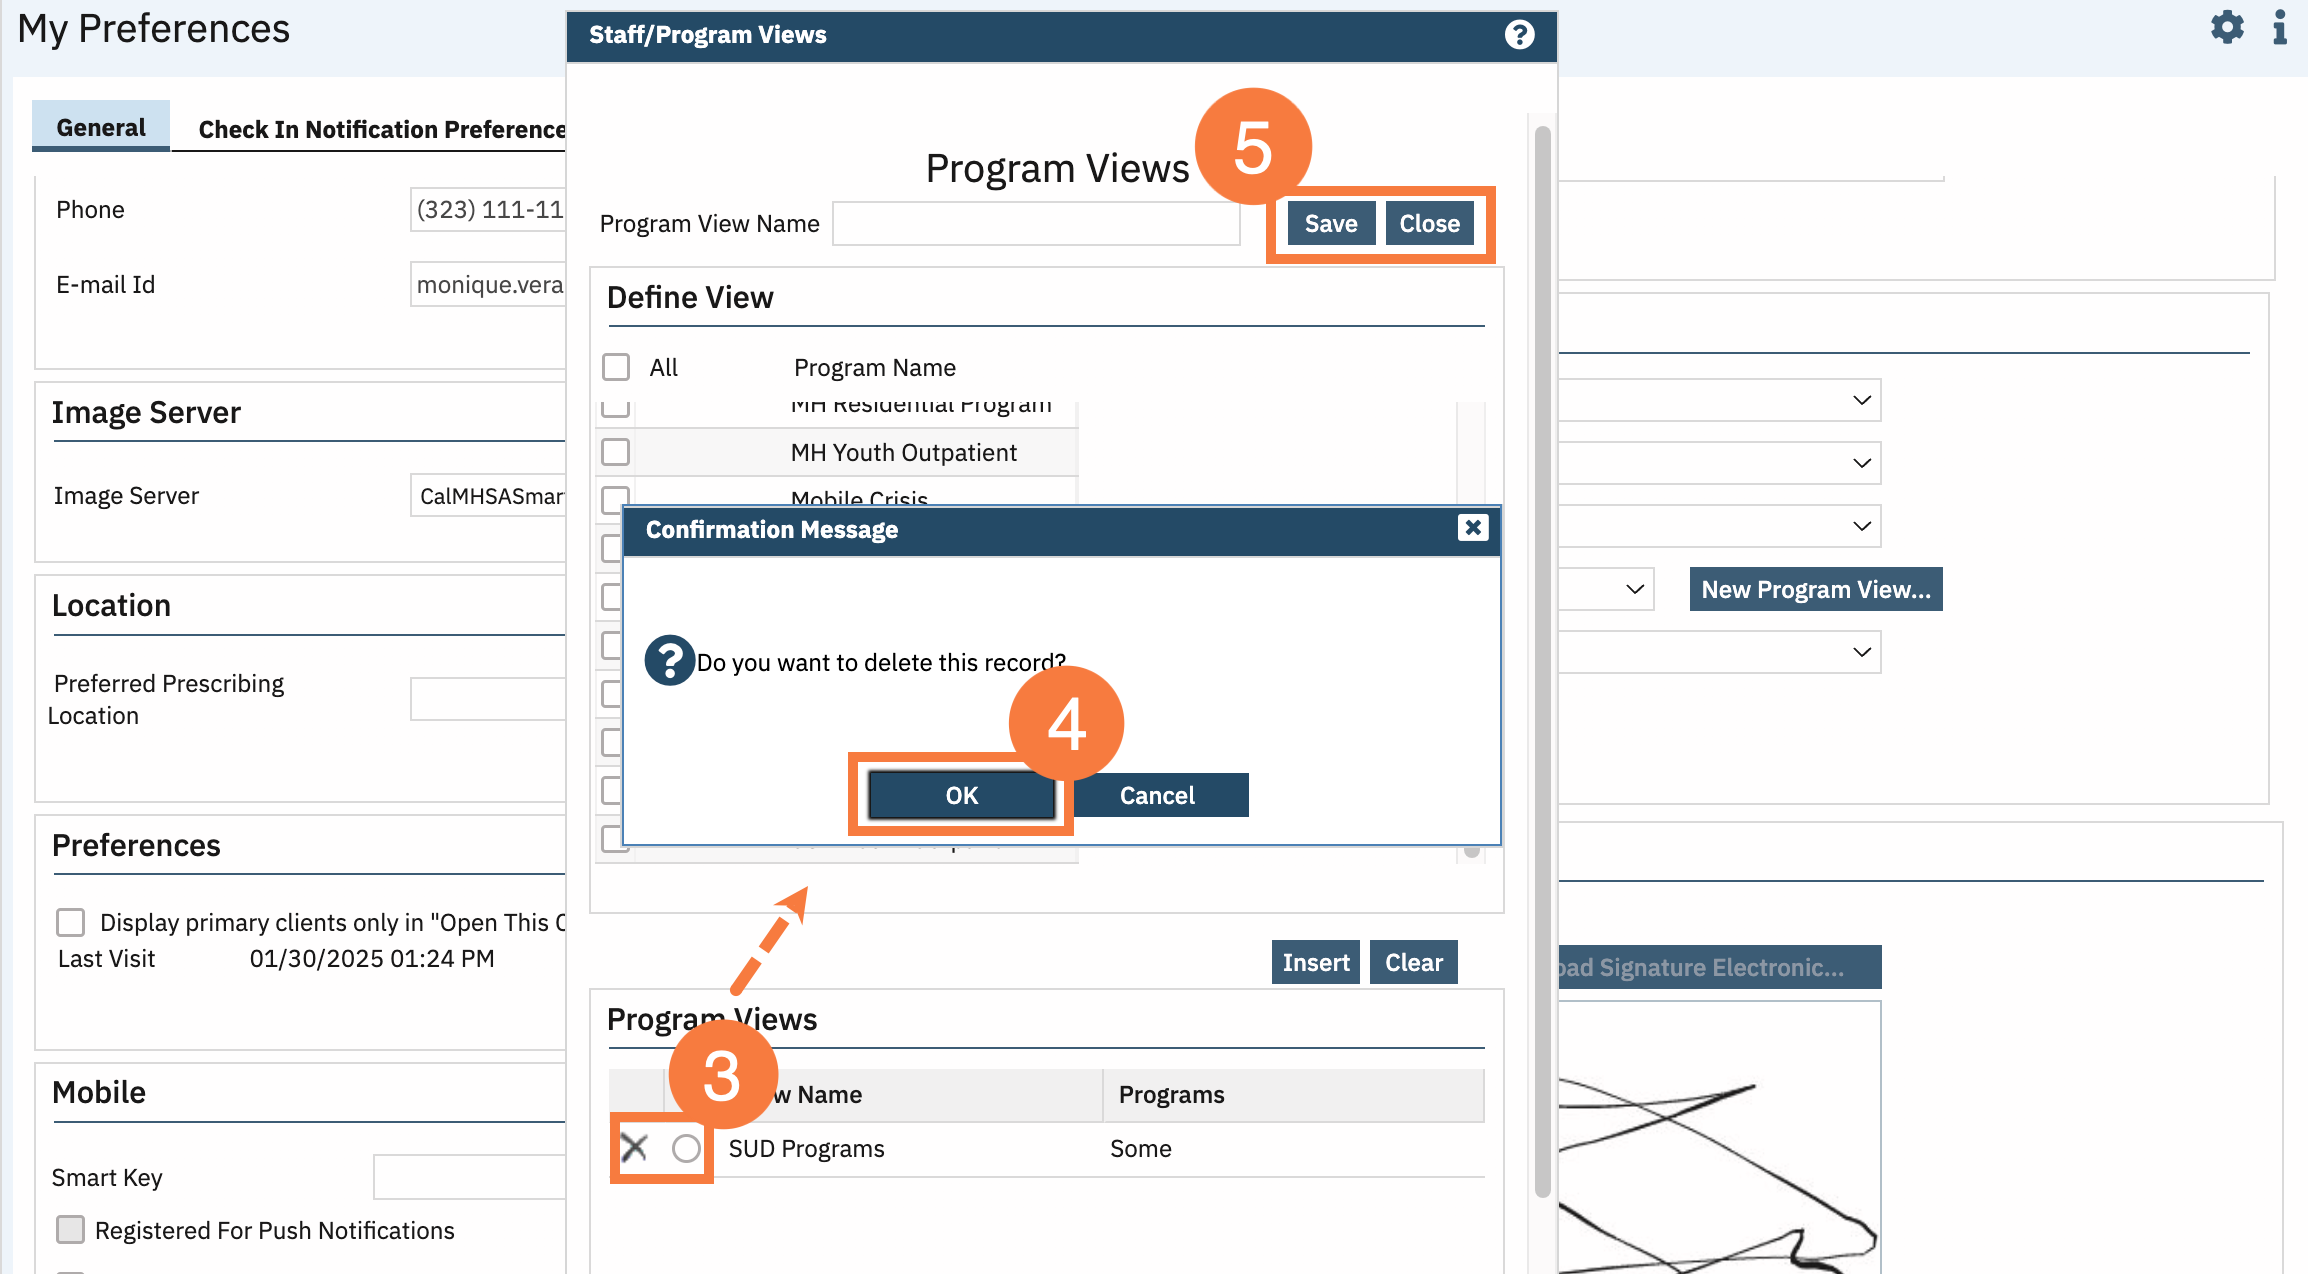
Click the Delete icon (X) next to the Program View you want to delete.
The Confirmation Message pop-up window opens. Click the OK button. The view is removed from the Program Views section.
Click the Savebutton to save the changes and click the Close button to close the Program Views window.