For Services That Have a Signed Note and Have Been Marked Complete
Click the Search icon.
Type “Services” in the search bar.
Select “Services (My Office)” from the search results.
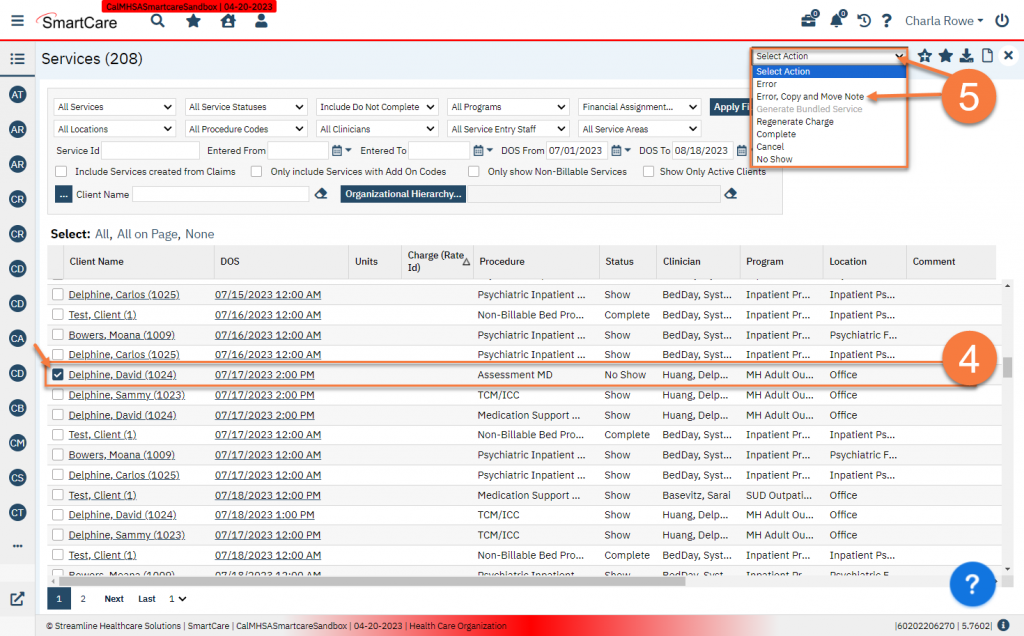
This brings you to the Services list page. Use the filters to find the service you’re looking for. Select the service you want to edit by clicking the checkbox next to the service.
Click on the Select Action dropdown and select “Error, Copy and Move Note”.
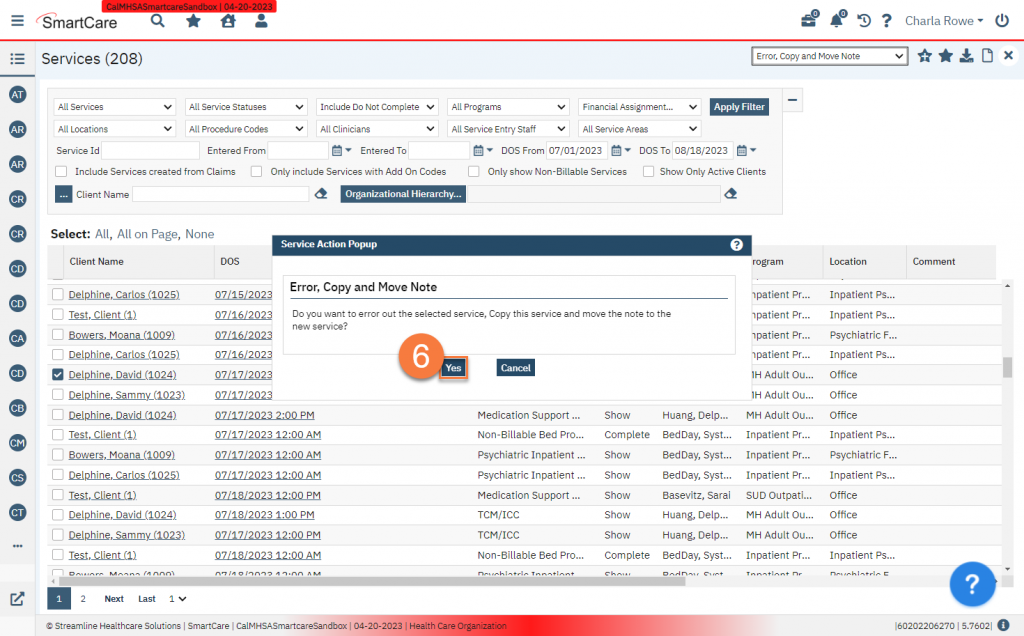
This brings up a Service Action Popup. Review the message and click Yes.
This will error out the initial service but create a duplicate. This duplicate is now editable by the end user. If there was a note attached, this note has now been moved from the errored service to the new service. The end user can now go into this service and make whatever edits they need. Billing staff can click on the date of service (DOS) link to bring up the service and make any edits they need.
For Services Marked as No Show or Cancelled
Click the Search icon.
Type “Services” in the search bar.
Select “Services (My Office)” from the search results.
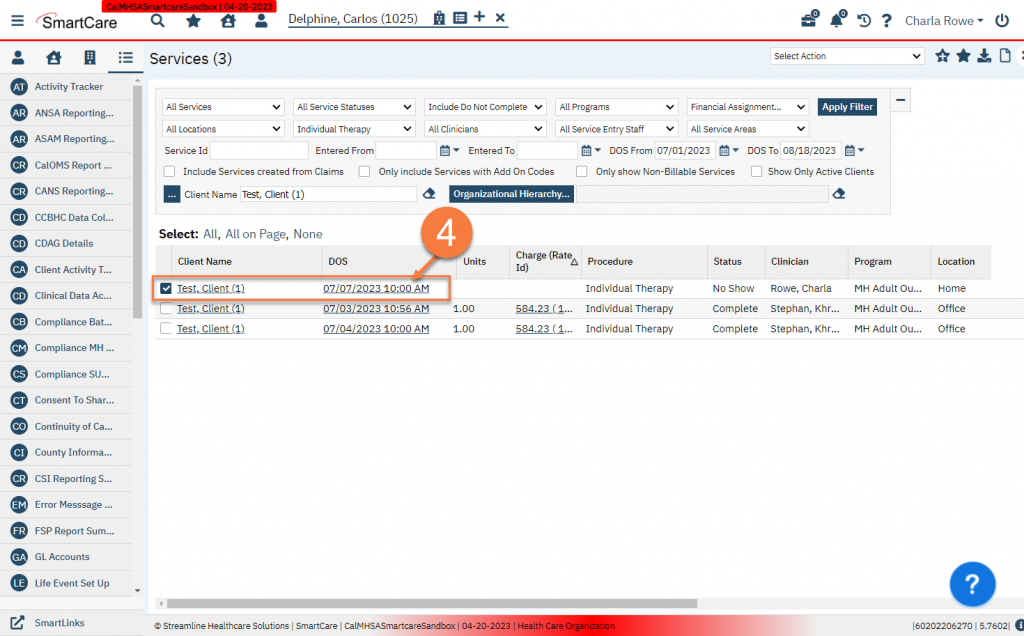
This brings you to the Services list page. Use the filters to find the service you’re looking for. Open the service you want to edit by clicking the DOS (date of service) link.
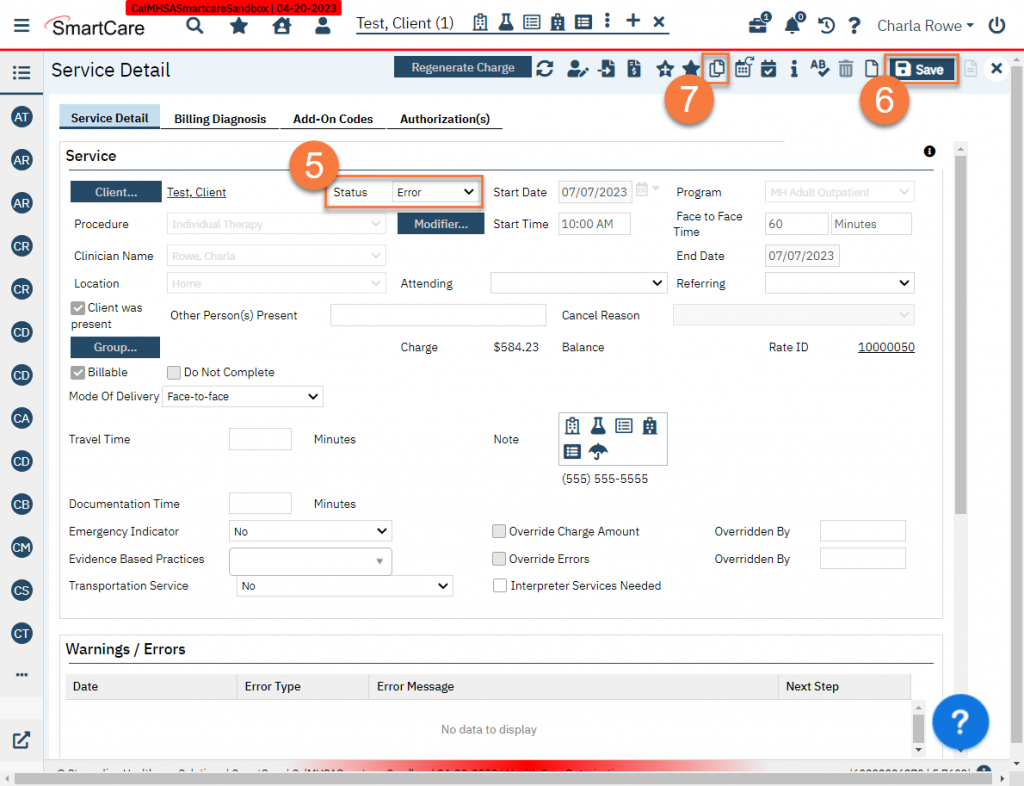
This takes you to the Service Detail screen. Change the Status to Error.
Click Save.
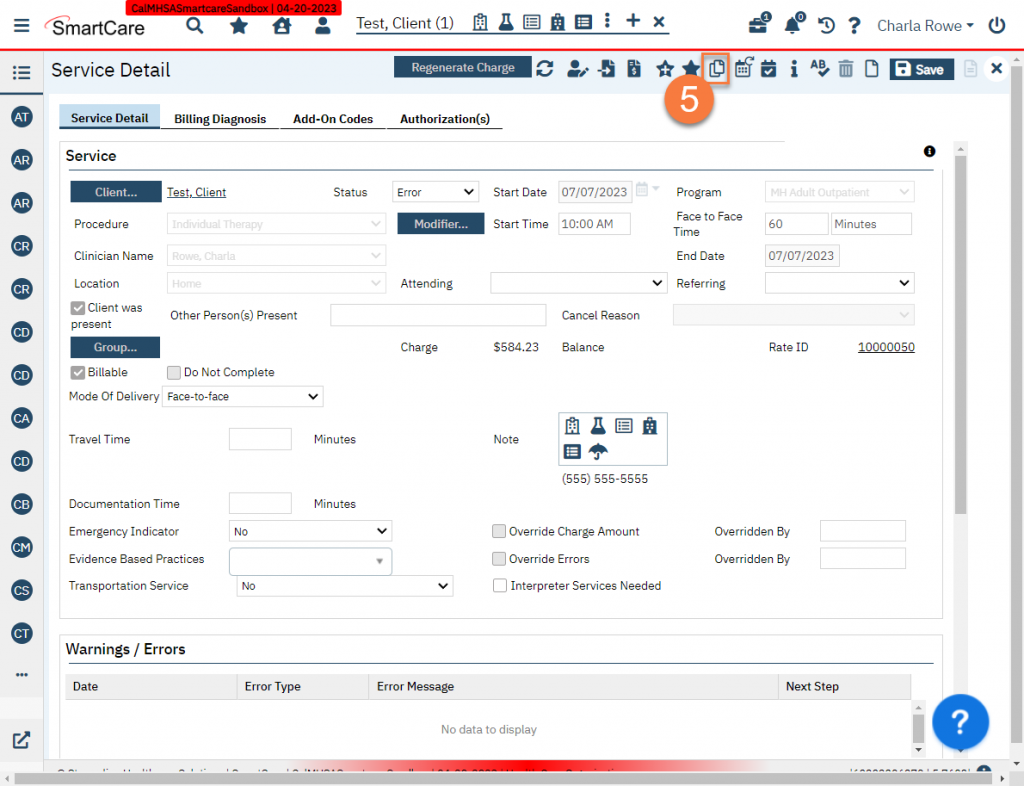
Click the Copy Service icon.
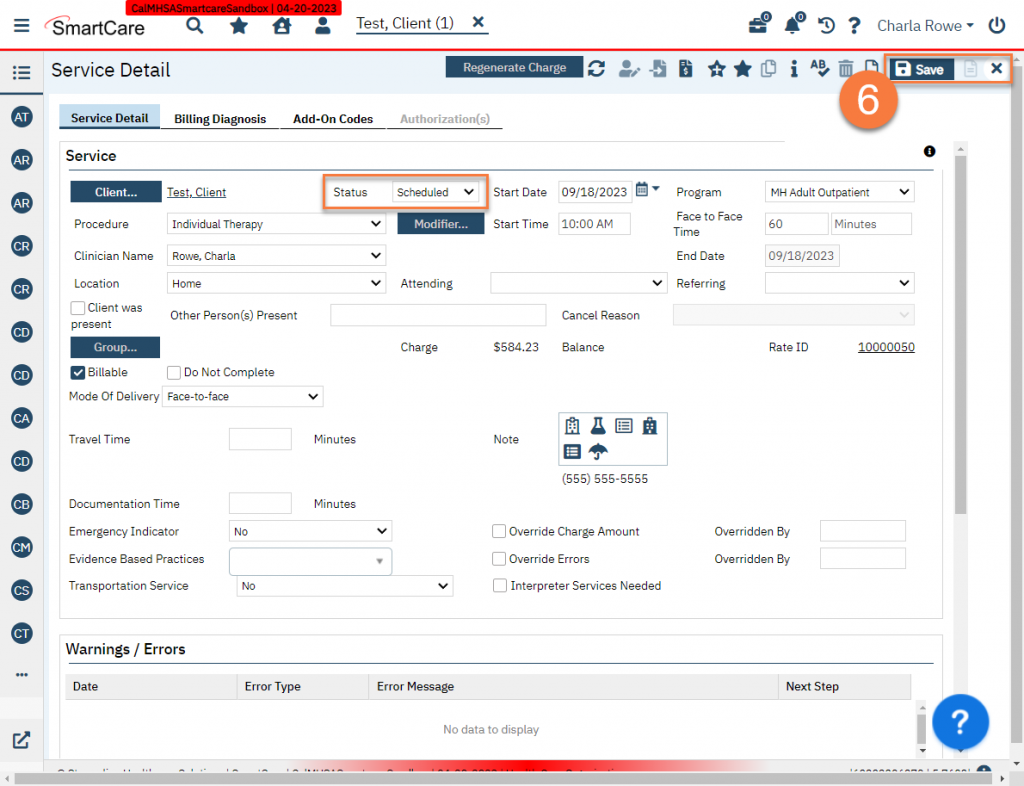
This brings up a duplicate of the service you just errored out but with status marked as Scheduled. Make whatever changes you need and click Save and close. If this results in a Show status, the end user will now be able to write a note for this service.
For Services Marked as Error
Click the Search icon.
Type “Services” in the search bar.
Select “Services (My Office)” from the search results.
This brings you to the Services list page. Use the filters to find the service you’re looking for. Open the service you want to edit by clicking the DOS (date of service) link.
This takes you to the Service Detail screen. Click the Copy Service icon.
This brings up a duplicate of the service you just errored out but with status marked as Scheduled. Make whatever changes you need and click Save and close. If this results in a Show status, the end user will now be able to write a note for this service.