This list page is generally considered the client’s chart, as it will list all the documents for a particular client. This will include all documents, progress notes, and scanned documents for the selected client. This list page is protected by CDAG, so you’ll only be able to see documents associated with programs associated to the CDAG you’re currently logged in under. If the client has signed an ASCMI Form, these CDAG rules will no longer apply, and you’ll be able to see all of a client’s documents for all programs.
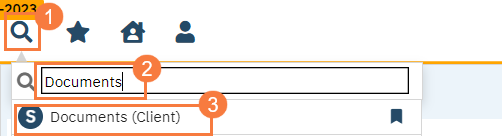
- Click on the Search icon with the client open.
- Type “Documents” in the search bar.
- Select “Documents (Client)” from the search results
This will bring up the Documents (Client) list page.
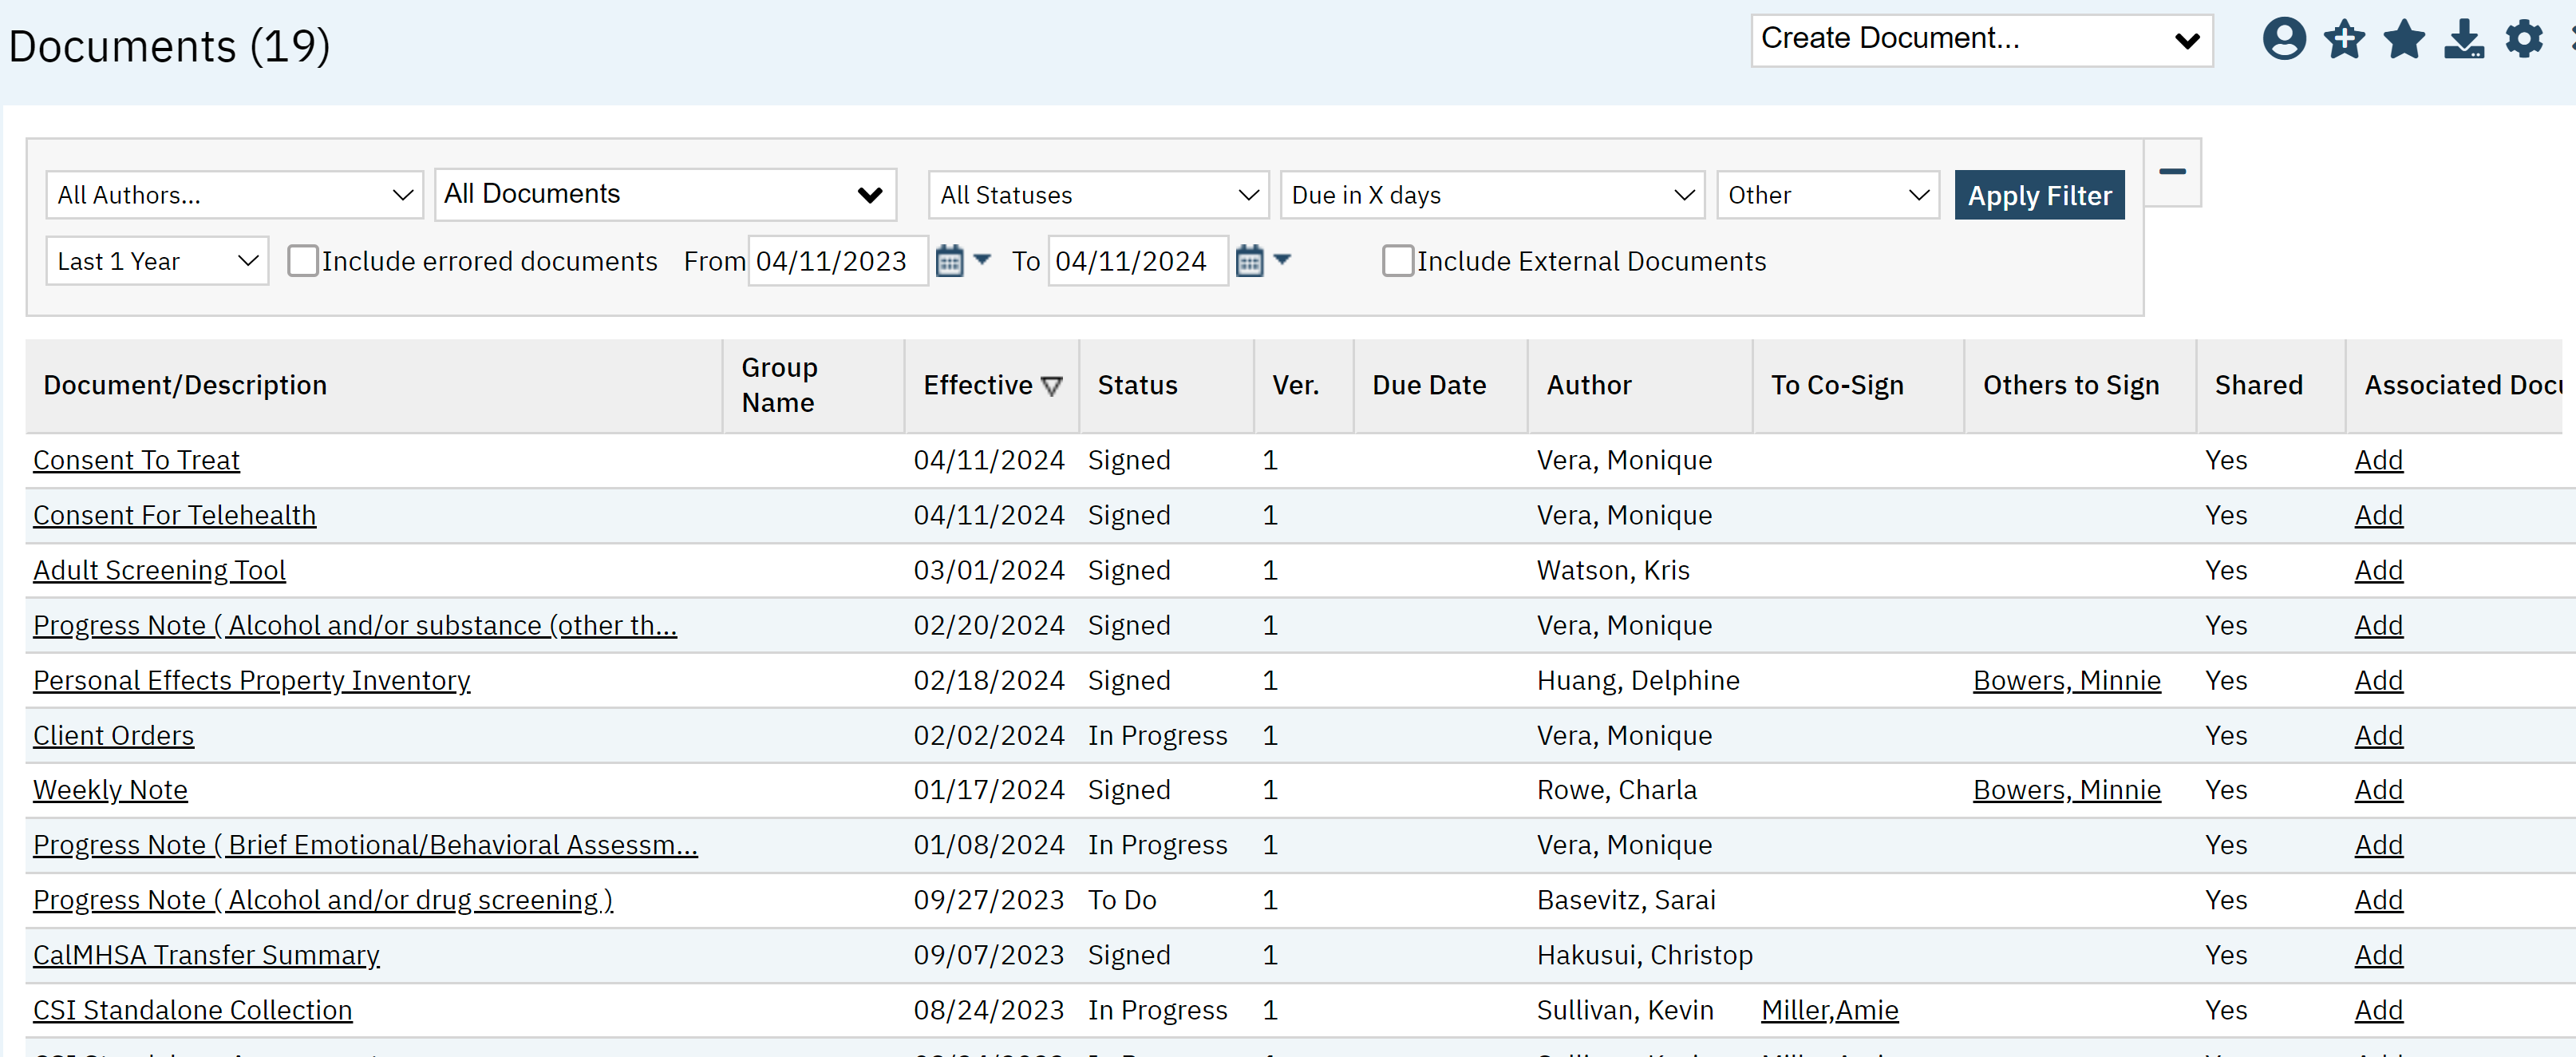
Filters:
The following filters are available on this list page:
All Authors: Select one author to filter by or choose to see documents by all authors.
All Documents: Select specific type of document (i.e. diagnosis document) or view all documents.
Note: This is a dynamic filter, so if a client does not have a document of a certain type, that document type will not show as an option in the filter.
All Statuses: Including In Progress, Signed, Completed, To Do, To-CoSign, or All Statuses.
Due in X Days: Filter by a document that is due in a specific number of days.
- Last 1 Year: If you click this icon, you can select a time period, such as Today, yesterday, last 90 days, custom, etc.
- Note: Selecting a specific date range in the drop-down menu in (e) will auto-update the date range fields in (g). Selection “custom date range” (double check actual wording) will allow you to enter the date range in (g).
- Checkbox to Include errored documents
From To Date: Choose date range documents are effective
- Checkbox to Include External Documents
- Click Apply Filter once the appropriate options are selected

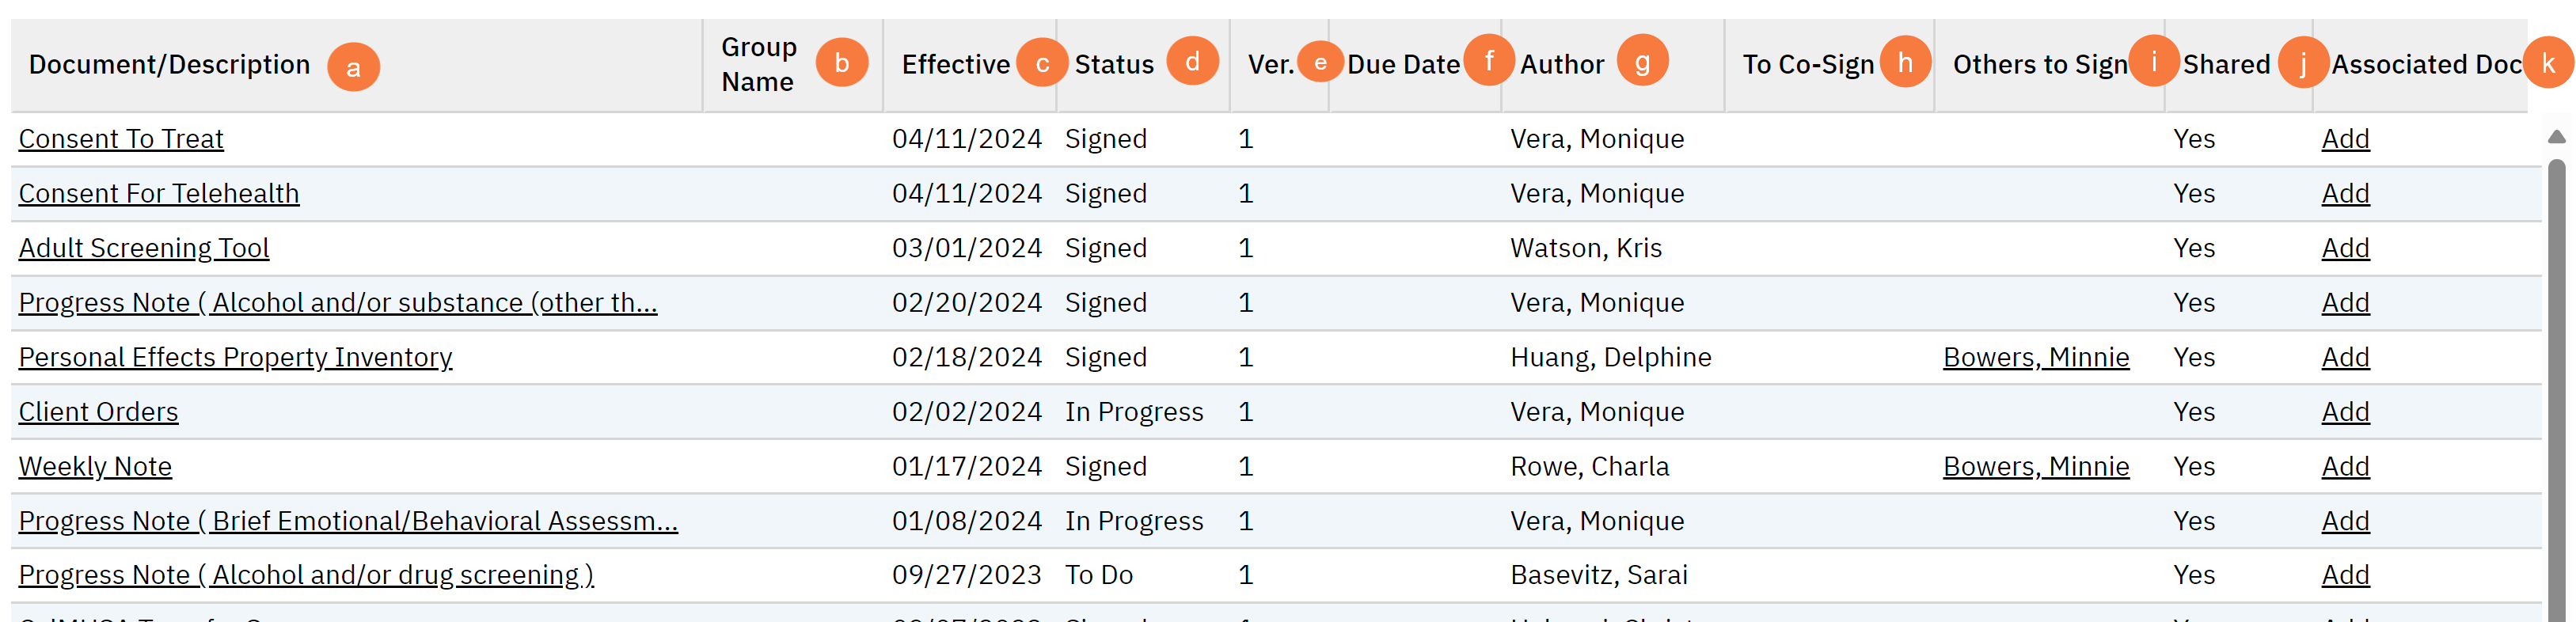
List Page Columns:
The following columns are available:
- Documentation/Description: name of the document. The hyperlink will take you directly to the document.
- Note: When the document is a progress note, the procedure code will show in parentheses next to the progress note type (e.g. “Generic (Crisis Inquiry)” or “Progress Note (Assessment LPHA)”
- Group Name: Not Used.
- Effective: Date the document became effective or was created.
- Status: The status of the document such as, Signed, To Do, In Progress.
- To-Do means the document hasn’t been started but has been created automatically.
- In-Progress means the document has been started, or has been assigned in a way different from the “To-Do” process.
- Signed means the document has been signed by the author
- Version: Version number of the document.
- Due Date: If there is due date associated with the document it will appear here.
- Author: Person who created the document in SmartCare.
- To Co-Sign: This will indicate the staff users who are designated as co-signers that have not yet co-signed the document. Once they’ve signed, their name will not show up here.
- Others To Sign: Non-users who are designated as co-signers that have not yet co-signed the document. This generally means clients and guardians. Once they’ve signed, their name will not show up here.
- Shared: All documents are considered “shared”, except those that are still in-progress or “to-do”.
- Associated Documents: Associated Documents are generally used when the main document in question references another document in the system. This is often the case for documents that the client signed on paper but was both scanned in and entered into SmartCare directly, with the client signature indicating that the client signed the paper version. By associating the scanned document to the SmartCare document, an auditor can quickly confirm the client’s signature on the paper version. Another use case would be associating two notes from staff who were working together on a client (e.g. doctor and nurse note for the same day). Another still would be associating the assessment documents (e.g. assessment, MSE, Diagnosis Document, consent forms, etc.) to the assessment progress note. If there are any associated documents, they’ll show in this column. If there aren’t any, the system will show “Add”. Clicking here will allow you to associate a document with the document in question
- Documentation/Description: name of the document. The hyperlink will take you directly to the document.
Upper Right-Hand Icons
- Create Document Drop-down: Click this dropdown menu for a list of documents you can create for the client from this screen.
- SmartView: This icon is an overview of the patient’s medical profile. You can quickly view the patients’ vitals, medications, documents that need to be done, and much more.
- New Favorites Icon: Clicking this icon sets your favorites for this screen with specific filters. A Favorite Pop Up will occur, and you’ll have to enter the parameters for the filters that you want to favorite.
- Favorites Icon: This allows you to see and select the favorites associated with this screen. Again, these are favorite filter settings. It allows you to quickly change filters as you need.
- Export Icon: This icon is available to admins. You will be able to export the data from this screen into an excel spreadsheet.

Exported Page Columns
- Document/Description
- Effective
- Status
- Due Date
- Author Name
- To Co-Sign
- Client To Sign
- Shared
- Has More Than One Version
- Associate Document Id
- Associate Screen Id
- Associate Service Id
- Attachments
- Group Name
- Group Id
- Group Service Id
- Document Type
- Document Version ID
- Scanned Or Uploaded
- Report Server Id
- Report Server Path
- Report URL
- Report Folder Name
- Report ID
- Report Name