Sometimes a client should be sequestered from all staff users, except for those few who are treating them. This is most commonly done for clients who are celebrities or clients who are also staff members. There are two methods of addressing this, those these aren’t mutually exclusive methods. The methods differ in what happens when a user searches for a sequestered client.
- When a user searches for the client, the client doesn’t show at all in the search results. To their knowledge, this person doesn’t exist as a client in the system at all. This is the most conservative method of sequestering.
- When a user searches for the client, the client shows in the search results but when the person attempts to open the chart, they receive a message indicating that they do not have permission to view this client’s chart. This user can then request access to view the client’s chart.
The first option is the default one. The second option can be achieved via permissions. CalMHSA does not plan on adding this permission to any of the standard user roles, to ensure that the default setting for county affiliate systems is the most private.
How to Sequester a Client from All Staff, With Exceptions
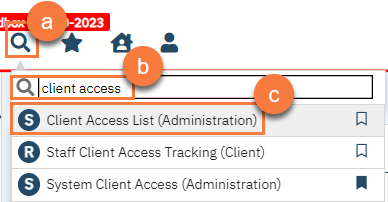
- Navigate to the Client Access List page.
- Click on the Search icon.
- Type “Client Access List” in the search bar.
- Click to select “Client Access List (Administration)” from the search results.
- Click New.

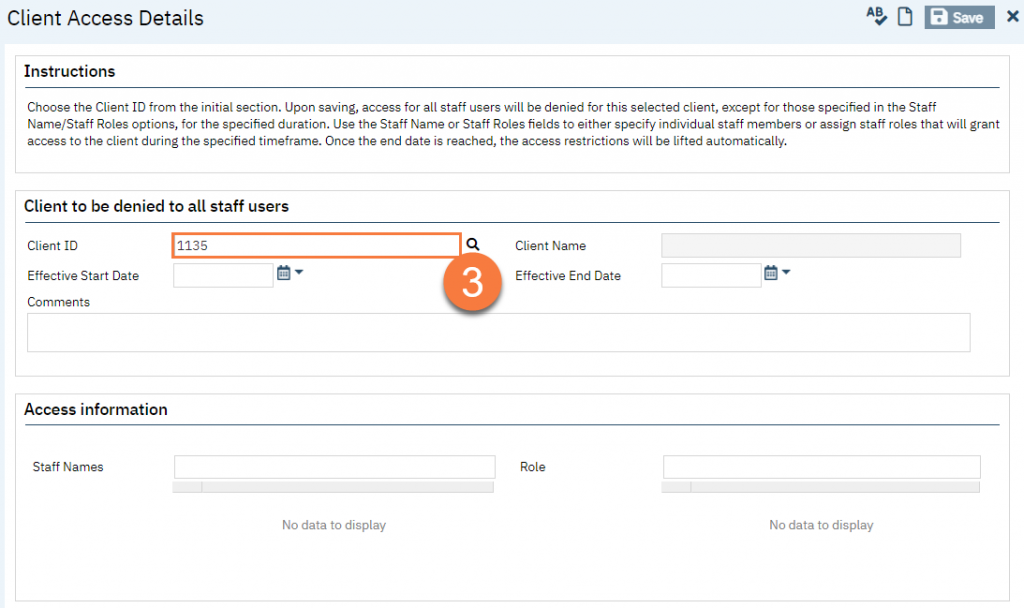
- This will take you to the Client Access Details screen. Enter the client ID. This will search for the client.
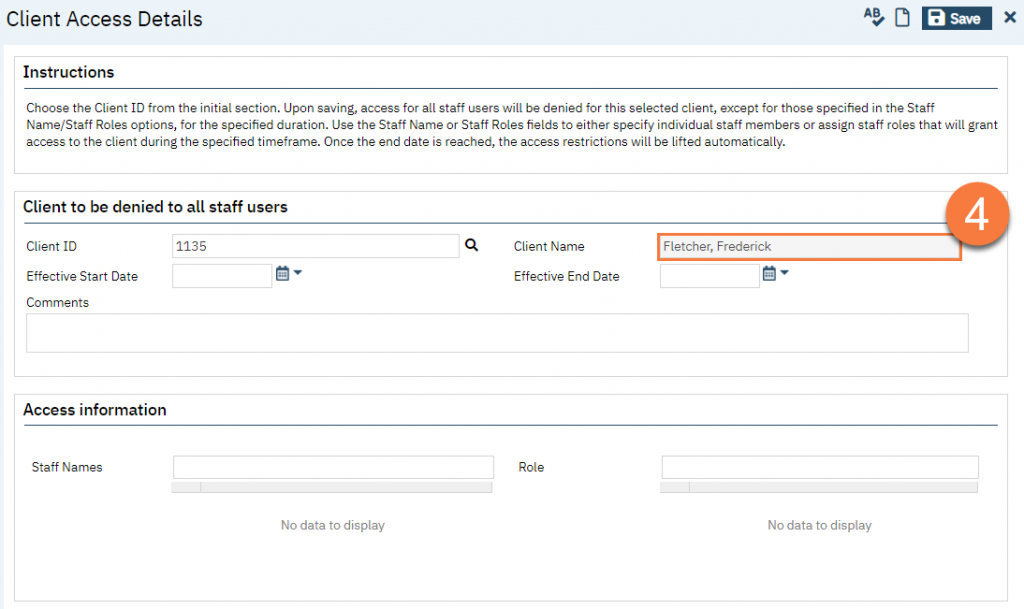
- Confirm you have the correct client selected.
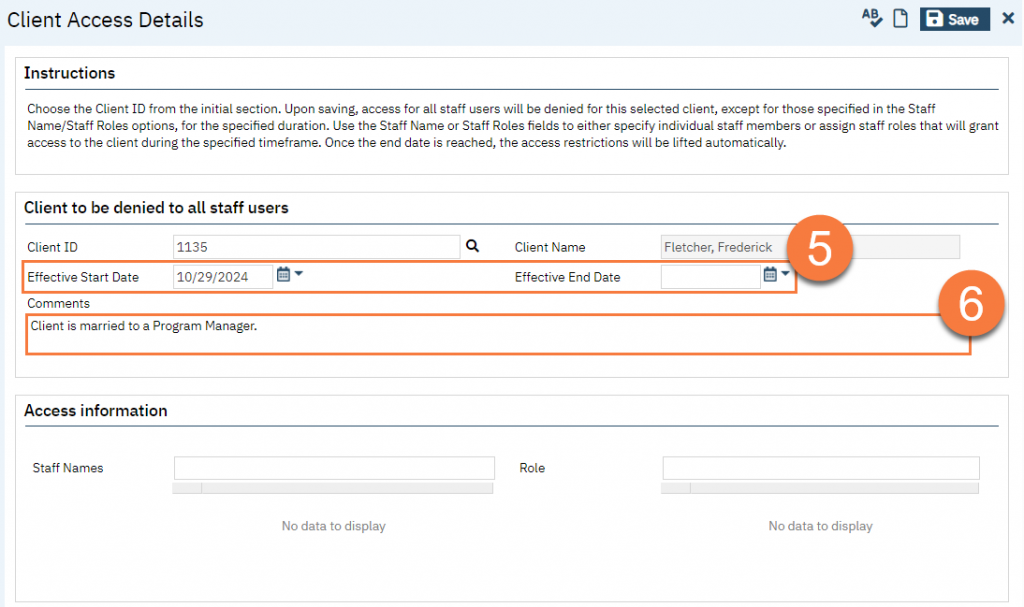
- Enter the effective dates of the sequester. Only the Start Date is required. If an End Date is entered, the sequester will automatically be lifted on that date.
- Enter any comments as needed.
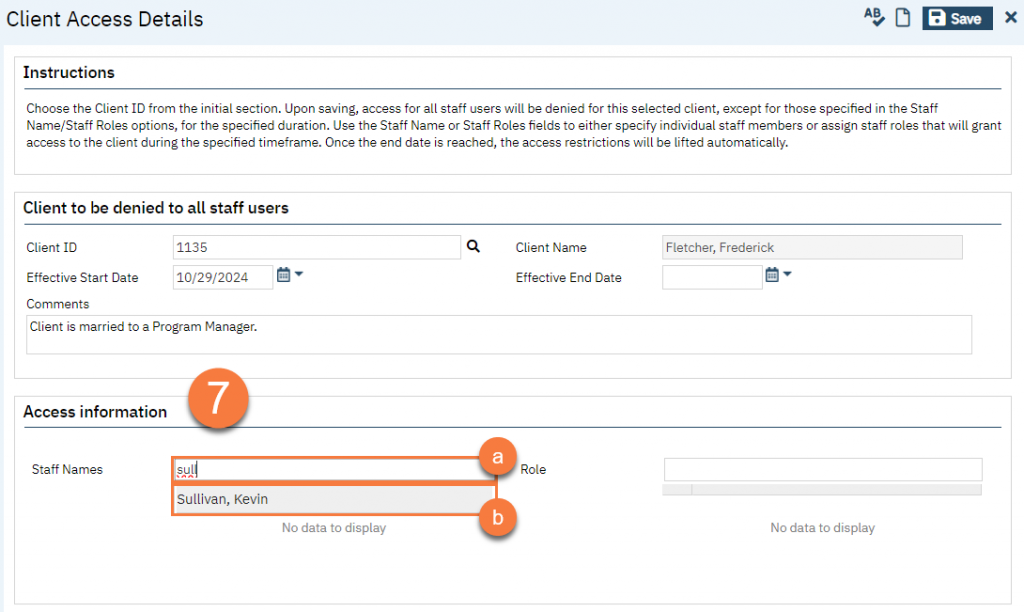
- Add any specific staff members who will be granted access to this client. This is a searchable field.
- Type the user’s name in the Staff Names field. This will initiate a search.
- Click to select the user from the search results.
-
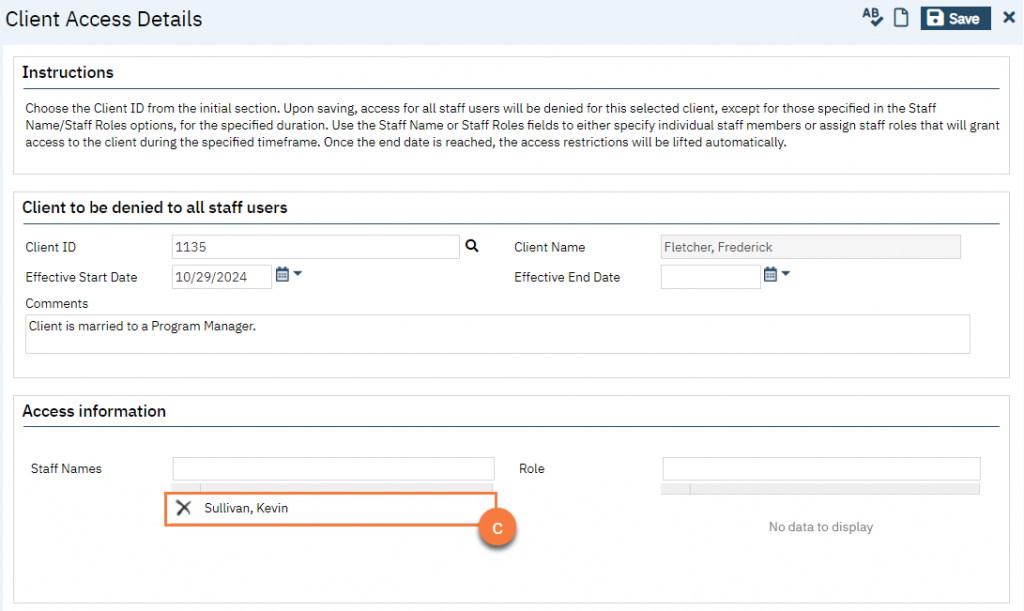
- This will add the user to the list. Repeat until all relevant users are added.
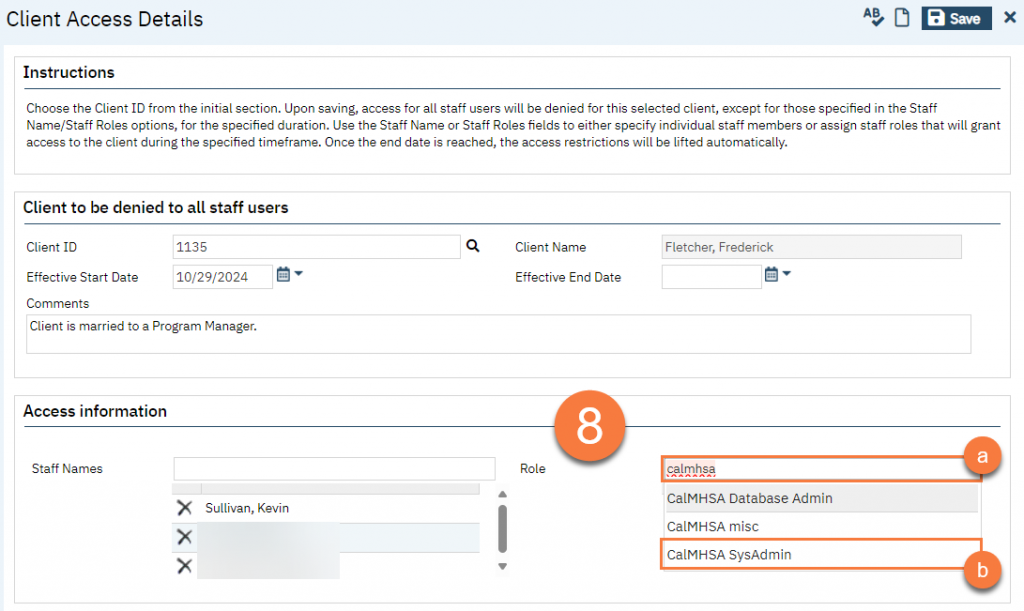
- Add any user roles that will be granted access to this client. Any user who has this user role will be able to see the client in the search. This may be useful for crisis services. This is a searchable field.
- Type the user role in the Role field. This will initiate a search.
- Click to select the user role from the search results.
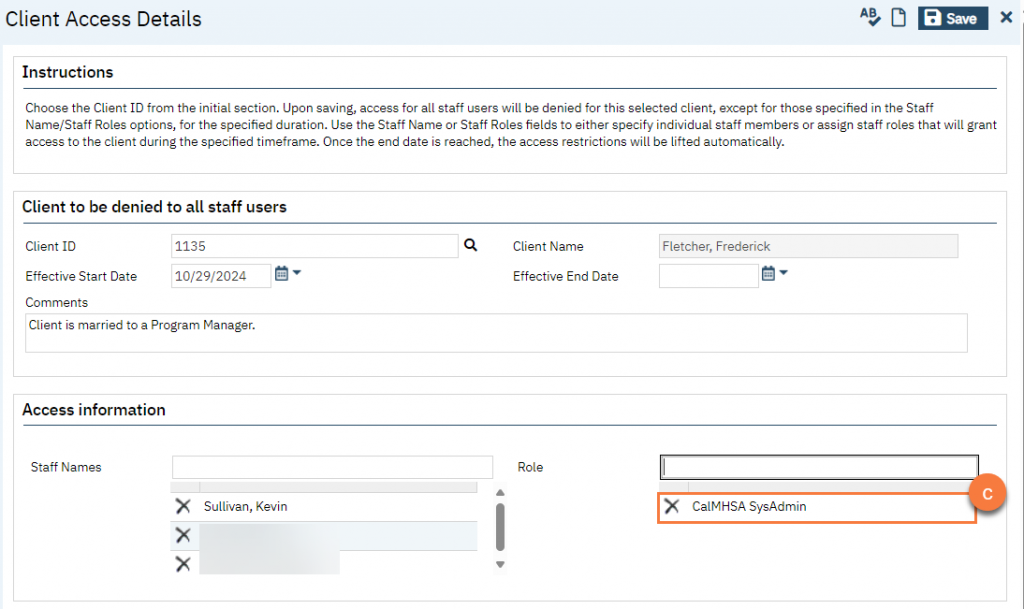
- This will add the user role to the list. Repeat until all relevant user roles are added.
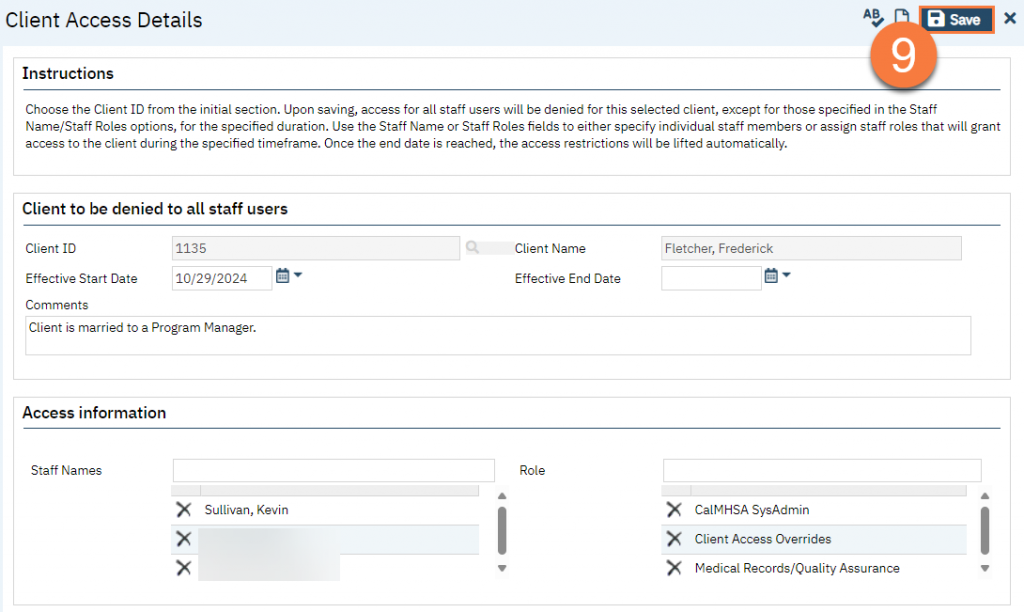
- Click Save.
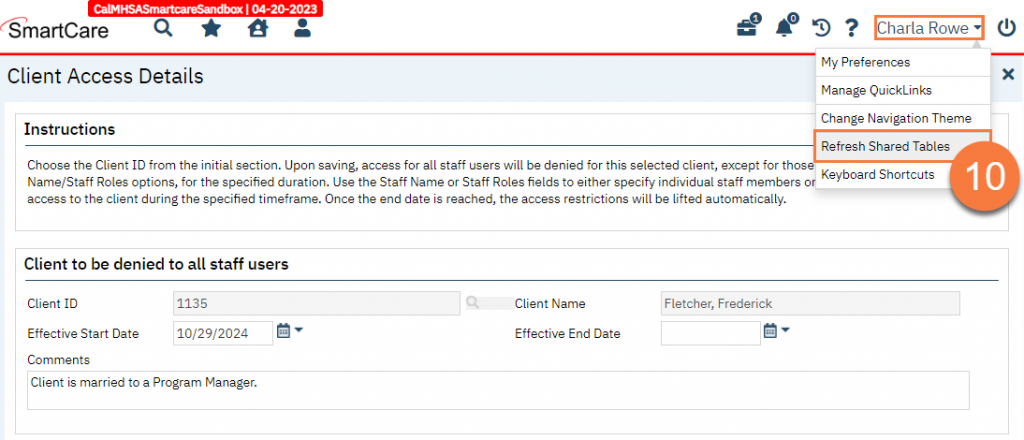
- Refresh Shared Tables. Staff may have to log out/log back in to see the changes.
How to Modify the Approved Users/User Roles for a Sequestered Client
Sometimes staff will need to be added or removed from the approved users for a sequestered client. This may also be the case for user roles. Follow the steps below to add or remove approved users or user roles to a client who already has a sequestered chart.
- Navigate to the Client Access List page.
- Click on the Search icon.
- Type “Client Access List” in the search bar.
- Click to select “Client Access List (Administration)” from the search results.

- Find the client in the list page and click on the link Sequence ID column.

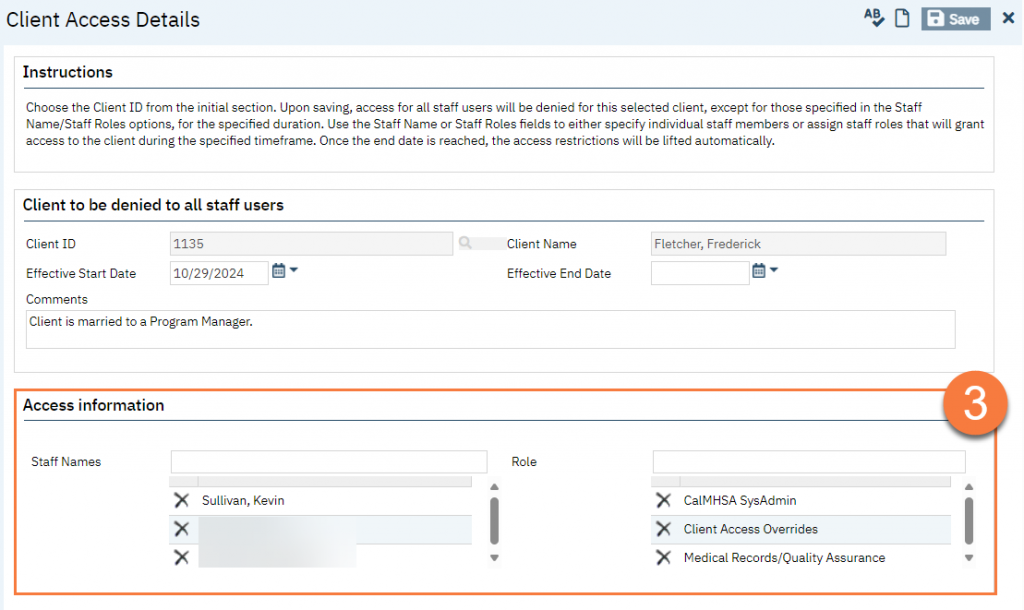
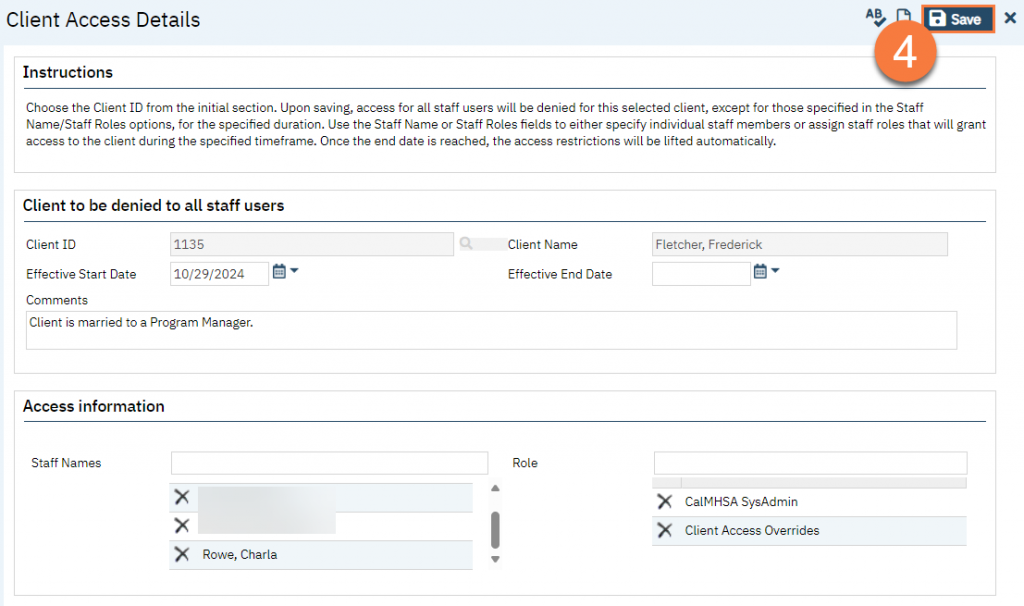
- This will take you to the Client Access Details screen for this client. Make edits as necessary.
-
- To add a staff or user role to the approved list:
- Type in the appropriate field to initiate a search.
- Click to select the desired staff/user role from the search results.
- To add a staff or user role to the approved list:

- To view the newly added staff/user role, you may need to scroll.

- To remove a staff or user role from the approved list:
- Click on the delete icon next to staff or user role you want to remove.
- To remove a staff or user role from the approved list:

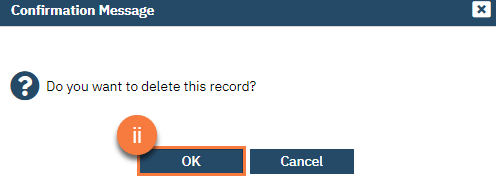
- This will bring up a confirmation popup. Click OK to continue.
- Click Save.
- Refreshed shared tables. Staff may have to log out/log back in to see the changes.

How to End the Sequester of a Client’s Chart
To do this, you’ll need to modify the existing sequester record.
- Navigate to the Client Access List page.
- Click on the Search icon.
- Type “Client Access List” in the search bar.
- Click to select “Client Access List (Administration)” from the search results.

- Find the client in the list page and click on the link Sequence ID column.

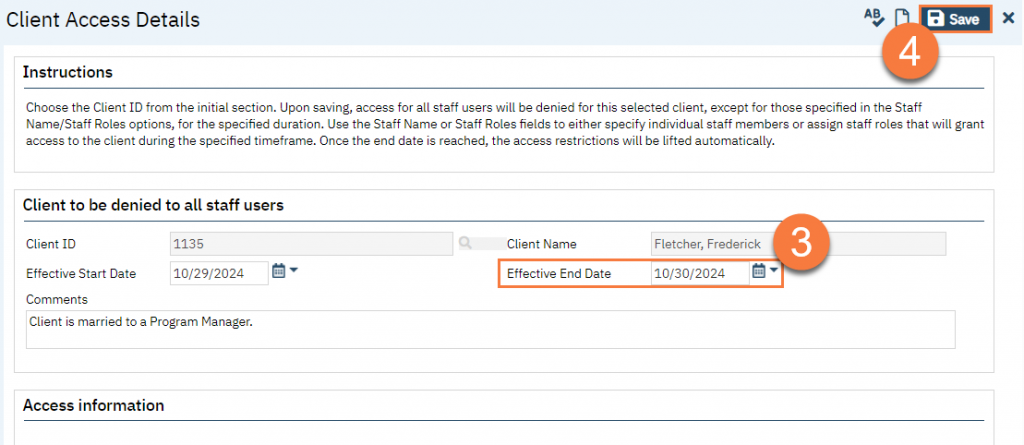
- This will take you to the Client Access Details screen for this client. Enter the End Date.
- Click Save.
- Refreshed shared tables. Staff may have to log out/log back in to see the changes.

Permissions Associated with Sequestering VIP Clients
There are 2 screens that are associated with sequestering a client.
- Client Access List
- Client Access Details
For each of these, the “Screens” permission type should be granted.

Also, the “Screen (New Mode)” and “Screen (Update Mode)” options should also be granted for the “Client Access List” in order to click “New” and “Export”.


- Last Updated: April 2, 2025
