How to Enroll for ePrescribe Non-Controlled and Controlled Substances

How to Install the Soft Token VIP App

Before selecting “invite” in the email you may want to install the soft token app.  This app can be installed at any time and does not require you to have started the invite process. It is a free app, and it should have a symbol and screenshot like what you see below.  If it asks you to purchase it, you are using the wrong app.

  1. Go to Google Play or Apple App Store and search for: Symantec VIP Access or VIP Access by Symantec. You should see this symbol with VIP Access next to the app to download. 
  1. Select Get or Download to install the app. When you open the app, you will see a screen as pictured below. 
  2. Notice the Credential ID (with SYMC in front) and the Security Code. You will be required to use these values during the invite process.  The credential ID and security code will be different for everyone and every phone.

NOTE: Dr. First sometimes refers to the Credential ID as S/N.  S/N is not your social security number.  The credential ID is the whole value of SYMCxxxxxxxx with the x being numbers.  The Security Code is also called the One Time Pin (OTP).

Enroll in ePCS

This article is for prescribers that will be prescribing non-controlled and controlled substances.  This process requires the addition of an authenticator “token” to your account.  It is recommended that two tokens be added to a prescribers account, one in the form of a soft token and the other in the form of a hard token.  One will act as a backup if the other gets lost or becomes unusable. 

You’ll receive an email (triggered by your administrator) inviting you to register to e-prescribe.

  1. Click on the email link (Enroll now) to auto-populate information on the screen that appears. Next, click Proceed.

You will need to read and accept the terms of use for both EPCS Gold and InfinID by selecting all checkboxes. Otherwise, you will not be allowed to proceed.

Note: For the next steps you will need:

    • Driver’s License, Passport, or State ID
    • Two-Factor authentication token
    • If you don’t have one, follow instructions on the screen or review Requesting a Hard Token.
    • A smartphone
  1. Click Continue.
  1. Home Address: Please enter the address related to your financial records. This is typically a home address. Please do not input any special characters within the address field.

    Recommended field: Credit Card Number. While this is not required, it is highly recommended as this can increase your chances of passing IDP if you fail the first time. Please enter a personal credit card that is either a VISA or Mastercard. You will NOT be charged; Experian requires only the first 8 digits.

  2. Click Continue

Based on the information you provided, Experian will determine whether you have successfully passed IDP.

Note: If you fail three times, this will lock your account. You cannot attempt IDP again for a full 24 hours.

  • If you successfully pass, continue to step 5.

If Experian cannot validate your information, you may be required to answer 3-4 knowledge-based questions pertaining to your financial history. If Experian can validate your information, then your process will continue without the knowledge-based questions.

  1. If your information is verified by Experian, you’ll see a screen prompting you to scan a QR code with a mobile device. If you’re already on a mobile device, you’ll select Tap here instead.

Before you continue, be sure to copy your temporary session password in case your session times out. If it does time out, go back to your email and select invite.  It should ask you to enter your temporary session password.

If your information was not verified by Experian, you may be asked credit-related questions before proceeding.

  1. Click Let’s Get Started. This indicates your consent to move forward with verifying your identity. This includes taking a photograph of an identification card or passport.
  1. Click to select the type of identification (e.g., ID card) you want to submit for identity proofing.
  1. Click Capture ID Photo.
  2. Click Allow to allow access to your phone camera.
  1. Center the front of your identification on screen and photograph it. Repeat this step with the back of your identification. Continue once you’re satisfied with the photos.
  1. Click Take selfie.
Recommended: Take a photo without glasses.
  1. Click Looks good. Finish application.

The application will prompt you to exit from your mobile screen to go back to the identity proofing screen where you scanned the QR code.

ATTENTION: When the InfinID app tells you to return to your identity proofing workflow to view your results make sure you go back to your computer to continue the process as you still have more steps to complete.  You still need to add your soft token and create your passphrase.

You’ll receive an email confirmation that you successfully verified your identity, or you will be prompted to retry the process. 

  1. Select the Check Status button to proceed to the next step. 
  1. On the screen where youhad scanned your QR code, you will see options to add 2 types of authenticators to your account. 
    1. Push Notification (iPrescribe Authenticator) > Add: Select this option if you would like to use the iPrescribe Authenticator as your soft token. 
    2. Code Generator > Add: Select this option if you are going to use the Symantec VIP App or a physical key fob that you ordered from DrFirst as your token. 
Important: For now, select Code Generator. We are going to continue to use Symantec VIP app for two factor authentication. At some point in the future this may change. 

Select Either "Code Generator" or "Push Notification" for Instructions (below)0

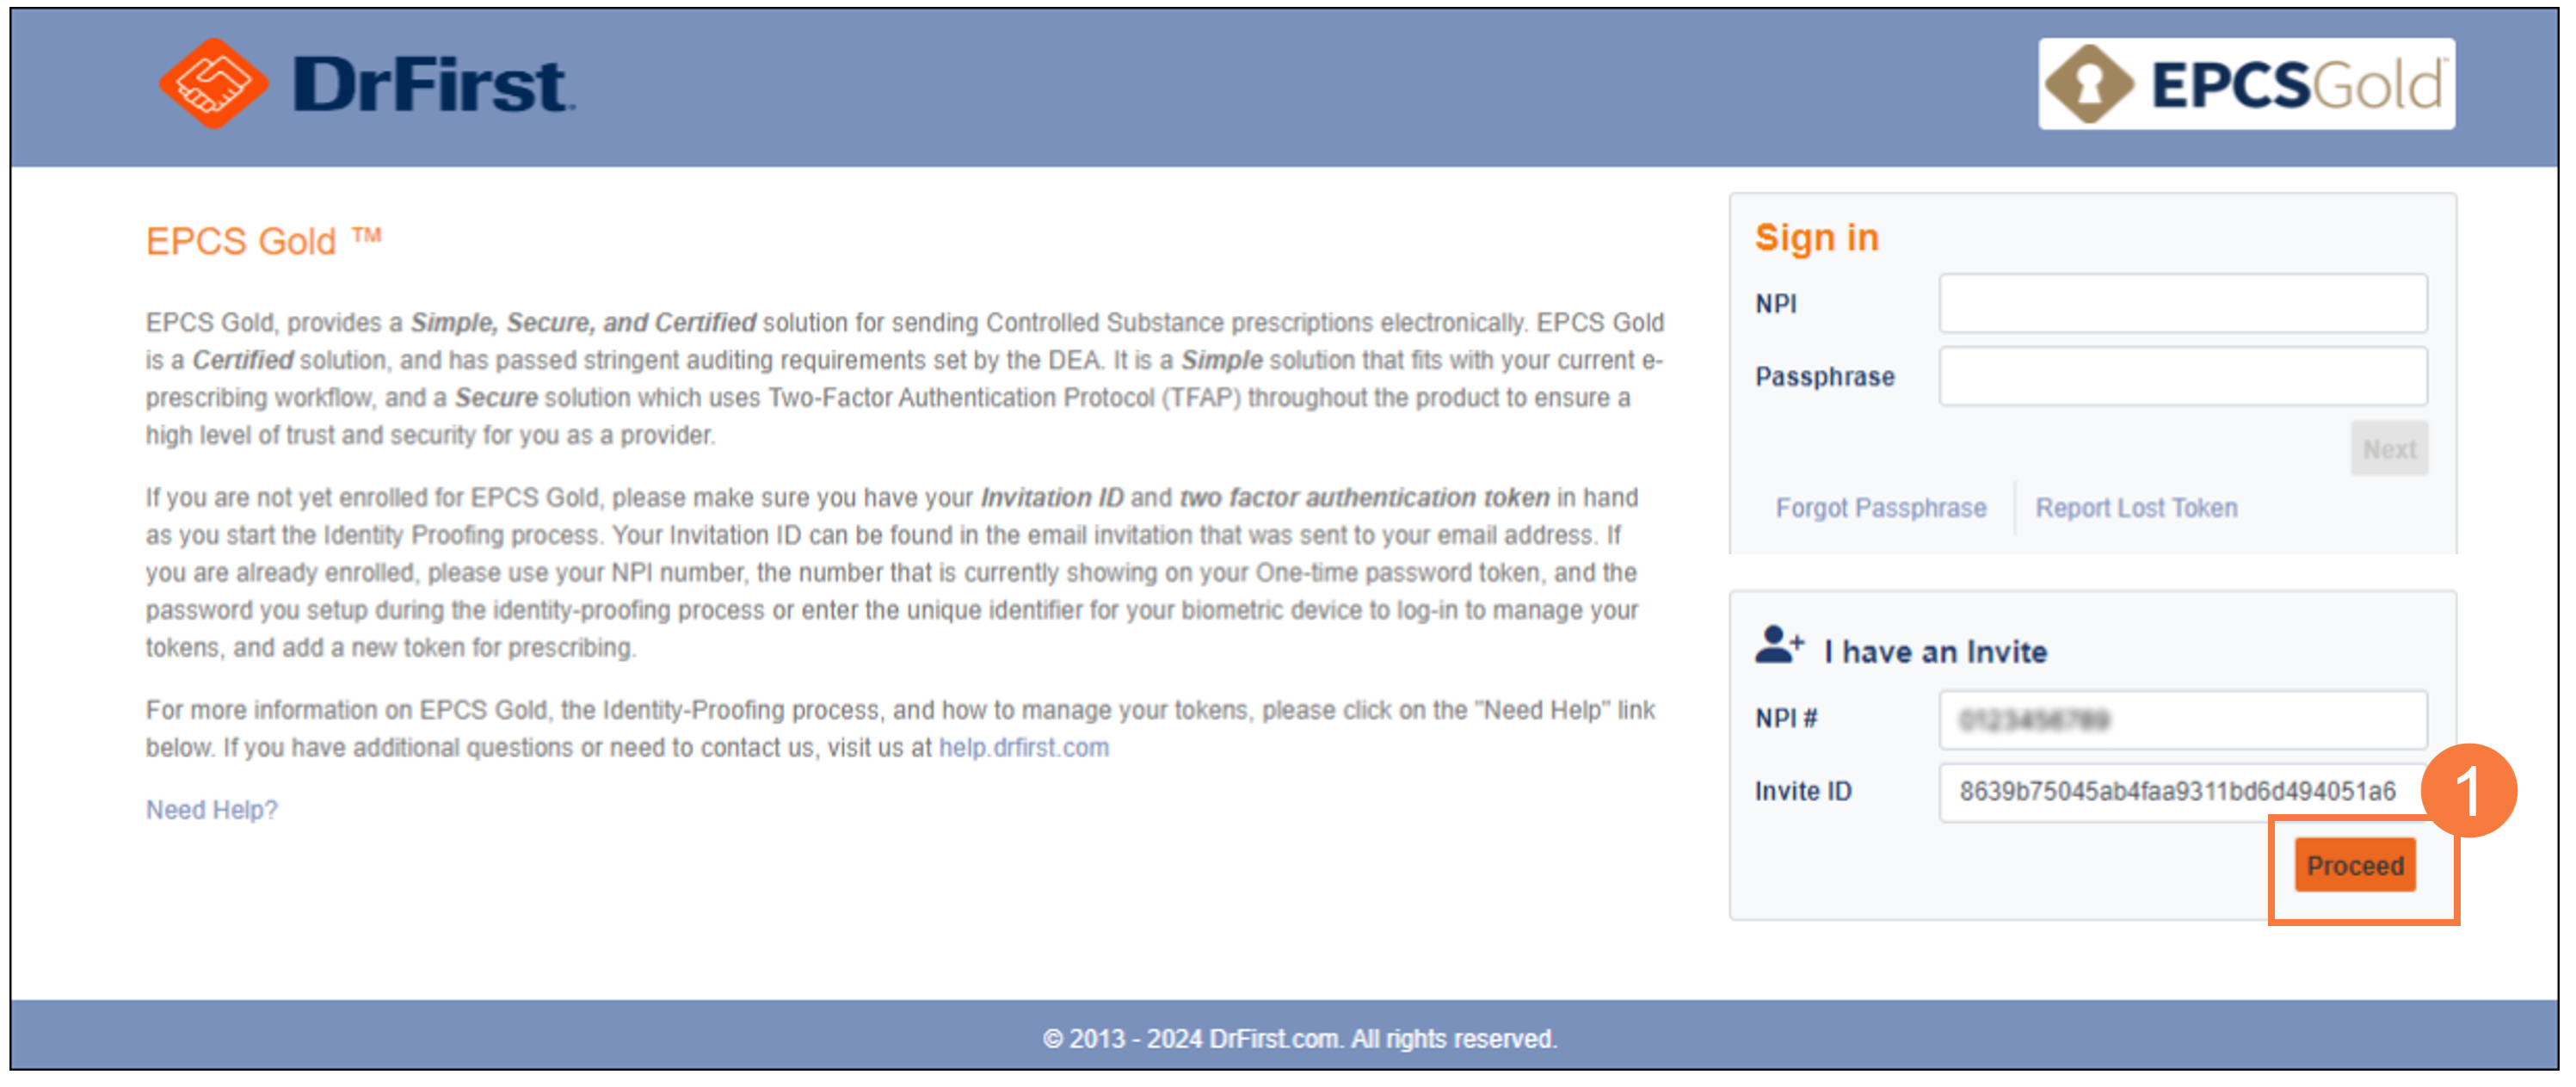
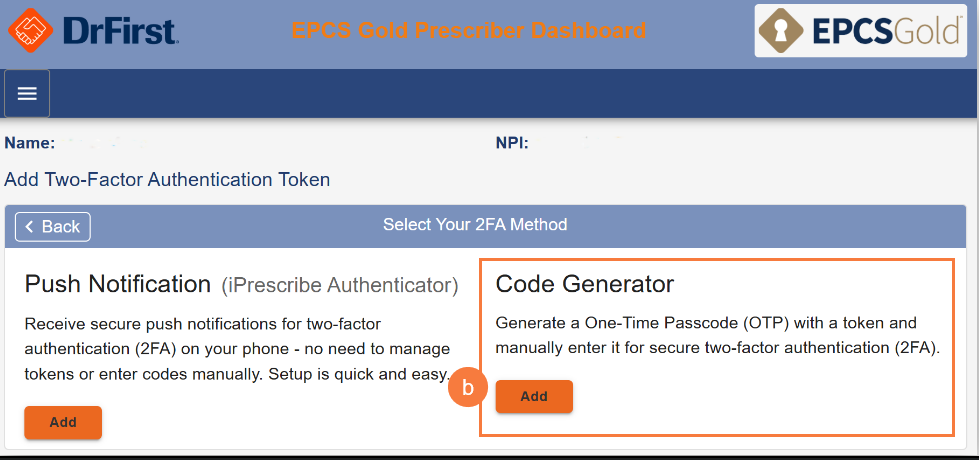
Have your Symantec VIP (soft token) or key fob ready.  See instructions above on how to install Symantec App. 

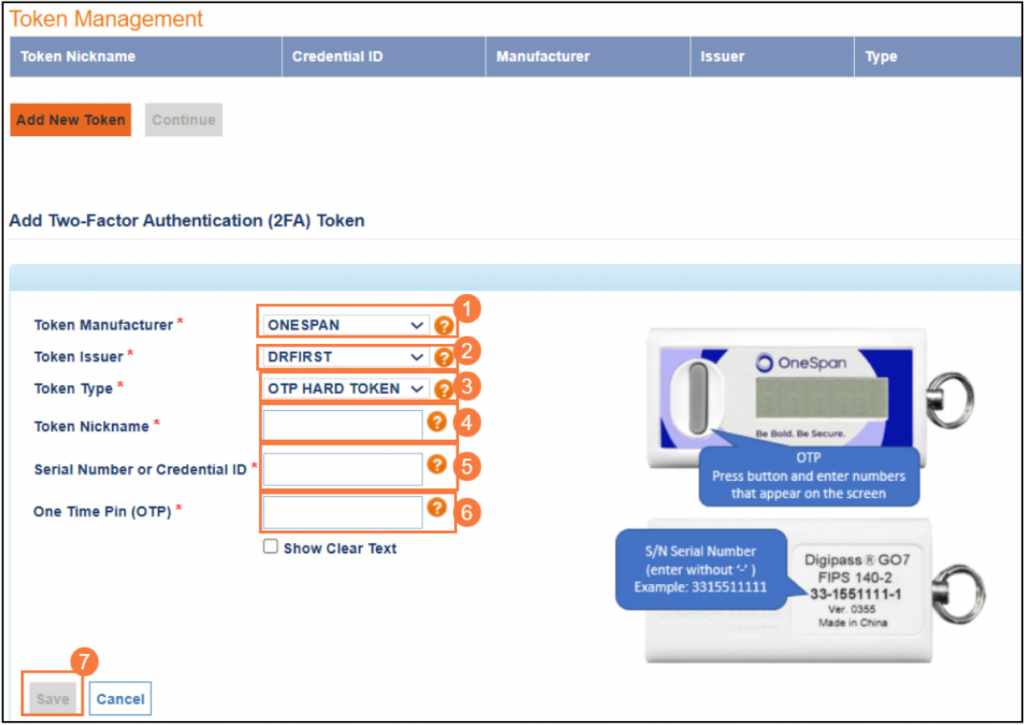
  1. Select the dropdown to choose the token manufacturer, Symantec (Symantec VIP) or Onespan. 
  2. Token Issue should default to Dr. First. Otherwise, select it from the dropdown. 
  3. If you are entering a soft token, select OTP Soft Token, if you are entering a hard token, Select OTP Hard Token. 
  4. Create a nickname for your token.  Something you will be able to recognize when using CalMHSA Rx. 
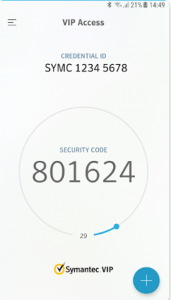
  5. Enter Credential ID or Serial Number 
    • If you are using a Symantec VIP soft token, enter the credential ID.
    • Credential ID= SYMCxxxxxxxx (the xxx… being numbers that are in front of the SYMC with no spaces or hyphens). 
    • If you are using hard token, enter the serial number from the back of the device without the spaces or dashes. 
  6. Enter the One Time Pin (OTP) from your token device.  It is the randomly generated number from your token device
  7. Select Save. 

  1. On the app, you will see a pop-up message saying your token was successfully paired to your account. Otherwise, try again.
    • On the web page, you will see a screen listing your token’s status as activated. 
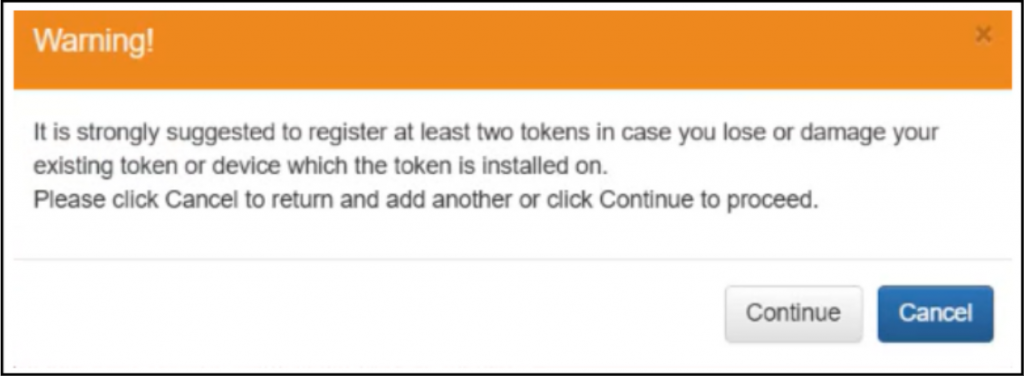
  2. Click Add Token to add a second token to your account if one is available. Otherwise, click Continue.  
    • Your next steps will be to create your passphrase and security question and answer. 
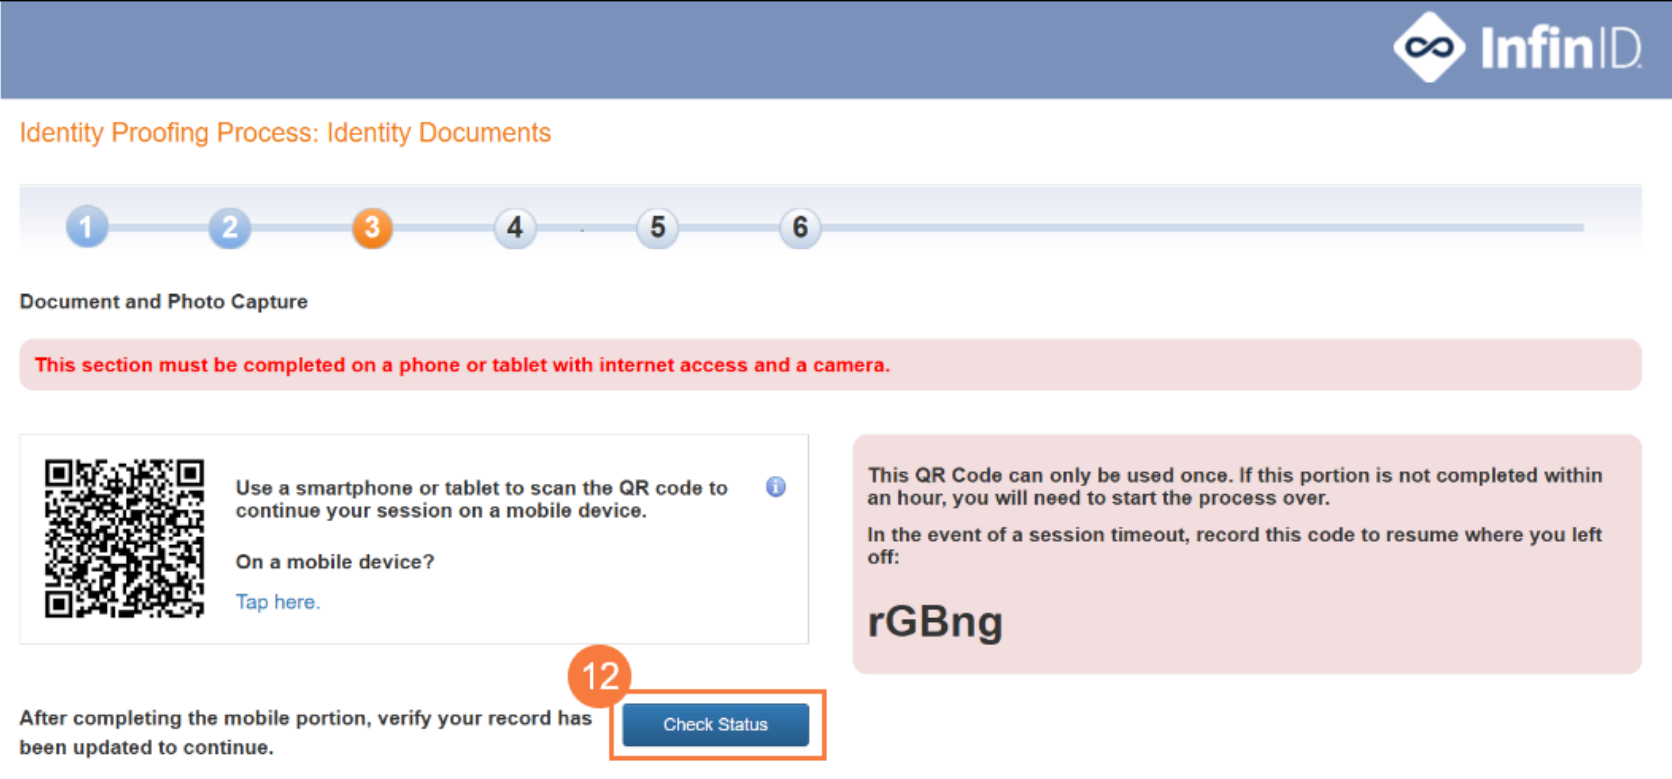
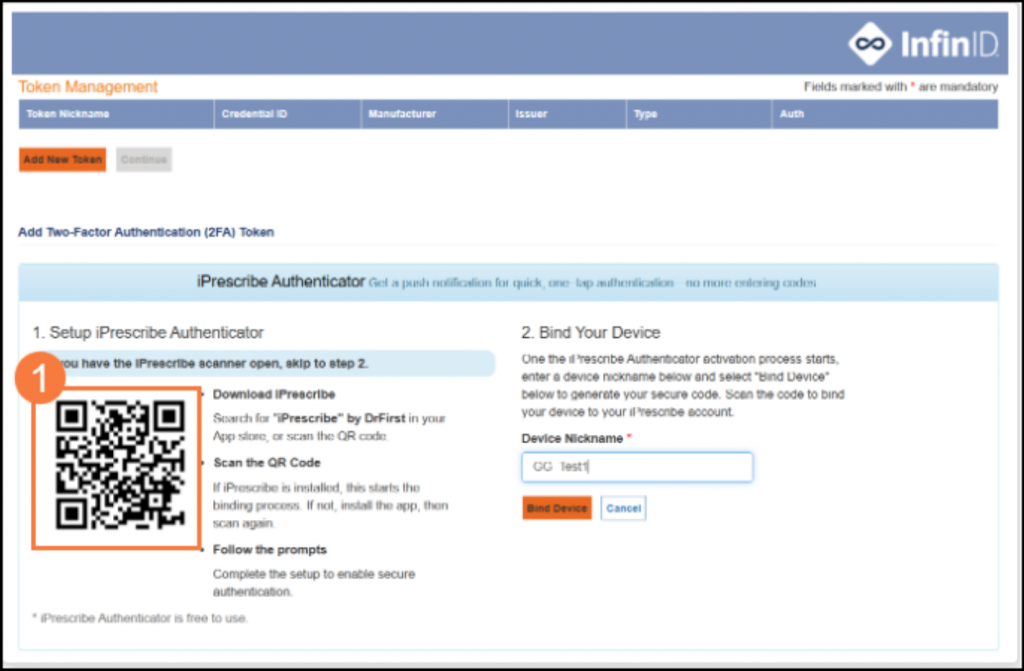
  1. Scan the QR code. This action either installs the iPrescribe Authenticator to your device or takes you directly to Open Scanner if you already had iPrescribe Authenticator on your device. 
    • Note: DEA requires you to install your authenticator (“token”) on a separate device from the device you use to e-prescribe controlled substances. 
 

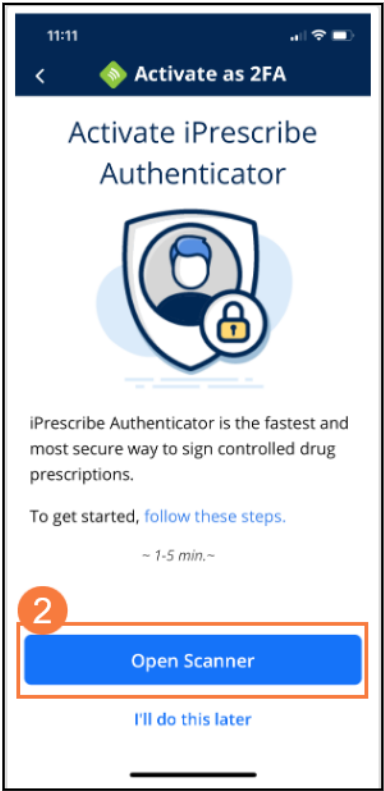
  1. Once you have installed iPrescribe Authenticator, the app should prompt you to accept push notifications and authorize access to your camera and click Open Scanner.
 

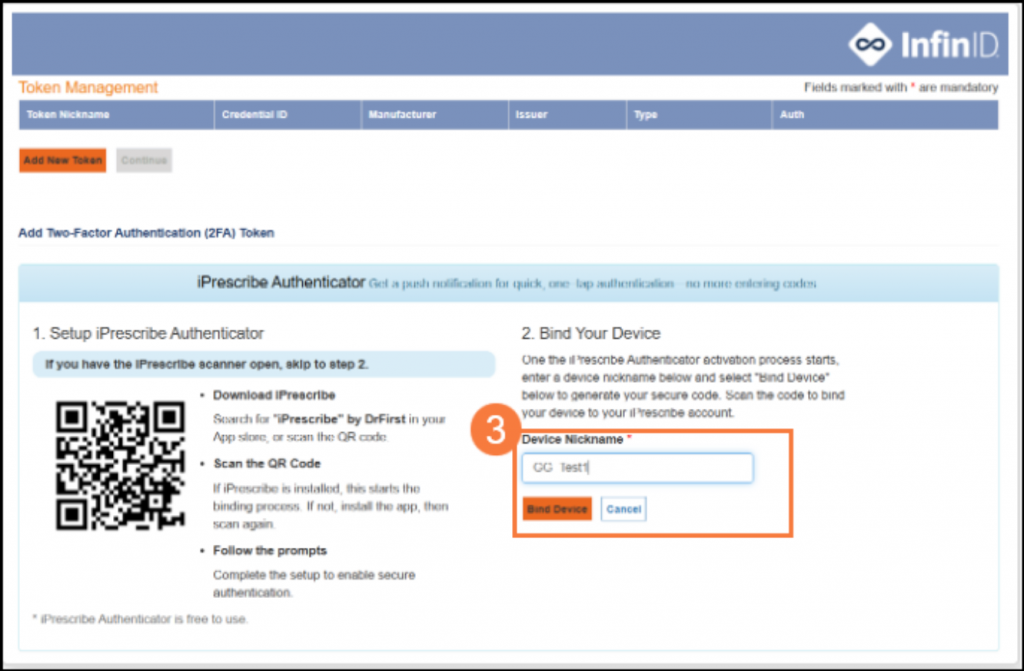
  1. Back on the screen, enter a nickname for this authenticator (“token”) and click Bind Device. Tip: Do not use an underscore ( _ ) in your token nickname to avoid error messages.
 

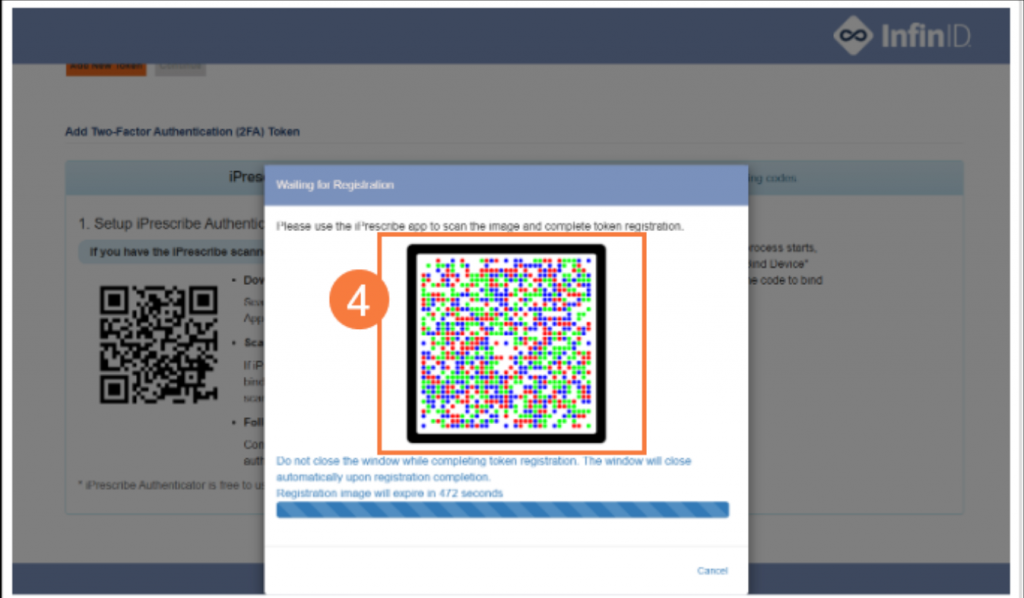
  1. Using your iPrescribe Authenticator as a camera (“Open Scanner” view that you’ve kept open from step 2), scan the next QR code (“cronto code”) that appears on the web page.
 

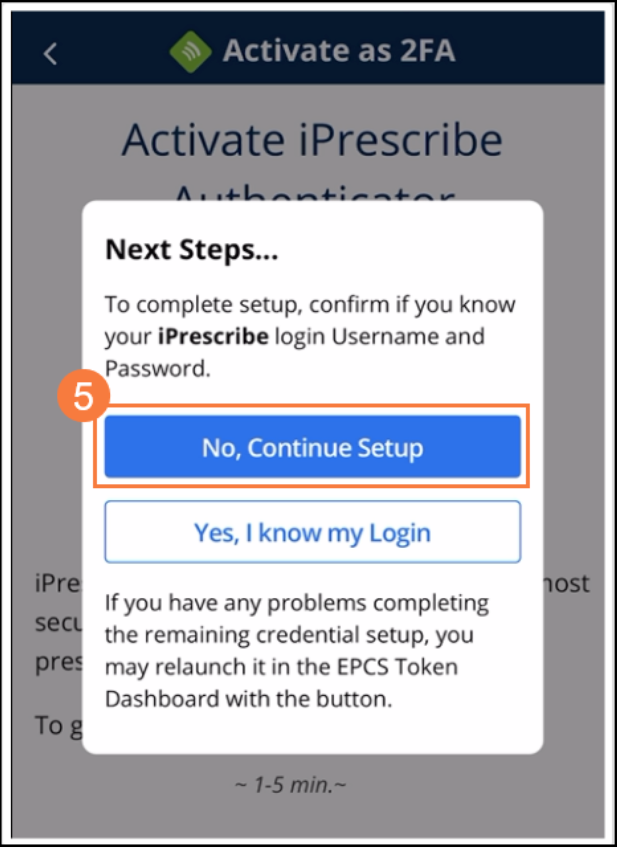
  1. Next, click No, Continue Setup, if you do not have an iPrescribe Authenticator username and password


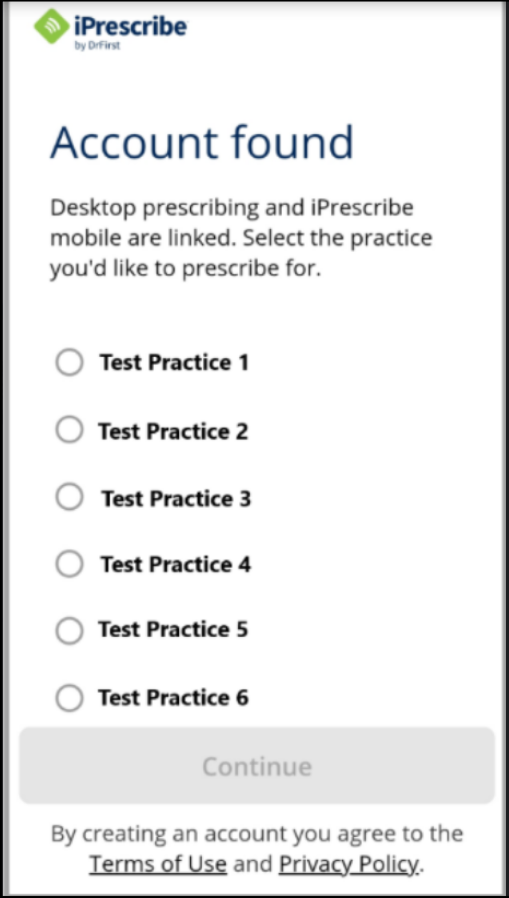
  1. You will then either see an “Account Found” screen (if you are part of more than one organization) or a “Create a password screen”.
    • For multi-practice users, select your practice and click Continue to get to the Create a password screen
 
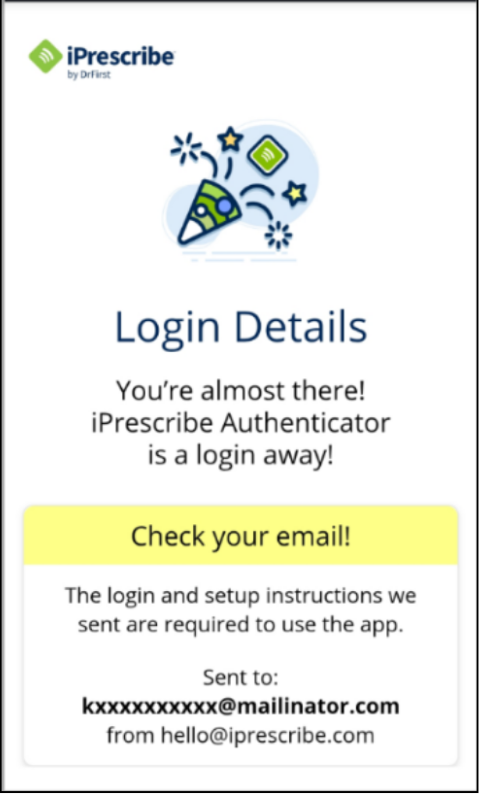
  1. You will get a confirmation screen asking you to check your email to retrieve your username.
    • Log in to iPrescribe Authenticator anytime to set up the app.

  1. Back on the web page, you will see a screen listing your token’s status as activated. You will also be prompted to click Add Token to add a second token to your account (recommended).
    • After you’ve added a second token, you will be able to Continue.

Your next steps will be to create your passphrase and security question and answer. 

  1. Next, create the following and click Continue:
    • Passphrase (password you’ll use to e-prescribe controlled substances). Do not use special characters in your passphrase.  This will be needed when you prescribe controlled substances.
    • Security answer and question (to recover your passphrase in the future). These fields are case sensitive. 
  1. Next, you will receive a verification code via text message or mail. Enter the Code.
    • You will get a text message if Experian verified your mobile phone number. Note: If you didn’t get your text message instantly, click Didn’t receive your code? to try again.
    • You will receive a letter in the mail within 5-7 days if Experian only verified your mailing address or if you were unable to receive a text message.
  2. Click Continue.

Example of letter:

Note: If you received the verification code after you timed out of your session (either via text or email), use the email link you received from [email protected] to enter your verification code. 

  •  If you cannot locate this email, you will need to ask your administrator to send you an invitation to begin the identity proofing and registration process again. 
  • In addition to your verification code, enter your passphrase and a one-time-pin from one of the tokens you registered previously.

When you are done, you will see a confirmation message that you’ve completed identity proofing and enrolled to e-prescribe controlled substances (EPCS).

Contact your administrator so they may complete Logical Access Control (LAC), which is the last step to authorize you to e-prescribe controlled substances.

If you will be e-prescribing controlled substances, you’ll need to contact your administrator after you pass identity proofing and register your authenticator (“tokens”) for two-factor authentication.

Before you can begin e-prescribing controlled substances, your administrator will need to complete Logical Access Control (LAC) to authorize (“activate”) you for EPCS.