How to correct Place of Service and or Procedure code on claimed services that have been flagged with a PCCN.
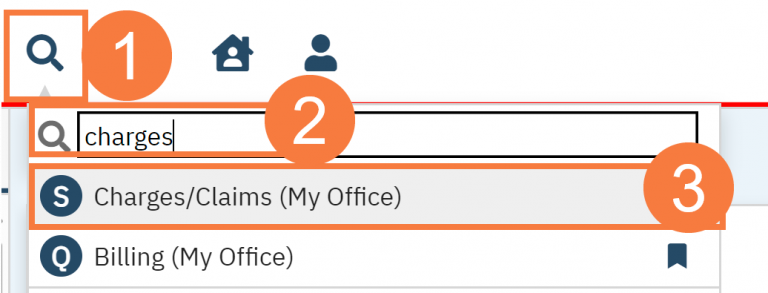
- Click the Search icon.
- Type Charges/Claims in the Search bar.
- Click to select Charges/Claims (My Office).
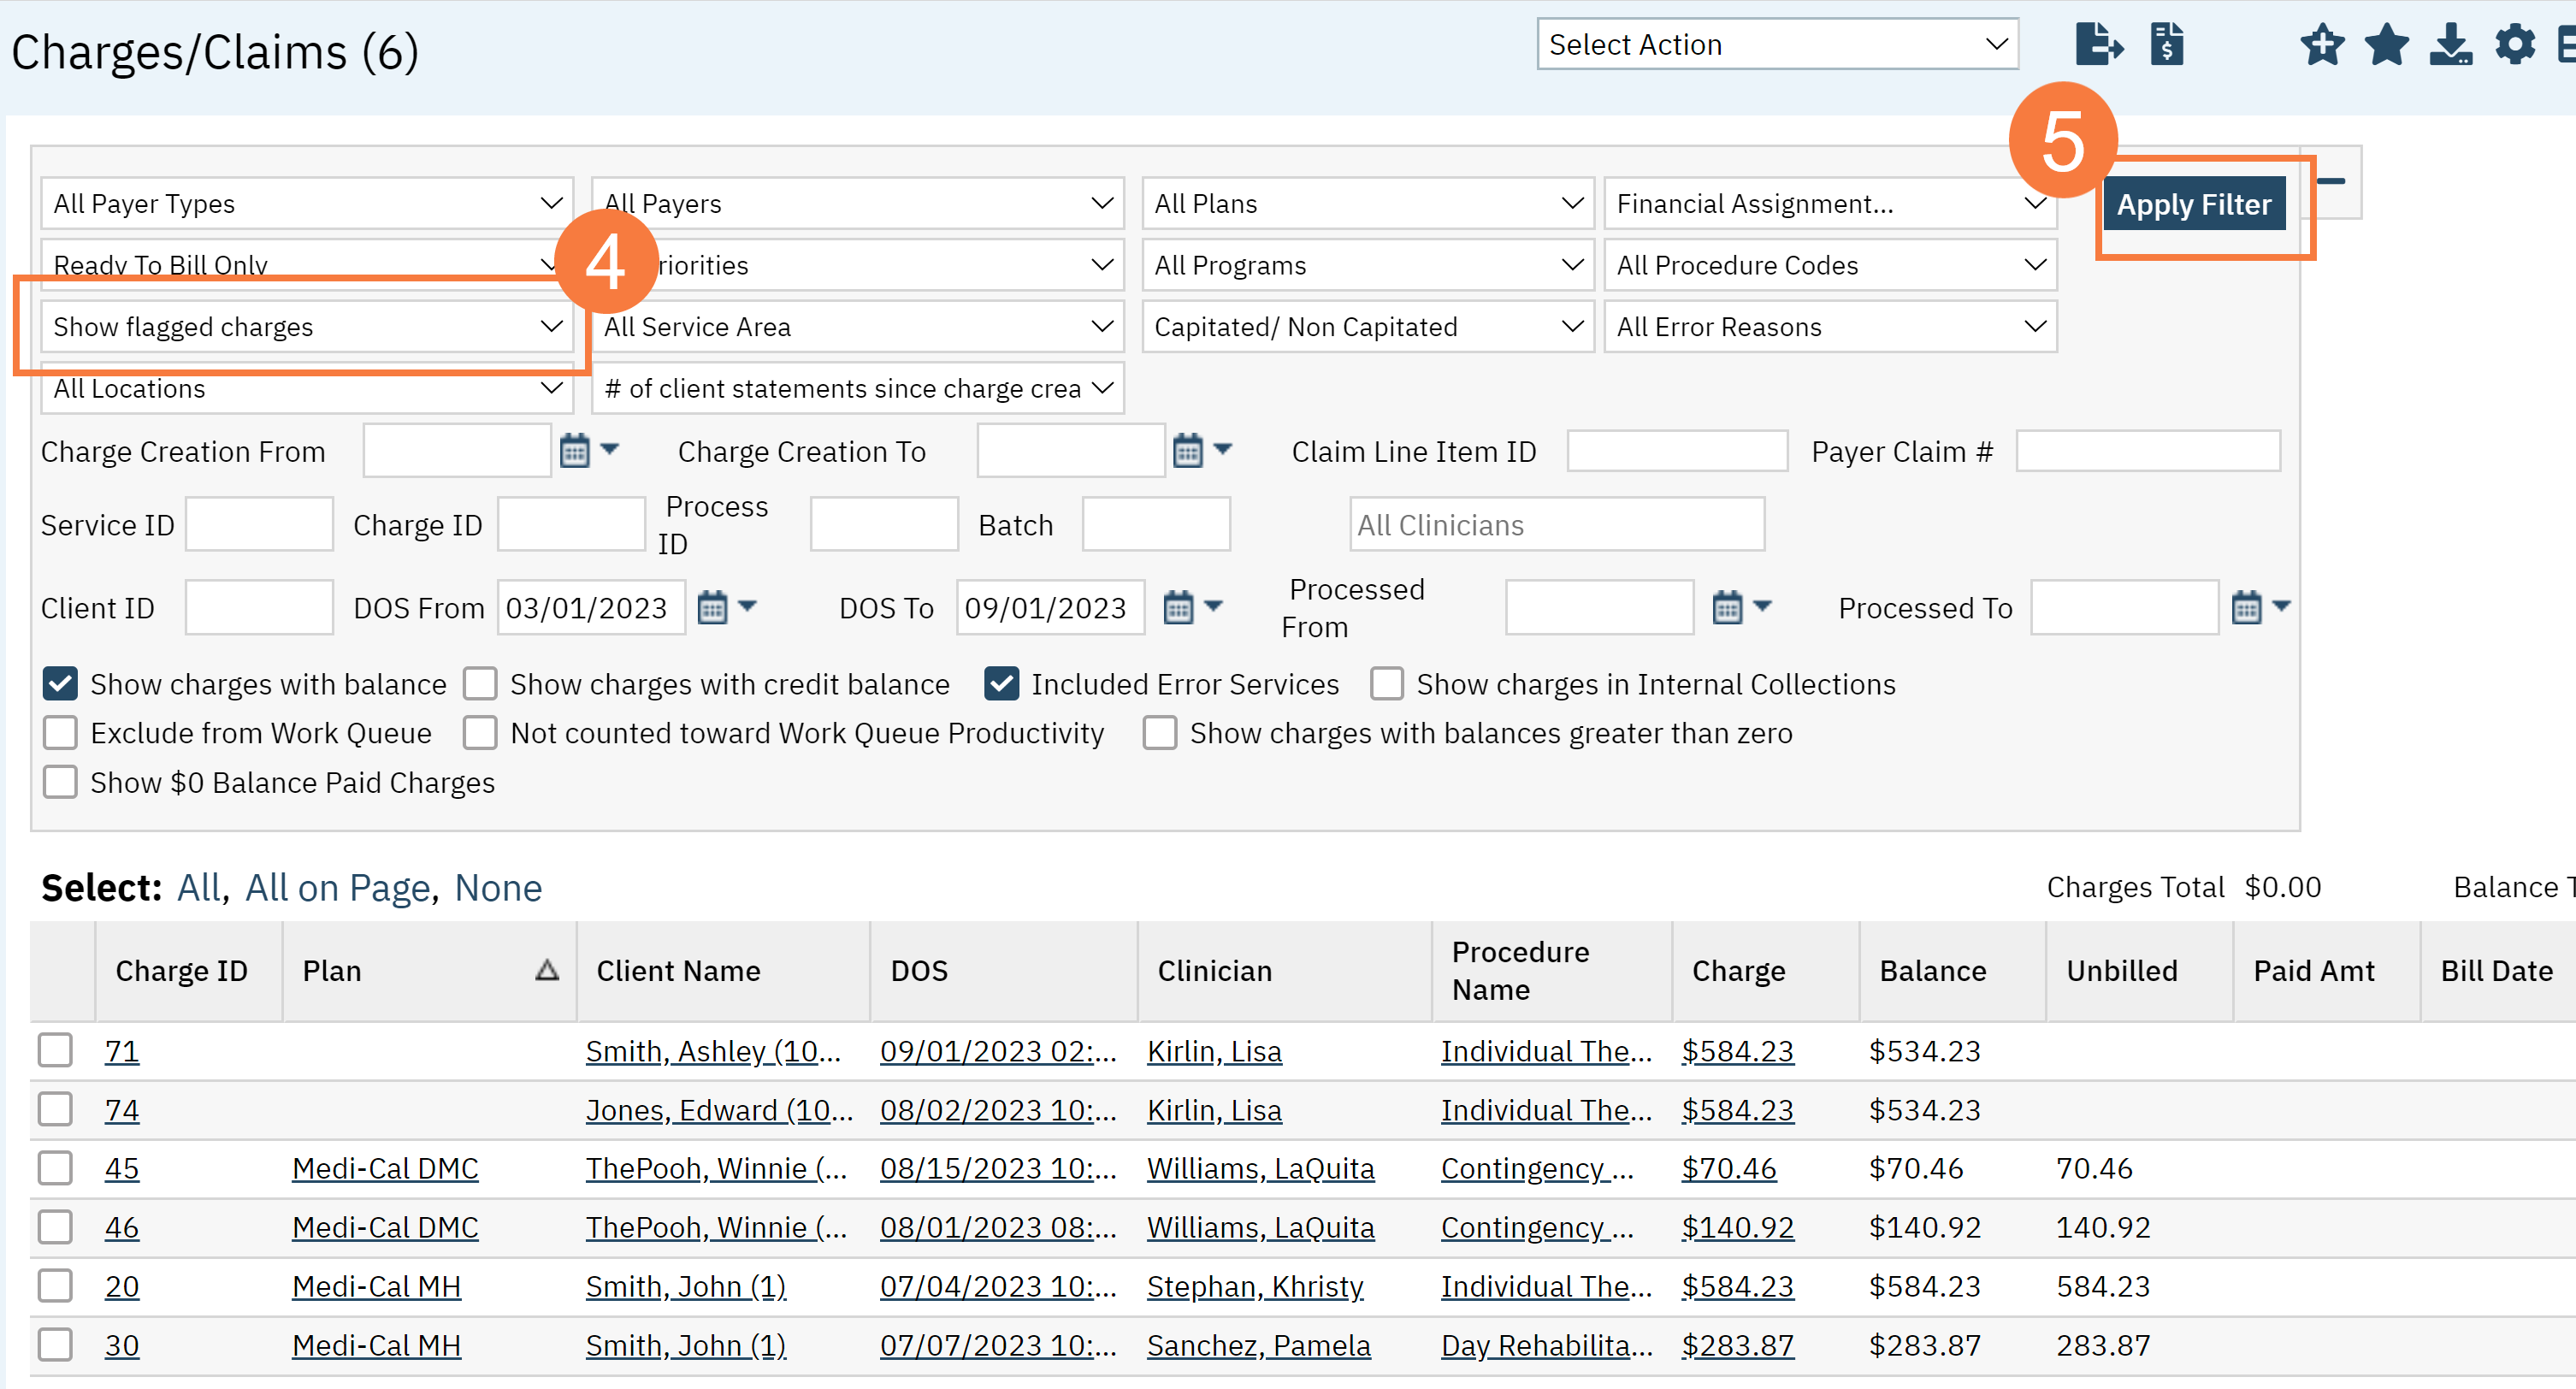
- Filter by Show Flagged Charges.
- Click Apply Filter.
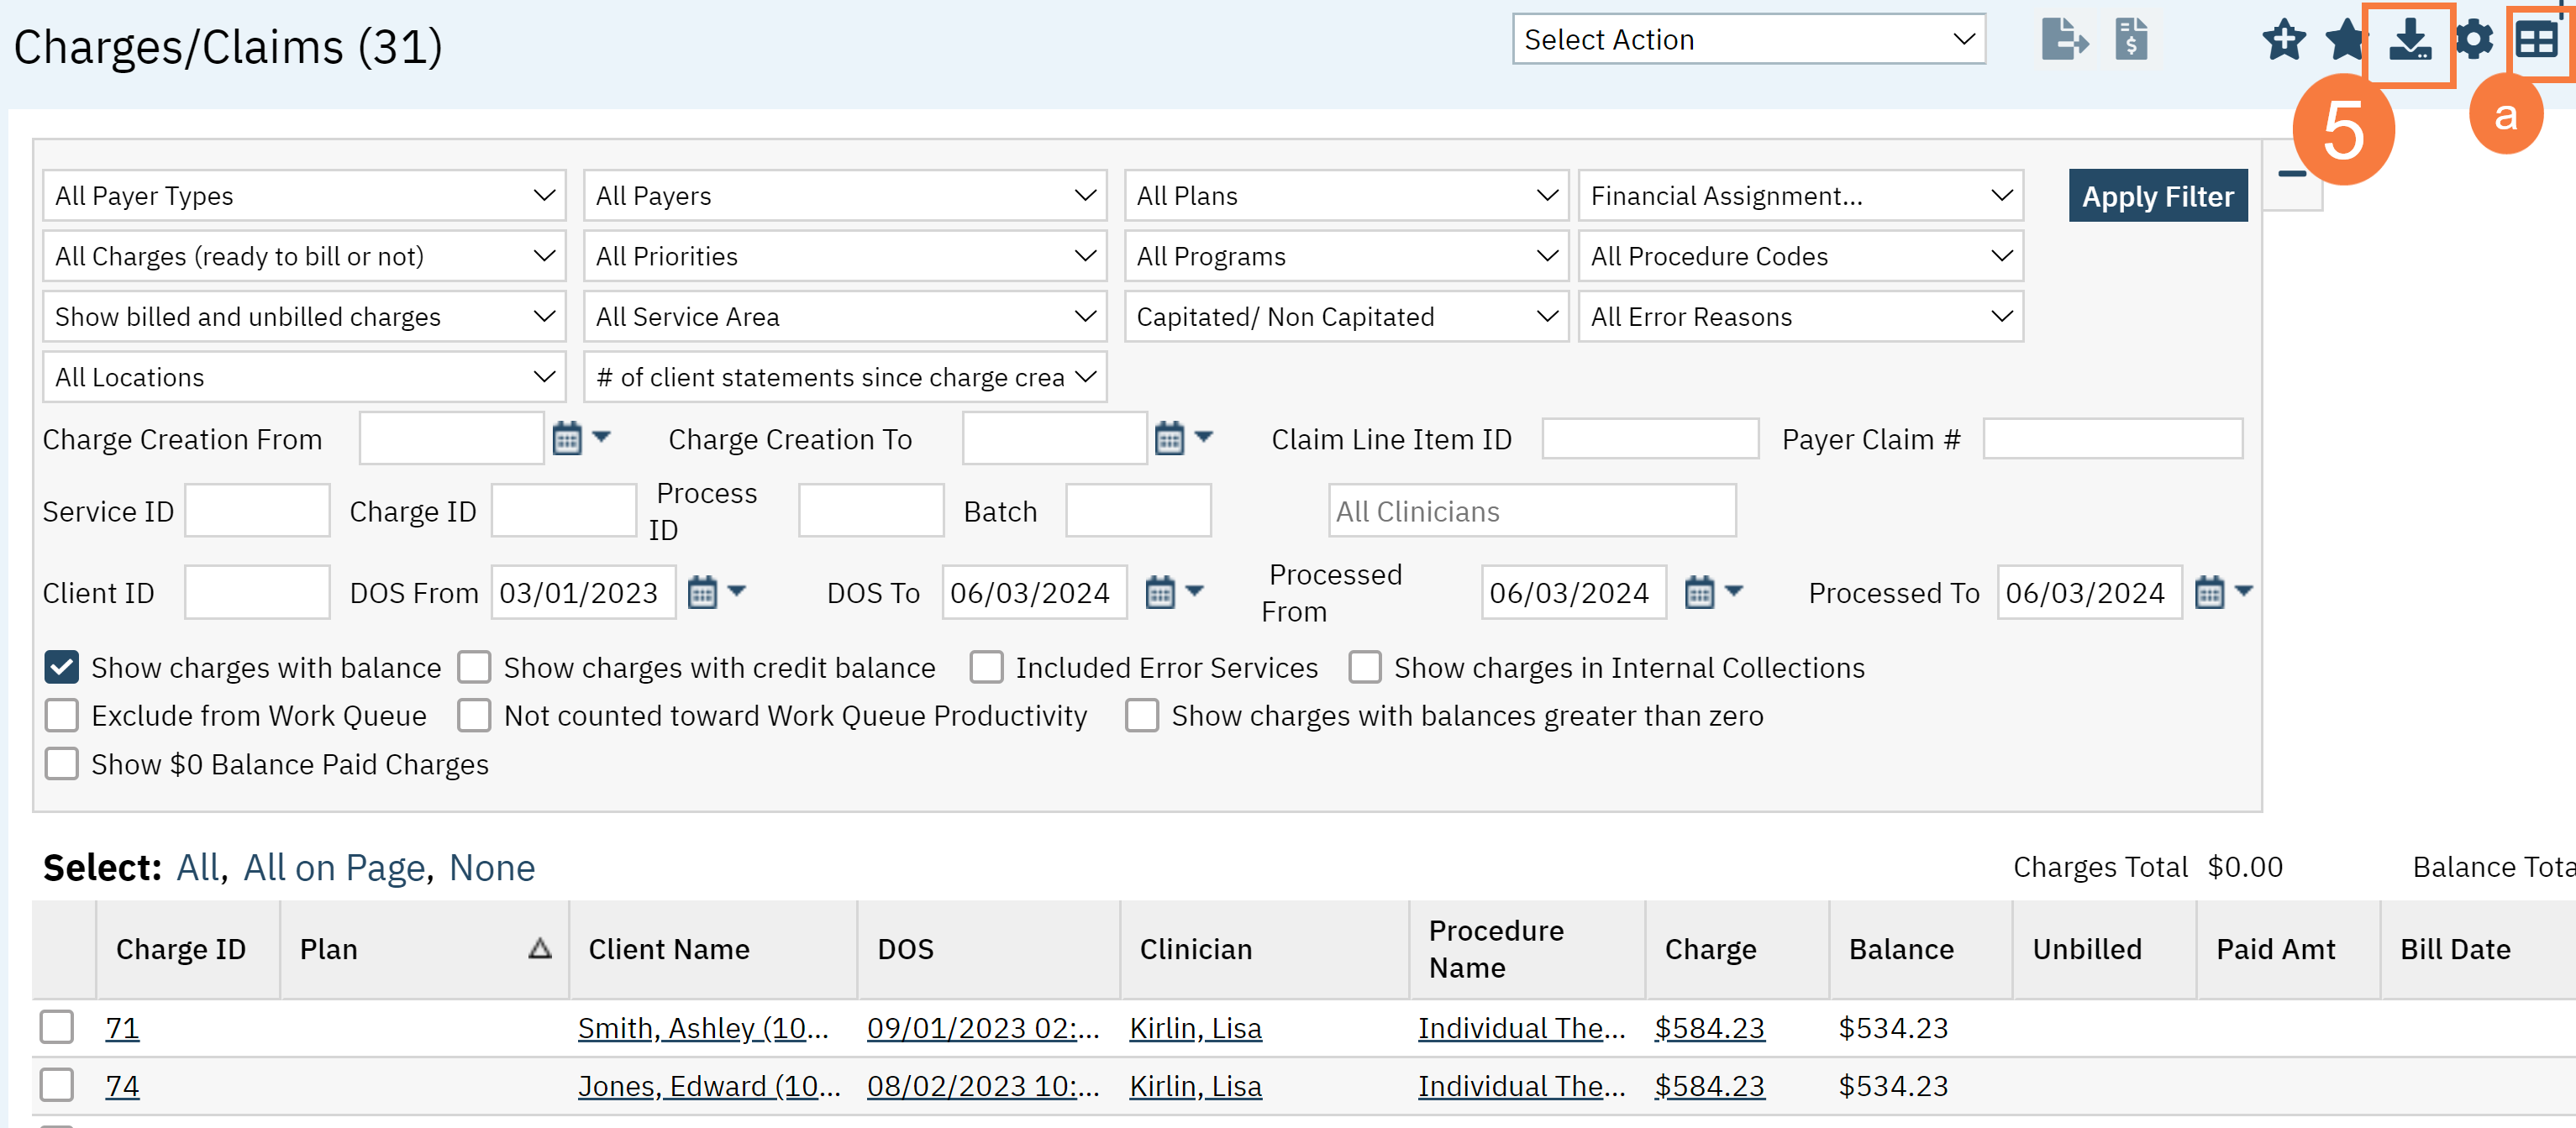
- Once the results are displayed in the table below, click the Export button. This is where you will retrieve the PCCN which you will need in a later step.
- Note: You will need to have a create a custom view which includes the PCCN number in the search results.)
- Take note of the Claim ID Number you want to remove.

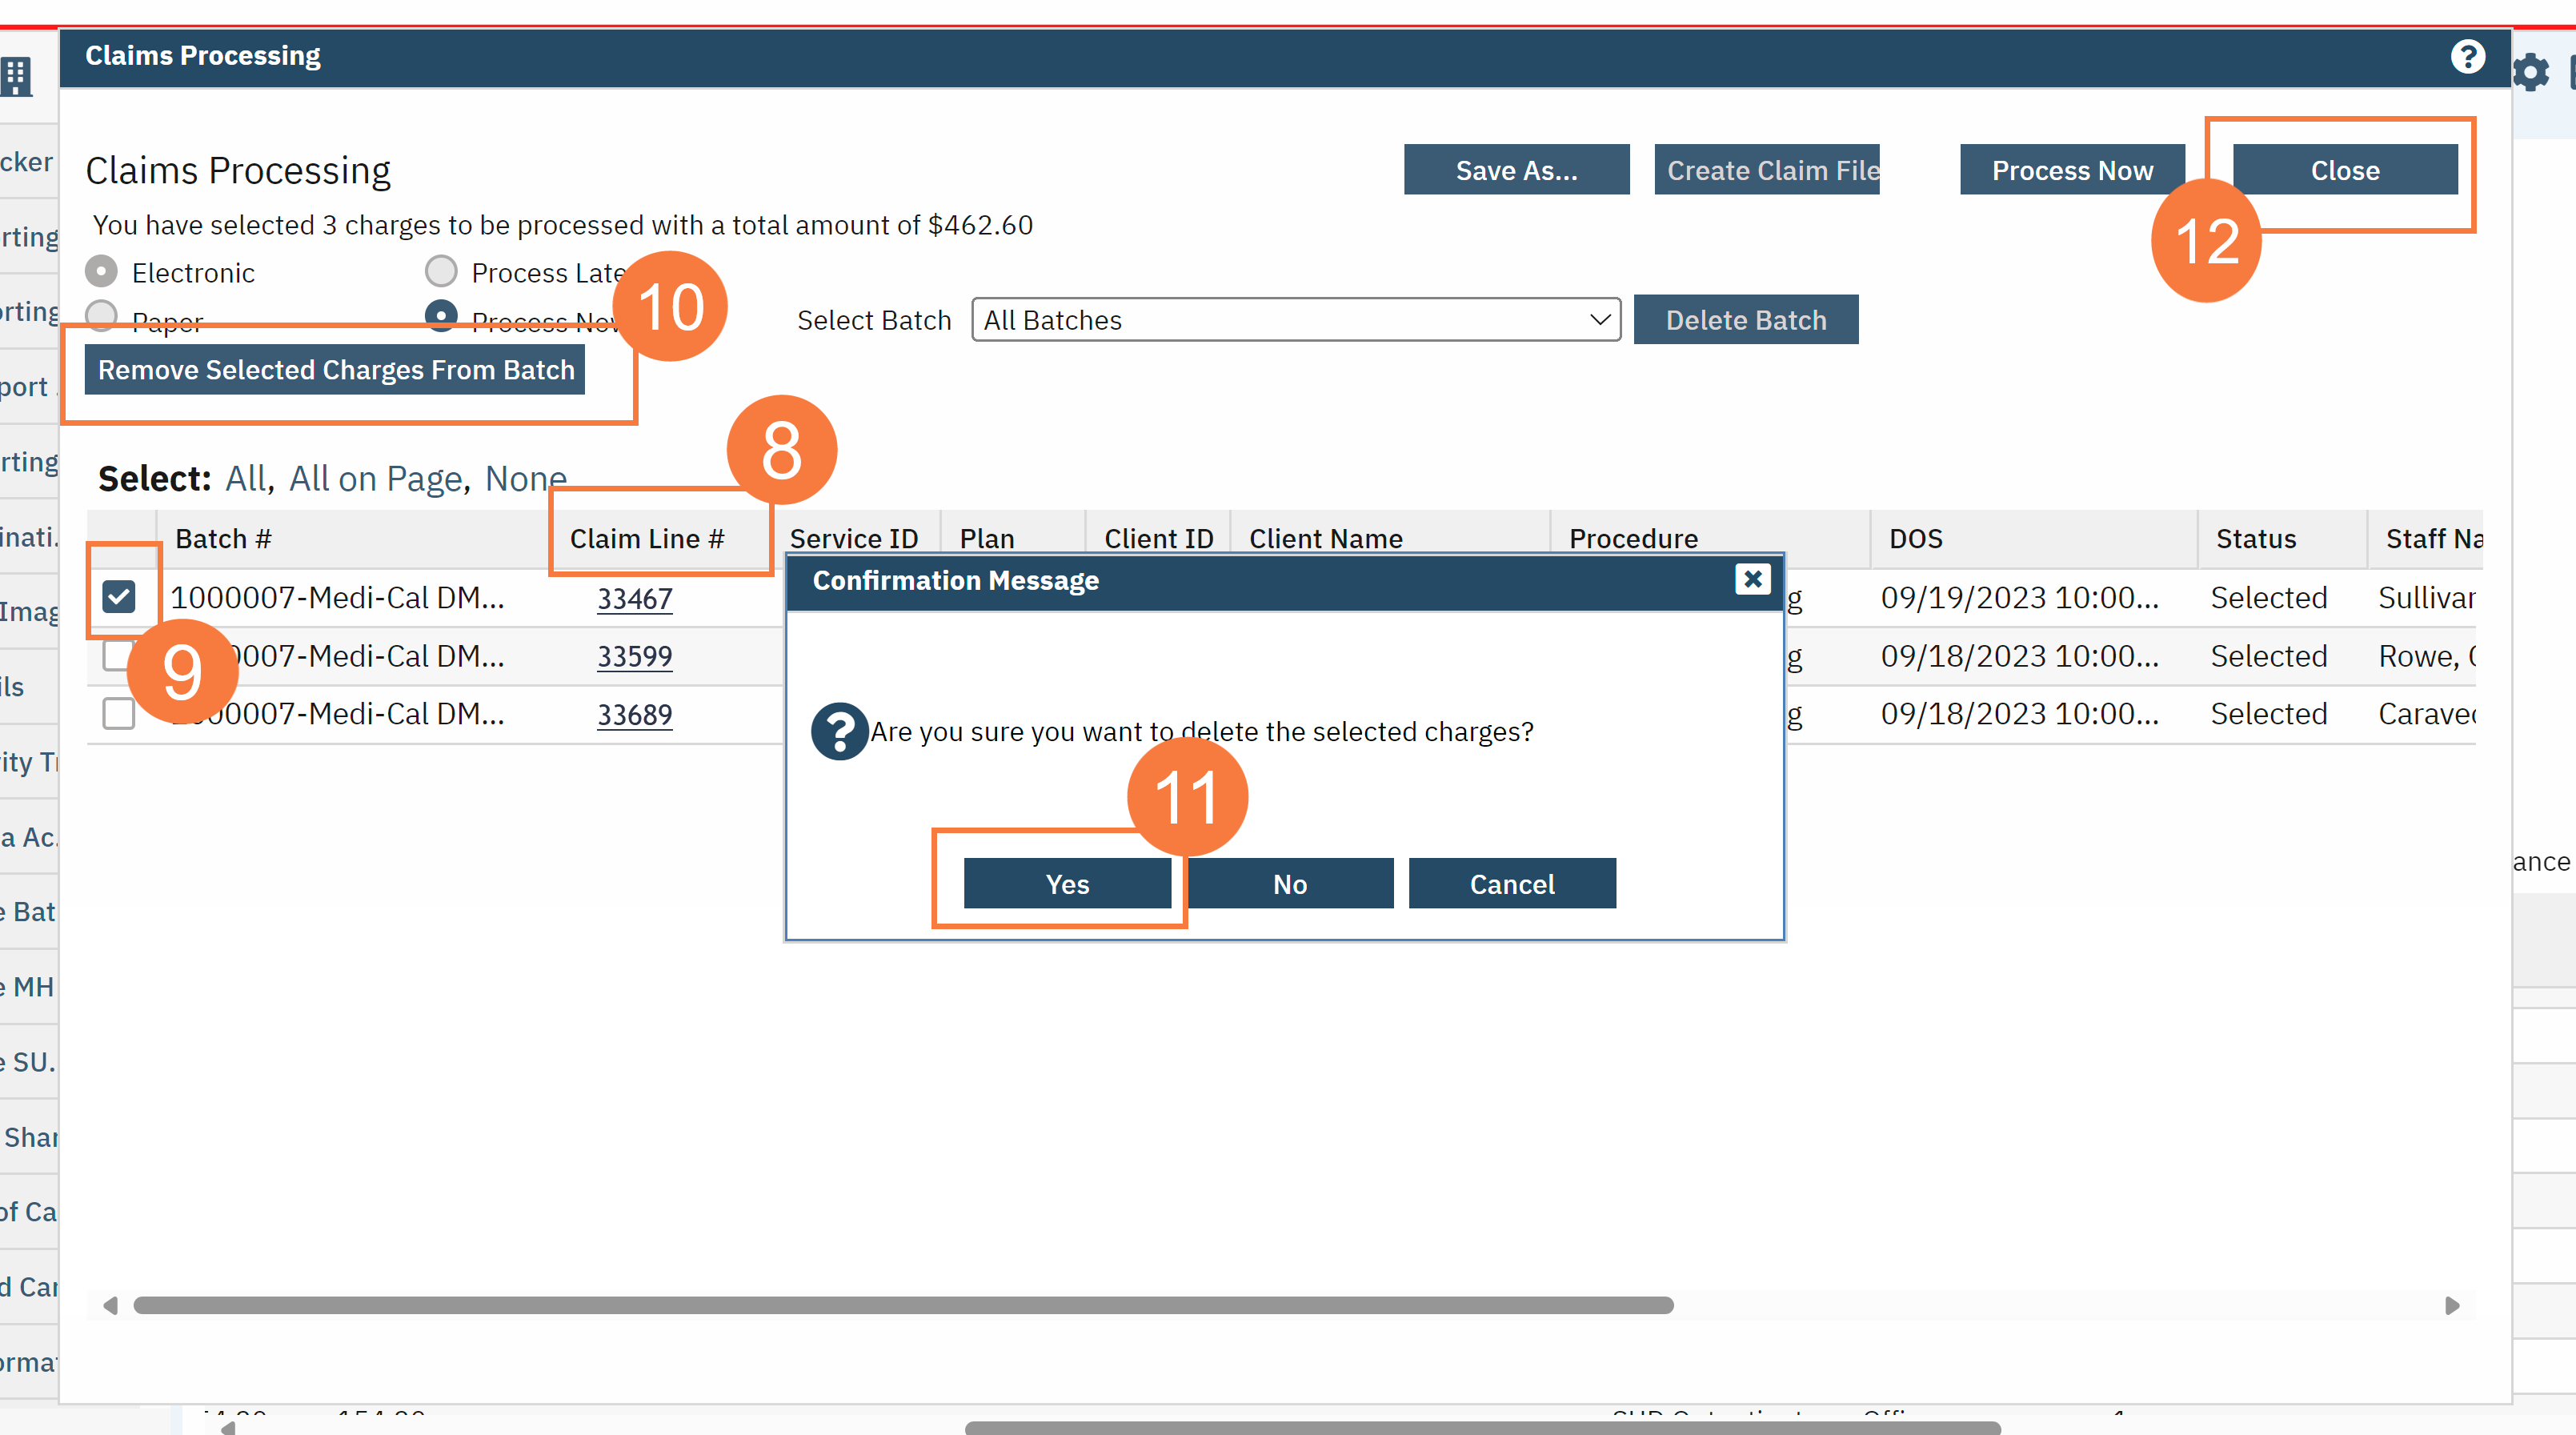
- From the grid, in the Batch column, click the hyperlinked batch number.

- The Claims Processing window will open. Click the Claim Line # column header to sort in numerical order.
- Click the checkbox for the service(s) you want to remove.
- Click Remove Selected Charges From Batch.
- In the confirmation message pop-up, click Yes. This will set the charge back to unbilled status.
- Click Close.
- To begin working the claims that were removed from the batch, click the Claim Line Item ID column header to bring the service without a claim line ID number to the top of the grid.
- Click the DOS hyperlink for the claim you are working on.

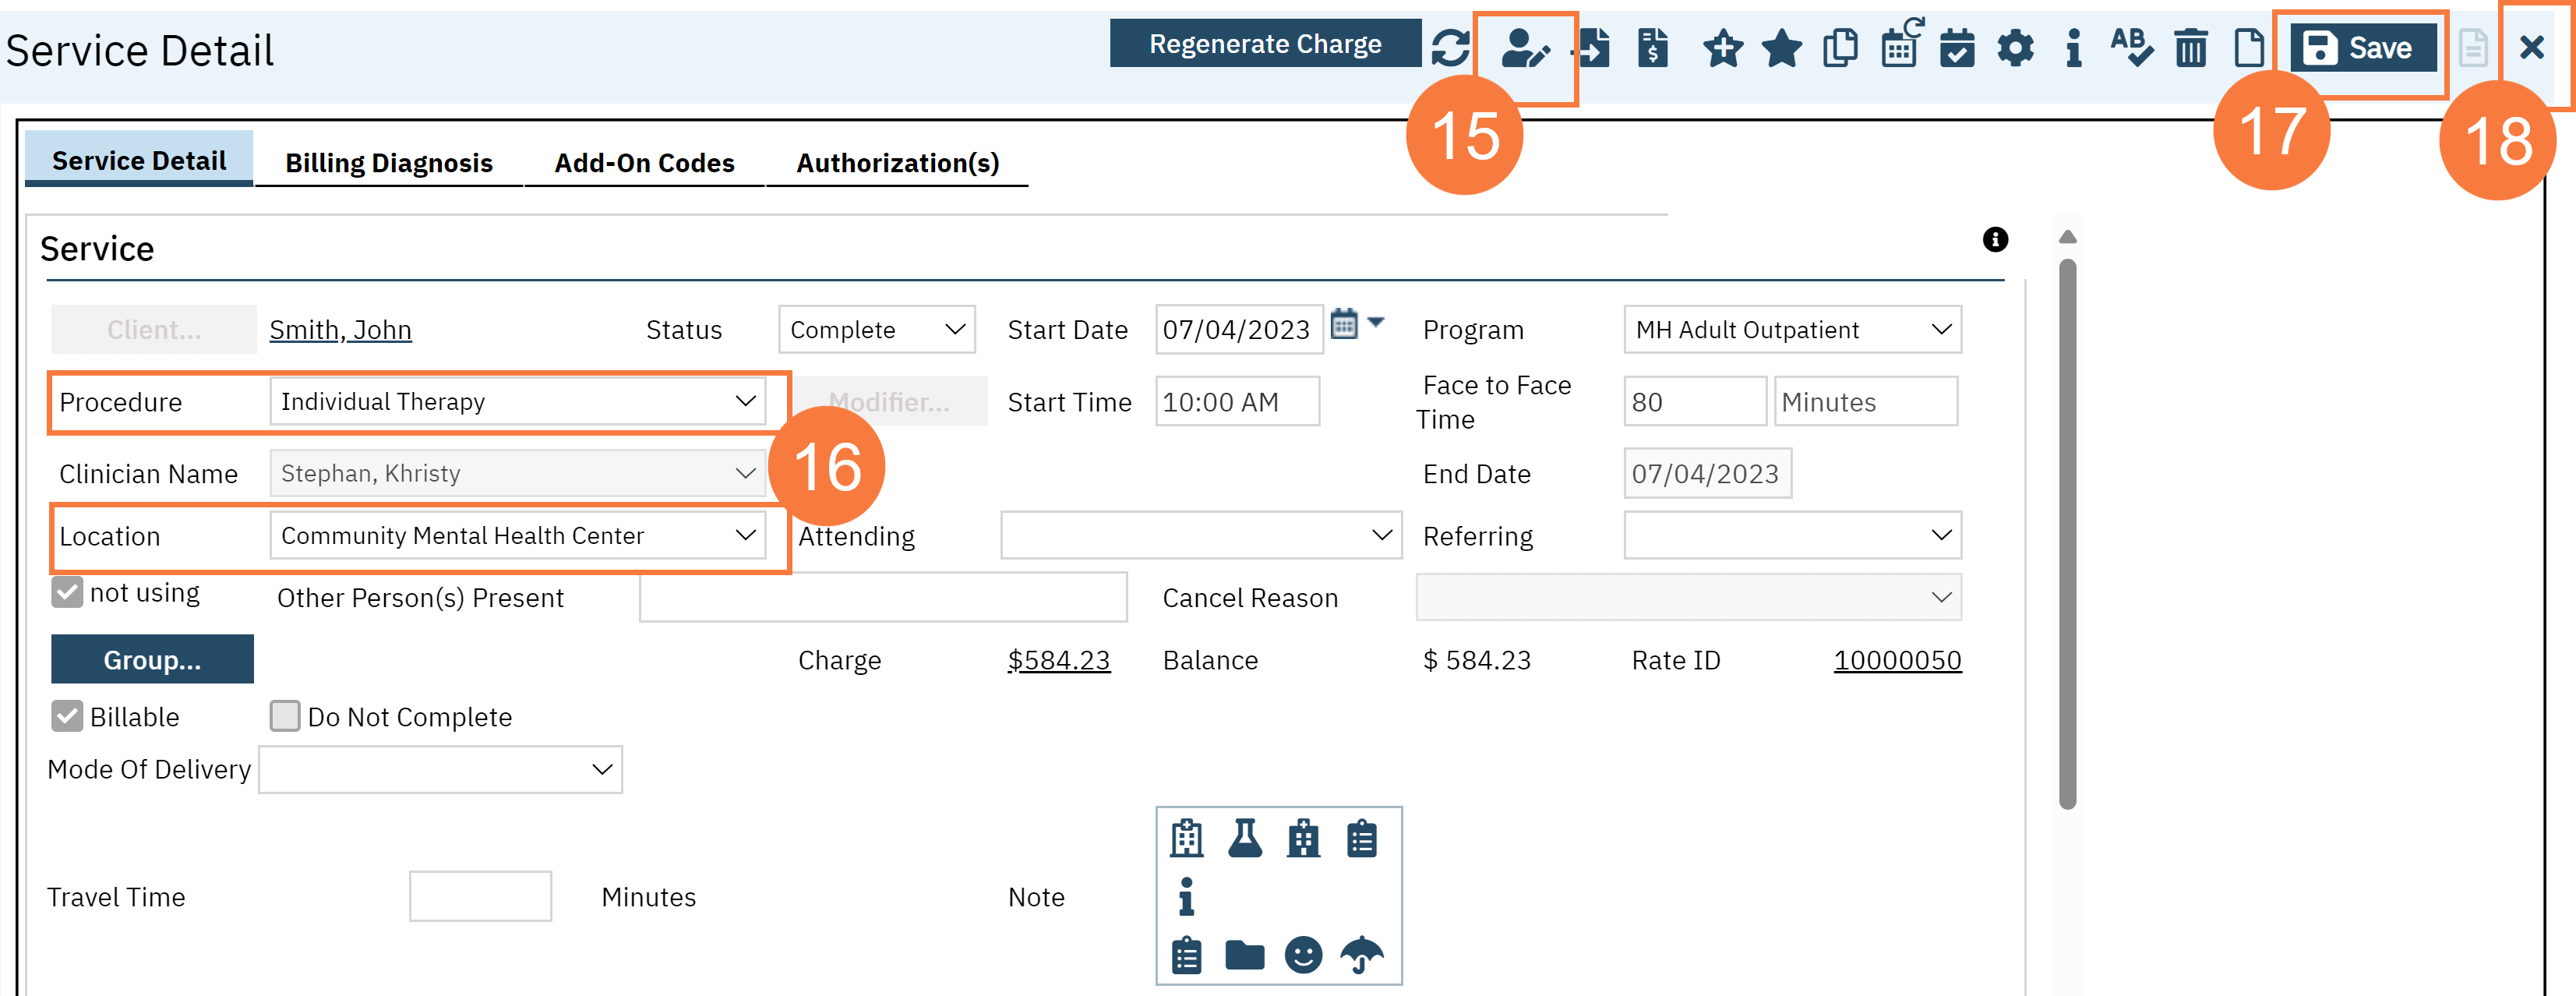
- The Service Detail window will open. Click the Override Service Detail icon.
- Make your corrections according to your denial reason. (location or procedure code)
- Click Save.
- Click Close.
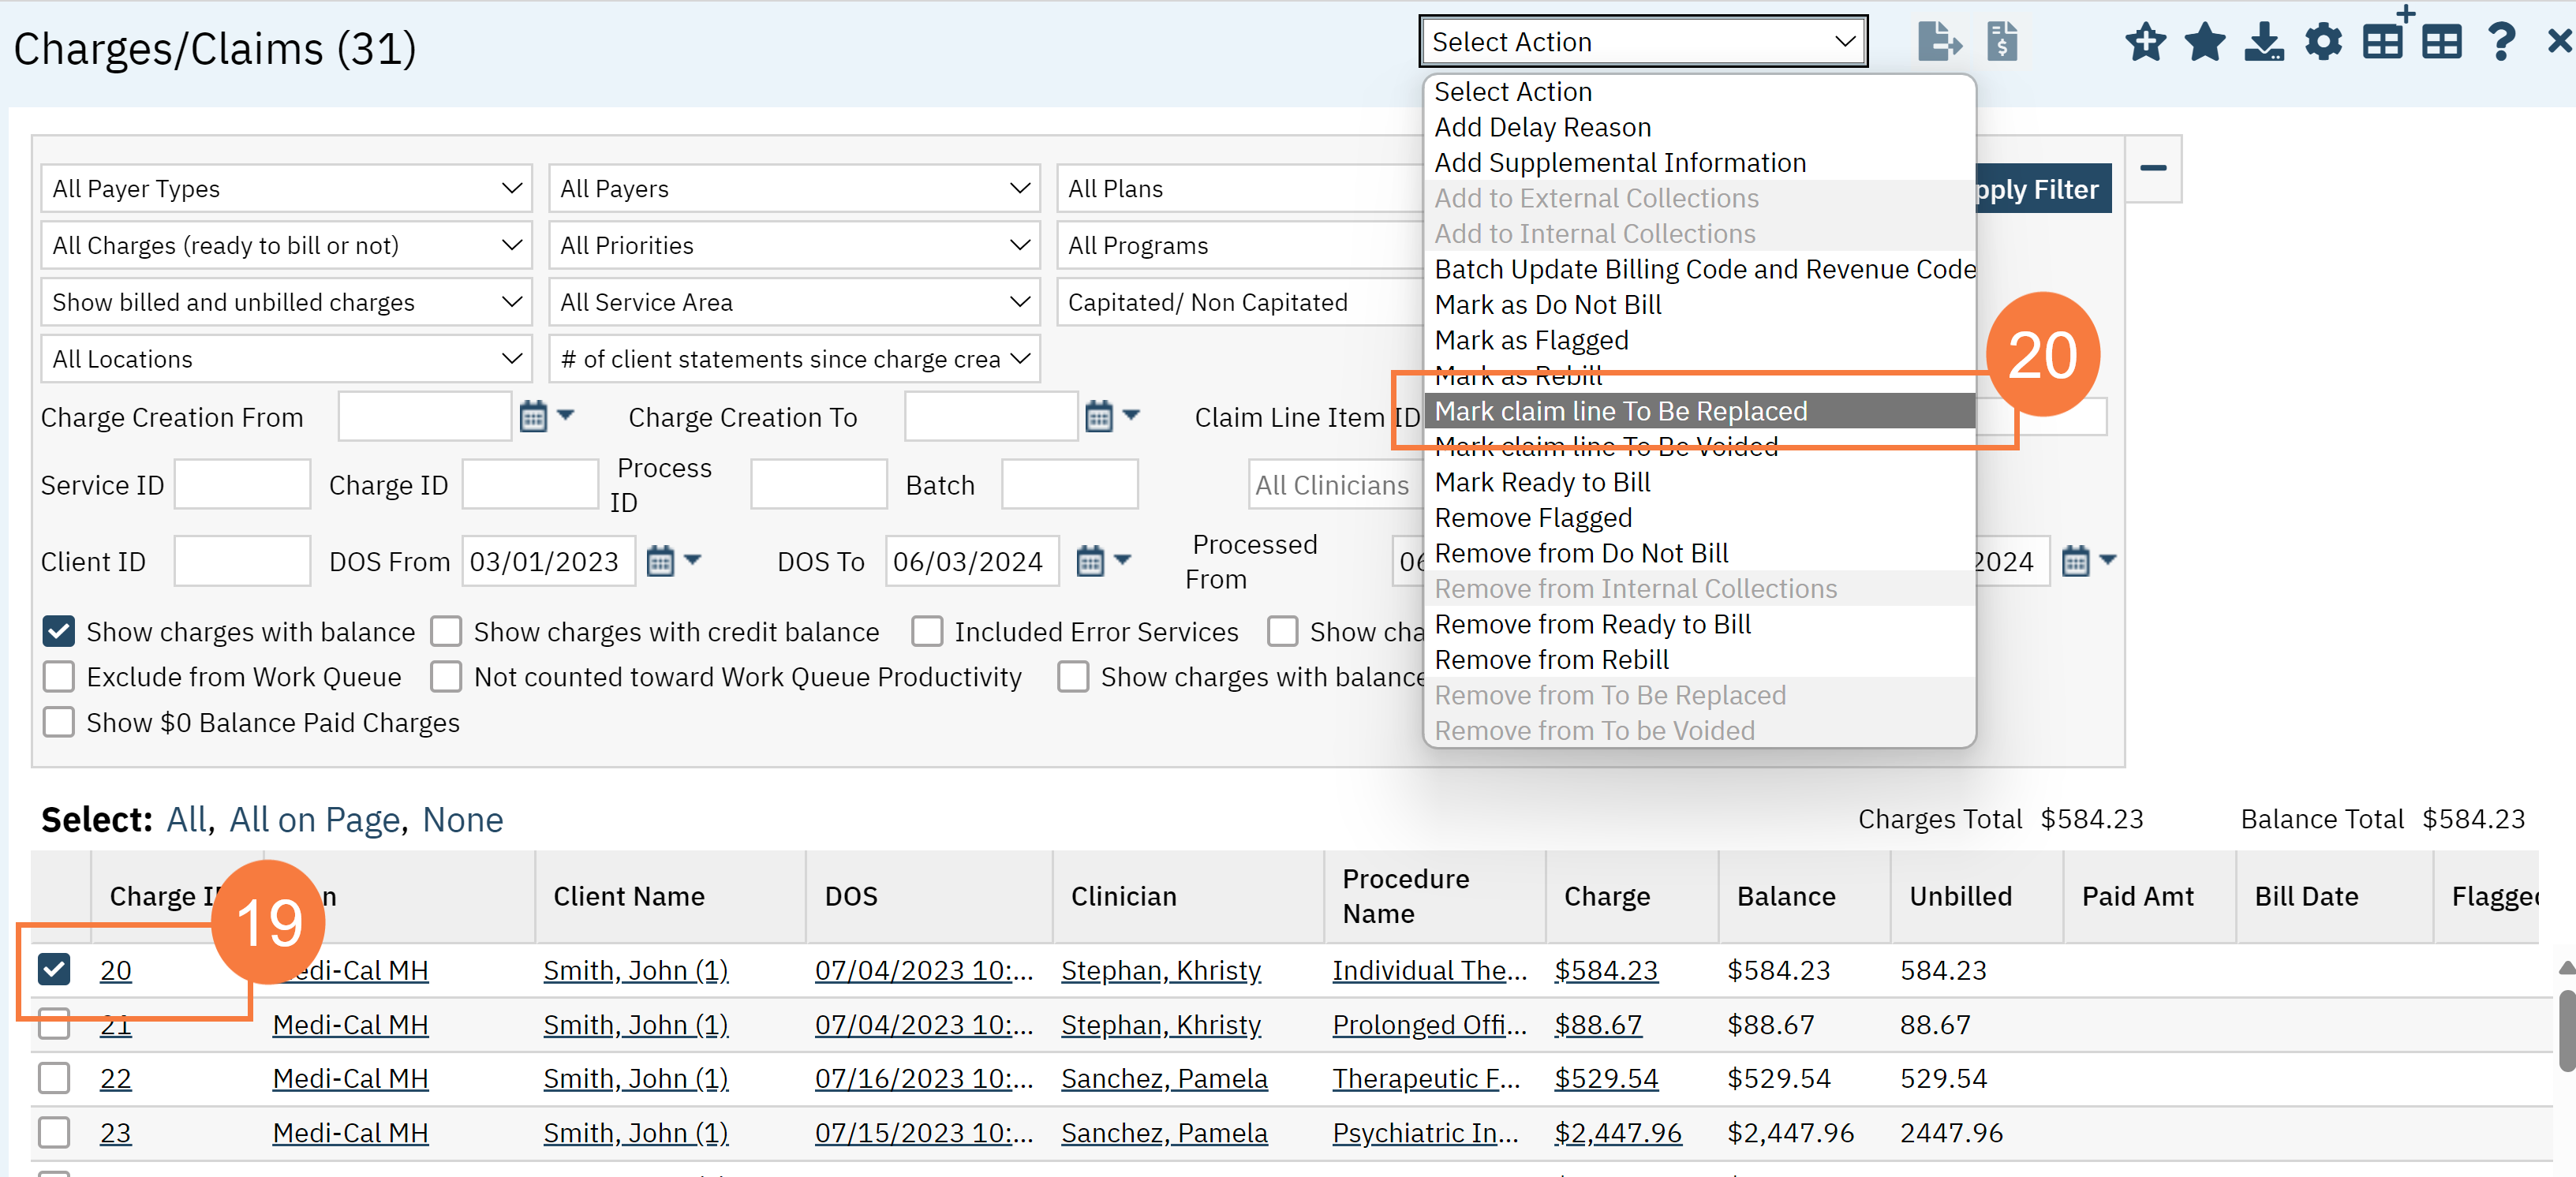
- Back on the Charges/Claims screen. Click the checkbox for claim(s) you are working.
- Click the Select Action drop-down menu and select Mark claim line to be replaced.
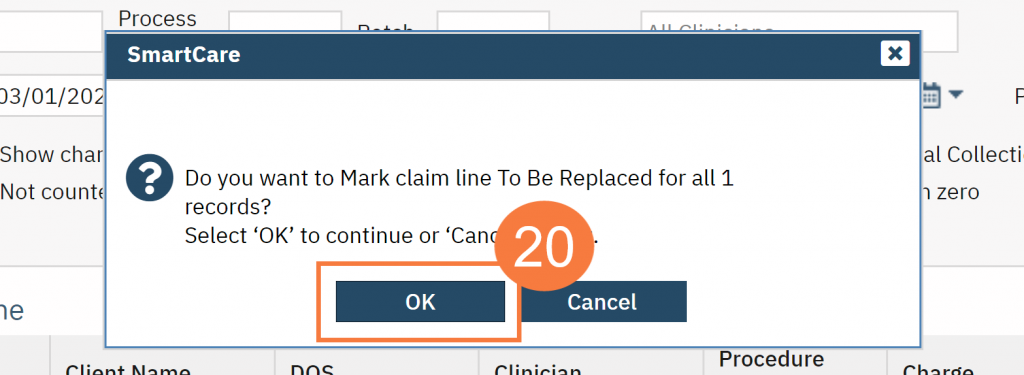
- Click OK to confirm.
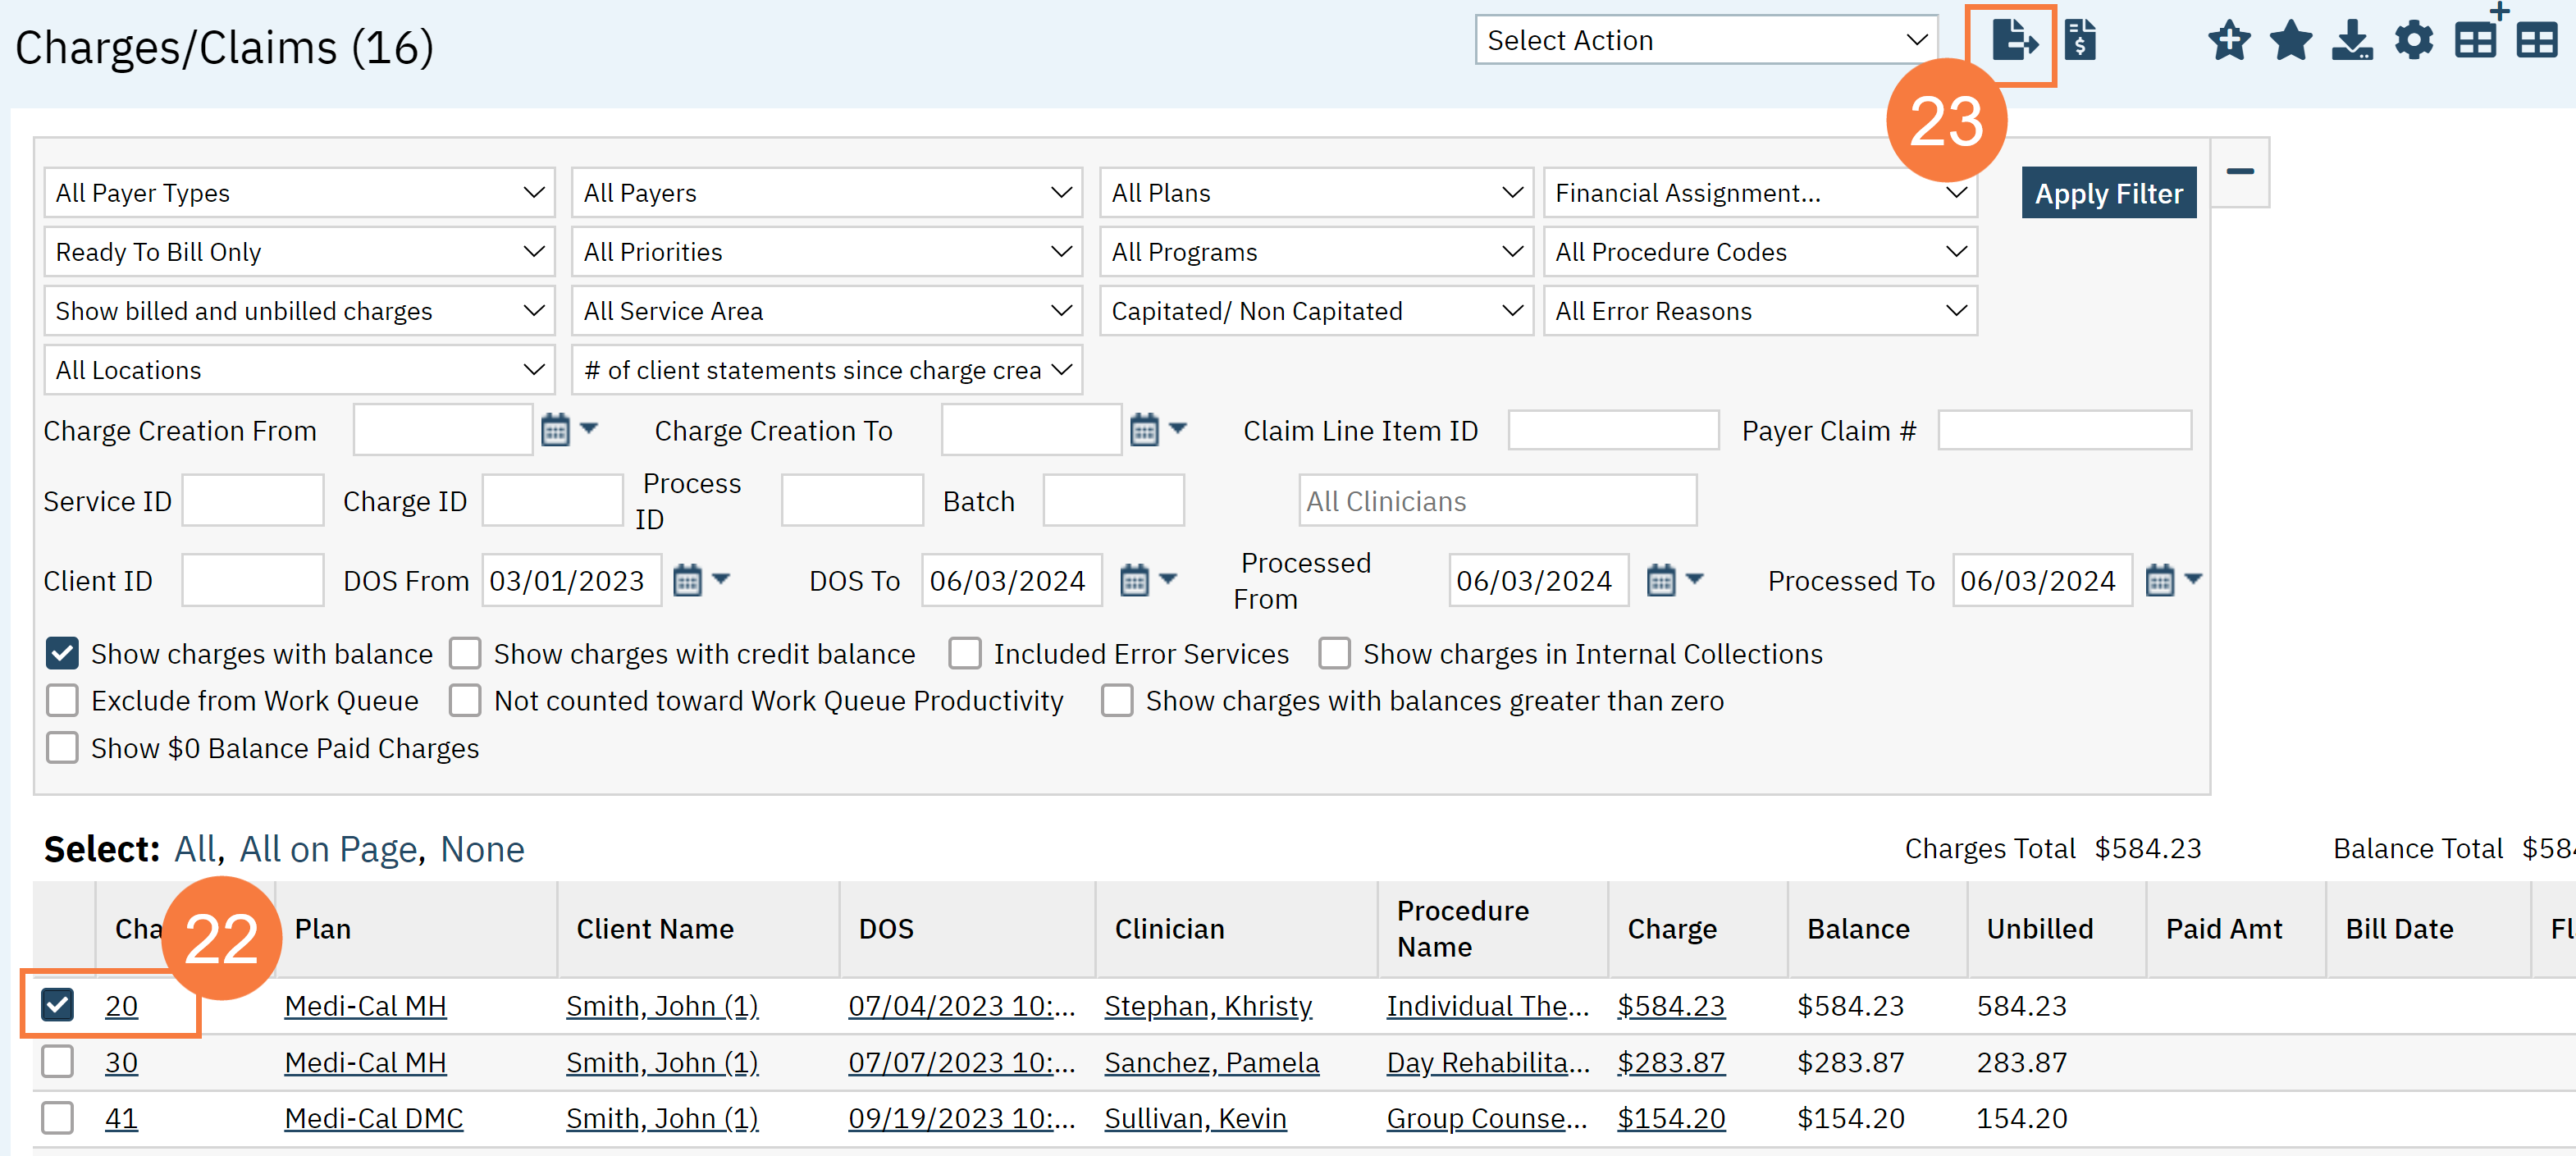
- Click the Claim checkbox to create a batch with the edited claims.
- Click the Electronic Claims icon.
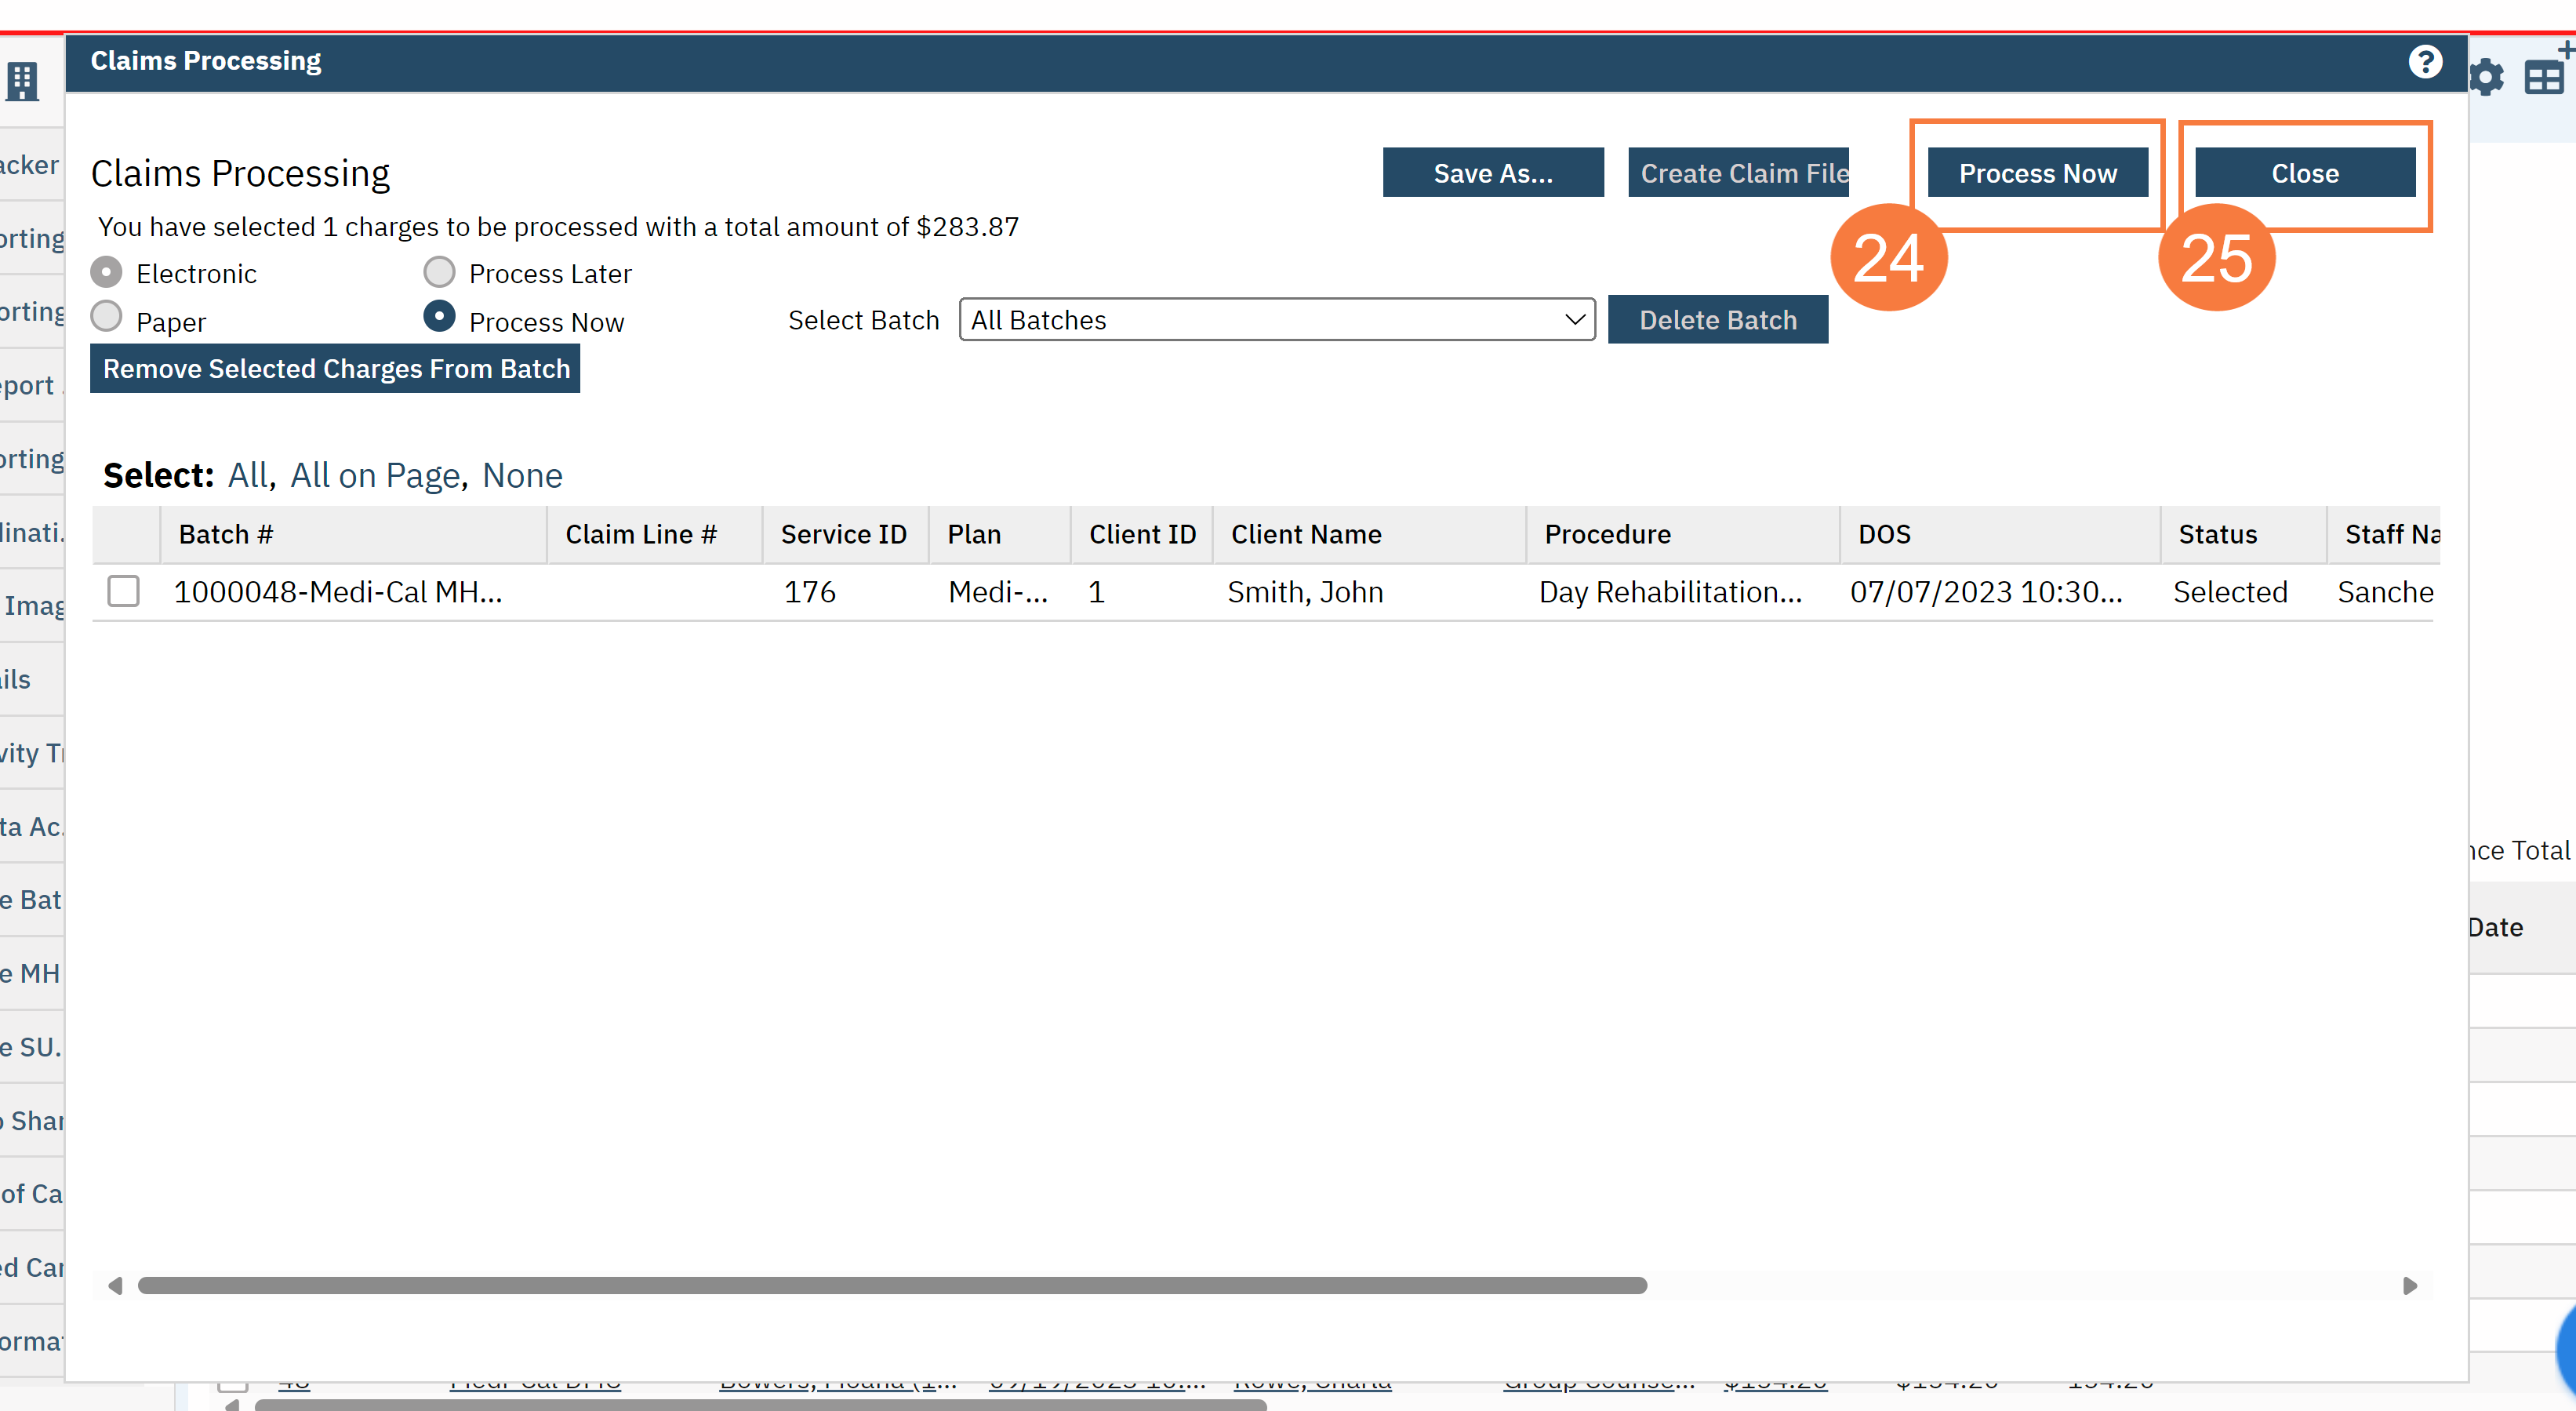
- Click Process Now. Note your new batch ID number.
- Click Close.
- Add the batch ID number in the corresponding field in the filters above the grid.
- Click Apply Filter.

- Click the Claim Line Item ID hyperlink.

- Click the Claim Details button.
- Enter the PCCN you got from the spreadsheet in the Payer Claim Number field.
- Click Save. Repeat 28-30 for any additional corrections.

