Skip to content
CalMHSA Learn (LMS System)
Help Desk Ticket (Admin)
Customer Ticket Portal
EHR Bulletin
MENU
Home
Accessing Data in SmartCare
Billing Documentation
CalMHSA Connex
CalMHSA Rx
Clinical Documentation
Contract Provider Data Entry Only
CSU Documentation
EHR LMS Dashboard
Eleos
Events
Frequently Asked Questions
Front Desk Documentation
Inpatient Documentation
Nursing Documentation
Patient Portal
Prescriber Documentation
Policy Playbooks
Protocols
QA/QI and State Reporting
RCM Counties
Reporting System Administration
Residential Documentation
SmartCare Downtime Forms
SmartCare EHR Go Live Migration
SmartCare Known Issues
Substance Use Documentation
Supervisor Workflows
System Administration Documentation
Manage Account
Manage Account
Search
Last updated: December 29, 2023
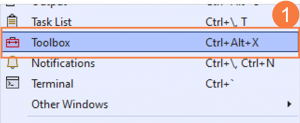
7. Toolbox Window
Click View on top menu and choose
Toolbox
or click
Ctrl+Alt+X
to display toolbox window
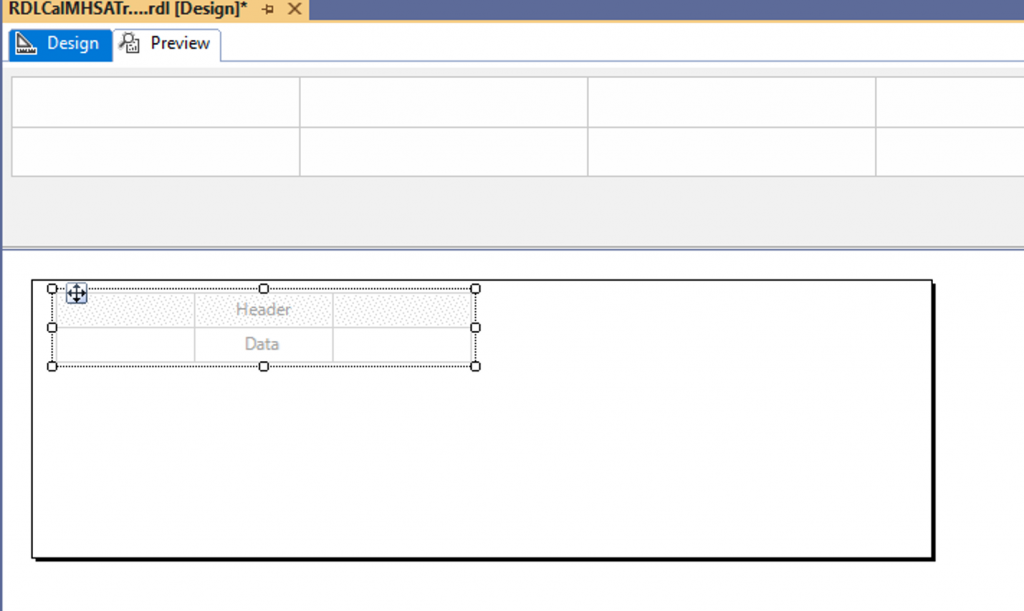
Left Click on
Table
and drag into report
Design
area
A table will appear with a default three columns (more can be added later)
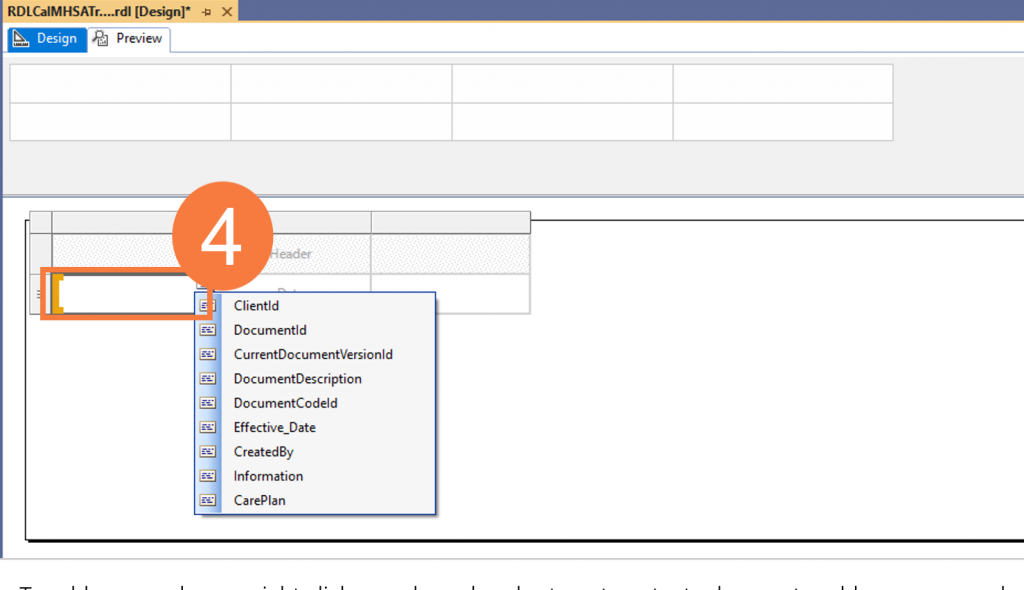
Click on upper right of a cell to select field for that column
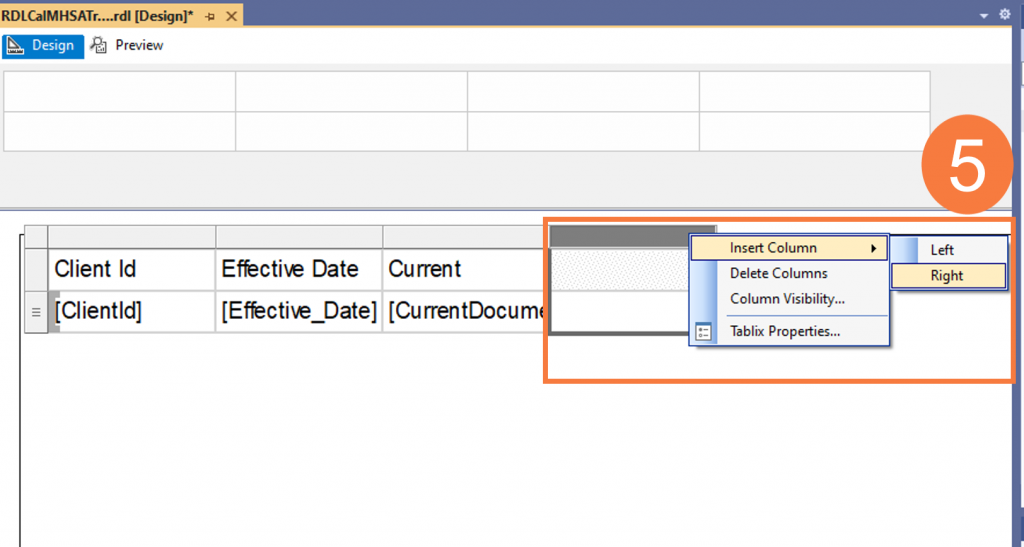
To add more columns, right click on column header to get contextual menu to add or remove columns
Repeat as necessary
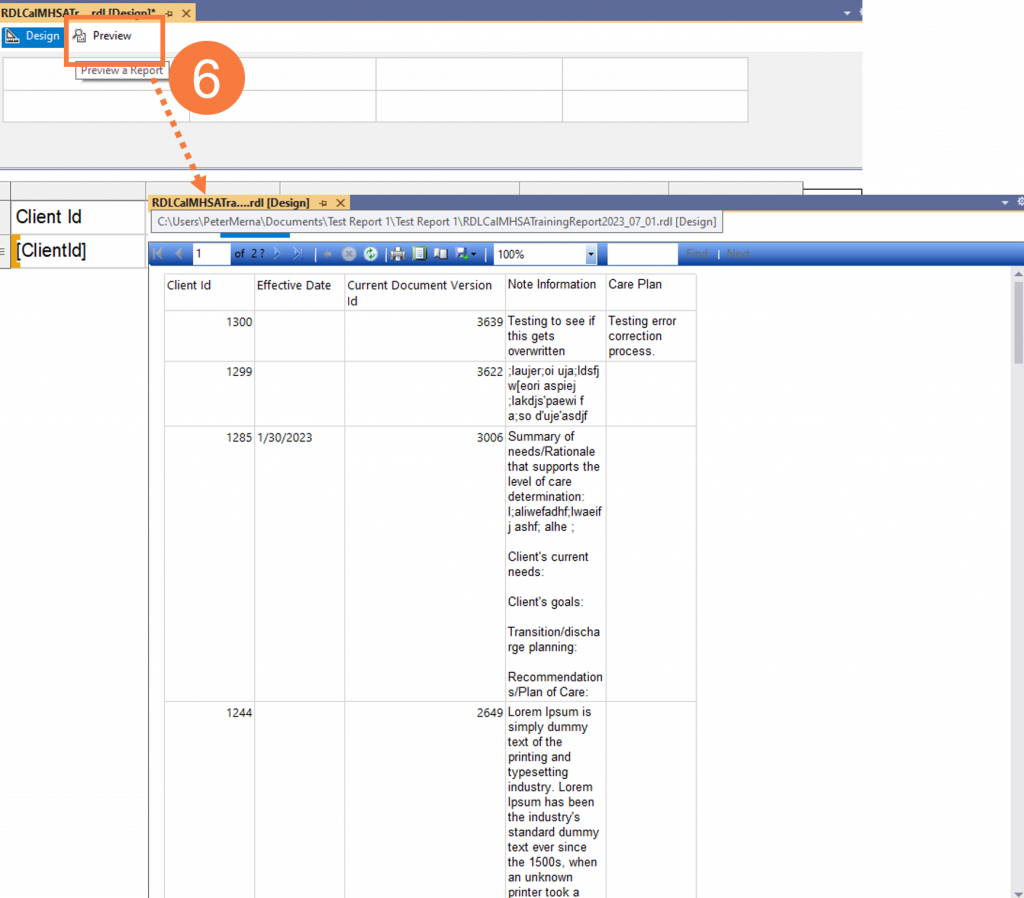
Click the Preview tab.
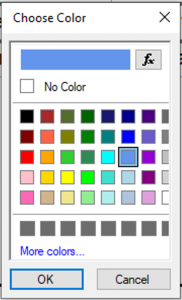
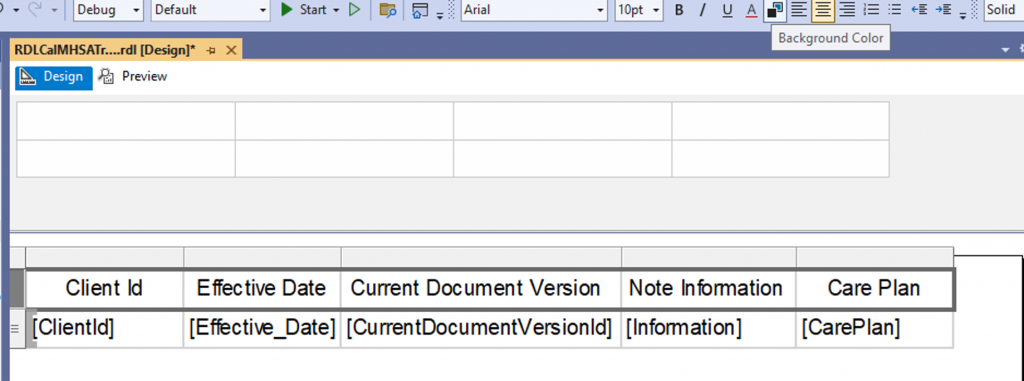
Back to Design tab, center labels and choose background color and click OK.
Last updated: December 29, 2023