An ad hoc order is one that you create as you work because no existing order can be found in the system. Creating an ad hoc order lets you create an order for immediate use in the Client Order page.
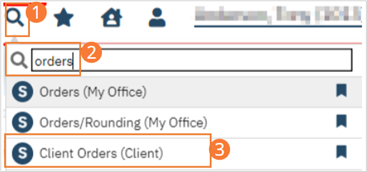
- You must first have the client open, then click the Search icon.
- Type “Orders” into the search bar.
- Click to select “Client Orders (Client)” from the search results.

- The client Orders list page will open. Click on the New icon.

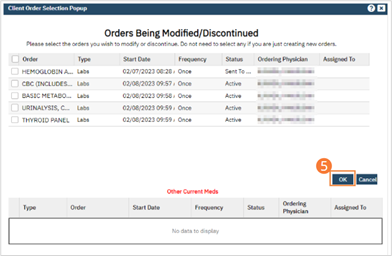
- This takes you to the Orders Being Modified/Discontinued window. Without selecting any orders listed in the top half of the window, click the OK button.
- Note: If you select an order listed in the top half of the window and click OK, you can modify or discontinue the selected order. Refer to Modify an Order (See page 44) or Discontinue an Order (See page 41) for instructions.

- A blank Client Order page opens where you can create a new order.

- Type the name of the Order or partially type the name of the desired Order in the blank field next to the Preferences tab.
- If the system does not find a match, the Create Adhoc Order button appears.
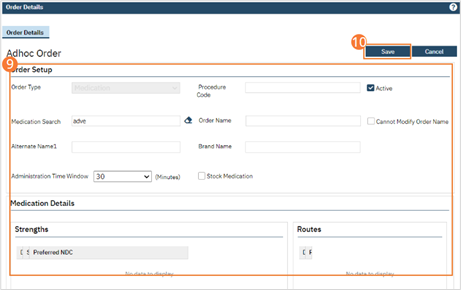
- Click the Create Adhoc Order button. The Adhoc Order window opens

- Complete the fields.
- Click the Save button in the window

- When you are finished, click the Close icon in the window. The fields appear in the middle section of the Client Order page.

- When the fields in the Order tab appear, complete the fields.

- Click the Save button in the tool bar.

- Click the Insert button in the Order tab section. The information appears in the Order List section.
- To add another order, click the Add Additional Orders hyperlink. Repeat steps 5 through 10.

- Sign the order(s).
